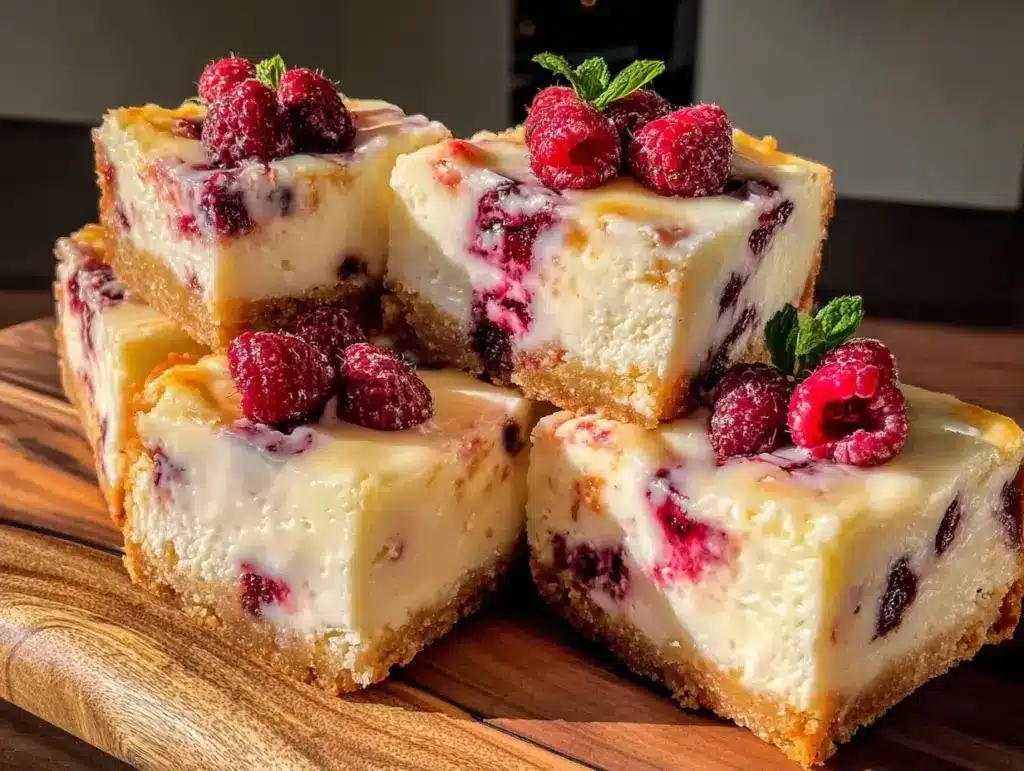
Last Saturday, I was staring at the clock, calculating how many minutes I had left before my husband came home from work, when my six-year-old looked up from the floor and asked if we could make “the sparkly pink thing.” He didn’t even know the name of it. He just knew it was sweet, it was fun, and it involved his favorite color. We had been trying to find a project that didn’t involve him running around with a stick or asking “why” every four seconds, and I knew exactly what to make.
That was the day I decided to commit to these Easy White Chocolate Raspberry Cheesecake Bars. I’ve made them at least a dozen times since, and they have become our go-to weekend ritual. There is something magic about watching a child’s face when they realize they can create something beautiful with their own hands. It’s not just about the dessert; it’s about the flour on their nose, the giggles when the graham cracker crumbs scatter, and the pride when they take a bite and say, “I made this!”
If you’ve been looking for a way to spend quality time with your little ones without stressing over a complicated recipe, this is it. These bars are forgiving. They’re sweet but not cloying. And honestly? They’re easier than most cookies. I remember my first attempt with my oldest. I tried to rush the cooling process because I wanted a sample immediately. Big mistake. The bars were a soupy mess when I tried to cut them. Lesson learned: patience is part of the recipe. Now, we treat the cooling time as a game of “how long can we wait?” which, spoiler alert, never lasts very long.
What I love most about this Easy White Chocolate Raspberry Cheesecake Bars recipe is that it scales well. I’ve made it for tiny family dinners and for large potlucks where everyone asks for the recipe. The contrast of the tart raspberry against the creamy white chocolate is sophisticated enough for adults but fun enough for kids who love bright colors and sweet treats. It’s a win-win. Plus, the cleanup is minimal, which means less stress for you and more time for them to play with their creations.
So, put on some music, pull up a stool, and let’s get baking. This isn’t just a dessert; it’s a memory in the making. And trust me, once you make these Easy White Chocolate Raspberry Cheesecake Bars, you’ll wonder why you ever bought pre-made ones from the store. They’re just not the same.
Why You’ll Love This Recipe
Here’s the truth: most baking projects with kids end in a mess. Batter everywhere, ingredients on the floor, and a dessert that tastes fine but looks sad. Not this one. This recipe is designed for success, both in the kitchen and on the plate. It’s simple, it’s visual, and it delivers on every promise.
- Kid-Friendly Simplicity — The crust is just crushed cookies and butter. My kids can do this. They love the tactile experience of crushing the cookies and mixing the butter. It’s safe, it’s easy, and they feel like real bakers.
- No-Bake or Low-Bake Options — You can actually make this entirely no-bake if you prefer, which saves time and energy. But even if you bake it, the filling is just a quick mix. No complex tempering or water baths. Just blend and pour.
- Visual Appeal — The white chocolate and raspberry swirl is stunning. It looks like something from a fancy bakery, but it’s just layered in a pan. Kids love seeing the colors mix, and adults love the aesthetic. It’s Instagram-worthy without the effort.
- Make-Ahead Friendly — This is my secret weapon. I make these the night before a party or event. They taste better the next day as the flavors meld. It takes the stress out of hosting because the hard work is already done.
- Customizable Fun — You can swap the raspberries for strawberries, blueberries, or even chocolate chips. If your kids are picky, you can make half plain and half swirled. It teaches them that cooking is flexible and fun.
- Less Mess, More Joy — Compared to a layer cake, these bars are contained. Everything happens in one pan. Cleanup is a quick wipe-down and a few bowls. No decorating with piping bags that end up on the ceiling.
This is my go-to when I want to bond with my kids and end up with a delicious treat. It’s reliable, it’s fun, and it tastes incredible. You’ll be making these Easy White Chocolate Raspberry Cheesecake Bars on repeat.
Key Ingredients
Let’s talk about what goes into these bars. I keep it simple because simplicity is key when you’re baking with little helpers. You don’t need a pantry full of exotic spices. You just need good quality basics.
For the Crust
Graham Cracker Crumbs (2 cups / 200g) — I prefer making my own by crushing whole graham crackers in a food processor. It tastes fresher and has a better texture than the pre-made crumbs, which can be dusty. If you’re short on time, store-bought works fine, just make sure they’re fine.
Unsalted Butter (6 tablespoons / 85g) — Melted. This binds the crust. I use unsalted so I can control the sweetness. If you only have salted, reduce the added sugar in the filling slightly. Real talk: don’t use margarine. It makes the crust greasy and sad.
Granulated Sugar (2 tablespoons / 25g) — Just a touch to sweeten the crust. It helps it crisp up a bit in the oven. If you’re using a sugar-free substitute, it still works, but the texture might be slightly softer.
For the Filling
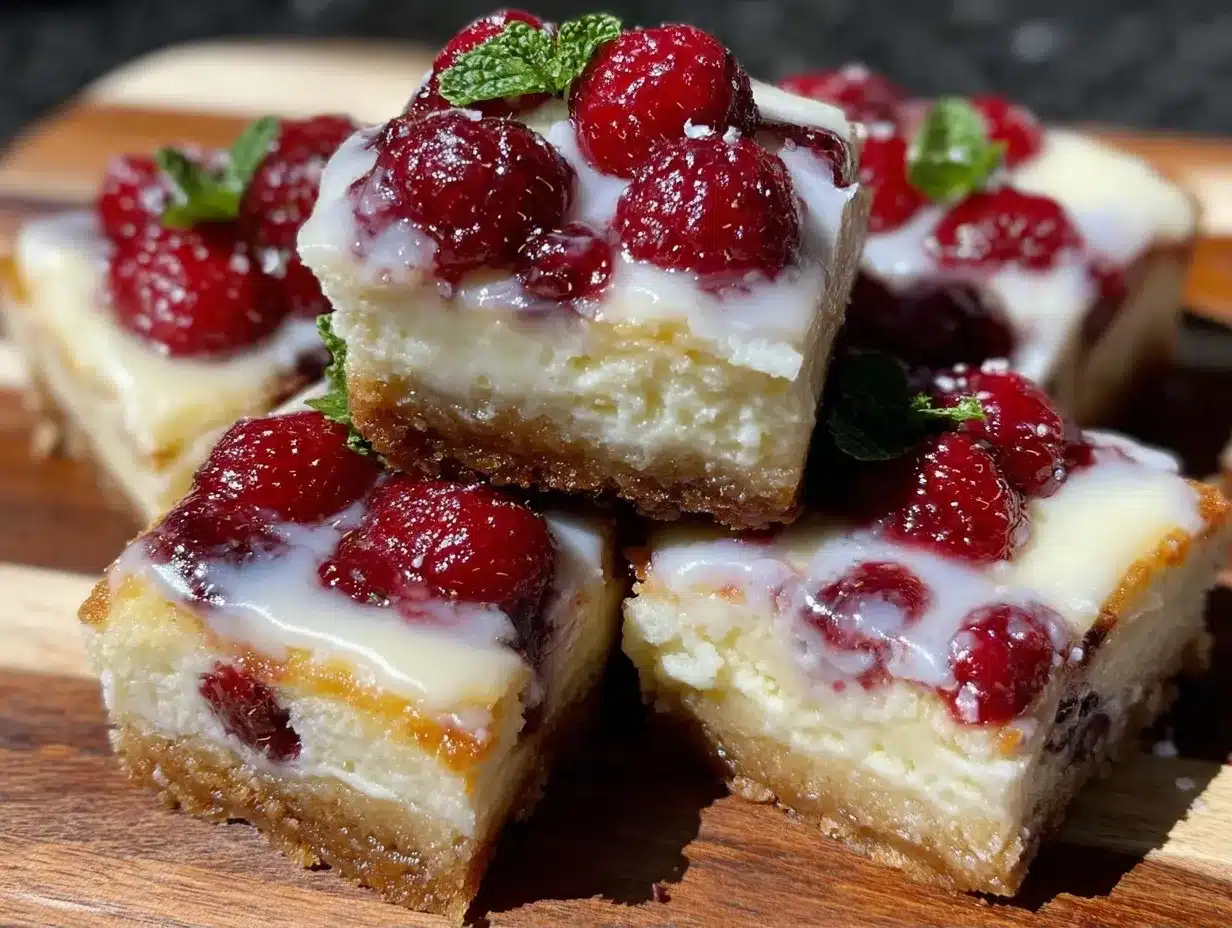
Full-Fat Cream Cheese (24 ounces / 680g) — This is non-negotiable. I use block cream cheese, not the spread in the tub. The tub stuff has too much moisture and air, which leads to a runny filling. Let it sit out for 30 minutes before you start. Softened cream cheese mixes smoothly. Cold cream cheese creates lumps, and nobody wants lumps in their cheesecake.
Granulated Sugar (1 cup / 200g) — This adds sweetness and structure. Don’t reduce this too much, or the cheesecake won’t set properly. I’ve tried it, and it turns out more like a mousse. We want dense and creamy.
Sour Cream (1/2 cup / 120g) — This adds tang and richness. It balances the sweetness of the white chocolate. I use full-fat sour cream. Low-fat can make the texture slightly grainy.
Eggs (3 large) — Room temperature. This helps them incorporate smoothly into the batter. If you crack them straight from the fridge, you risk uneven mixing. I let them sit on the counter while I prep the other ingredients.
Vanilla Extract (1 teaspoon / 5ml) — Pure vanilla. I avoid imitation vanilla because the flavor is flat. A little bit goes a long way in enhancing the cream cheese flavor.
For the Swirl
White Chocolate Chips (1 cup / 170g) — I prefer high-quality white chocolate chips, like Ghirardelli or Callebaut. They melt more evenly. Avoid cheap chips that contain vegetable oil; they can seize up when melted.
Raspberry Jam or Preserves (1/2 cup / 150g) — I use seedless raspberry jam for a smooth swirl. If you have fresh raspberries, you can cook them down with a little sugar to make a compote, but it takes extra time. The jam is easier for kids to handle.
Butter (2 tablespoons / 28g) — To help melt the white chocolate smoothly. It adds shine and prevents the chocolate from becoming too thick.
Tools Needed
You don’t need fancy equipment. Here’s what I use, and what you can substitute if you’re missing something.
9×13 Inch Baking Pan — I use a glass pan because it bakes evenly. Metal works too, but keep an eye on the crust so it doesn’t burn. Line it with parchment paper for easy removal. This is a lifesaver.
Food Processor or Ziplock Bag — For crushing graham crackers. If you use a bag, give it a few good smashes with a rolling pin. It’s surprisingly satisfying for kids.
Stand Mixer or Hand Mixer — Mixing the cheesecake filling by hand is possible, but it’s tiring. A mixer ensures a smooth batter. I’ve mixed it by hand once, and my arm hurt for days. Don’t make my mistake.
Spatula — A flexible silicone spatula is best for scraping the bowl and swirling the chocolate. It gets into the corners.
Small Saucepan or Microwave-Safe Bowl — For melting the white chocolate. I use a microwave in 30-second intervals, stirring in between. It’s faster and less messy than a double boiler.
Toothpick or Knife — For creating the swirl pattern. A toothpick gives you more control for intricate designs. A knife makes bolder swirls. Both work.
Wire Rack — For cooling the bars. Don’t skip this. Placing a hot pan on a counter can crack the cheesecake due to thermal shock.
How to Make It
Let’s walk through the steps. I’ll keep it clear and simple, with tips for involving your kids.
Step 1: Prep the Pan (5 minutes)
Preheat your oven to 350°F (175°C). Line your 9×13 inch pan with parchment paper, leaving an overhang on the sides. This is crucial for lifting the bars out later. Grease the parchment lightly with butter or cooking spray. This ensures nothing sticks.
Step 2: Make the Crust (10 minutes)
In a medium bowl, mix the graham cracker crumbs, melted butter, and sugar. Your kids can help here. Let them stir until it looks like wet sand. Press this mixture firmly into the bottom of the prepared pan. Use the bottom of a measuring cup to pack it down tightly. If the crust isn’t tight, the bars will crumble. Bake for 8-10 minutes until lightly golden. Let it cool completely while you make the filling. This step is a great time for kids to wash their hands and get ready for the next part.
Step 3: Mix the Filling (10 minutes)
In a large bowl, beat the softened cream cheese on medium speed until smooth. This might take 2-3 minutes. Scrape down the sides of the bowl. Add the sugar and beat until combined. Add the sour cream, vanilla, and eggs. Mix on low speed just until combined. Do not overmix! Overmixing adds air, which can cause cracks. I learned this the hard way. The first time I made this, I mixed it for five minutes, and it cracked. Now, I mix for just a minute. Pour the filling over the cooled crust.
Step 4: Prepare the Swirl (5 minutes)
Melt the white chocolate chips and butter in the microwave in 30-second intervals, stirring in between, until smooth. Alternatively, use a double boiler. Pour the melted chocolate into a small bowl. Add the raspberry jam. Mix them together until you get a pink swirl color. If the jam is too thick, microwave it for 10 seconds to loosen it up.
Step 5: Swirl and Bake (40-45 minutes)
Drop spoonfuls of the white chocolate-raspberry mixture over the cheesecake batter. Use a toothpick or knife to swirl the colors together. Don’t over-swirl; you want distinct ribbons of color. Bake for 40-45 minutes. The edges should be set, but the center should still have a slight jiggle. It will continue to set as it cools. If the top starts browning too much, cover it loosely with foil after 30 minutes.
Step 6: Cool and Chill (4 hours minimum)
Let the bars cool in the pan on a wire rack for 1 hour. Then, refrigerate for at least 4 hours, preferably overnight. This is the hardest part, but it’s necessary for clean cuts. If you cut them warm, they will be messy. I know, I know. But wait it out. Once chilled, lift the bars out using the parchment overhang. Cut into squares with a sharp knife. Wipe the knife between cuts for clean edges.
Total Time: 10 minutes prep, 45 minutes bake, 4 hours chill. Total: About 5 hours, mostly passive.
Expert Tips
Here’s everything I learned from making these bars too many times. Some of these are hard-learned lessons.
The Game-Changers
Room Temperature Ingredients — This is the #1 rule for cheesecake. Cold cream cheese and eggs create lumps. I leave my cream cheese on the counter for 30-60 minutes before baking. If you forget, you can microwave it on low power for 10-15 seconds at a time, but be careful not to melt it. Soft is the goal.
Don’t Overmix — Once you add the eggs, mix on low speed. Overmixing incorporates air, which leads to cracks and a dense texture. I mix just until smooth. It’s better to have a few tiny lumps than a soupy mess.
Cool Slowly — Sudden temperature changes cause cracks. Let the cheesecake cool in the turned-off oven with the door slightly open for 30 minutes after baking. Then, move it to the counter. Finally, refrigerate. This gradual cooling process is key for a smooth surface.
Common Problems & Solutions
Cracked Top — Usually caused by overmixing or high heat. Bake at 350°F, not higher. If it cracks, it still tastes good! You can cover the cracks with extra white chocolate swirl.
Runny Center — Underbaking. Cheesecake continues to cook as it cools. If the center is still very liquid after chilling, you might need to bake it longer next time. But a slight jiggle is normal.
Greasy Crust — Too much butter or not enough compression. Make sure you press the crust down firmly. If it’s too greasy, it didn’t bind properly.
Pro Tricks
Freeze for Easy Cutting — If you’re having trouble getting clean cuts, freeze the bars for 15 minutes before slicing. The cold firmness helps the knife glide through.
Use Fresh Berries — If you have fresh raspberries, mash them slightly and fold them into the white chocolate for a more intense flavor. It’s a nice variation.
Recipe Variations
Once you’ve nailed the basic version, here’s how to mix it up. These bars are a blank canvas.
Strawberry White Chocolate
Swap the raspberry jam for strawberry jam. The pink and white swirl is classic and always a hit with kids. I’ve made this for Valentine’s Day, and it’s a crowd-pleaser.
Blueberry Lemon
Use blueberry jam and add 1 teaspoon of lemon zest to the filling. The lemon brightens the white chocolate. It’s a refreshing twist.
Chocolate Chip Cookie Dough
Instead of the swirl, fold mini chocolate chips into the cheesecake batter. It’s like a cookie dough cheesecake. Add a few chocolate chunks on top for extra texture.
Vegan Version
Use vegan cream cheese (like Kite Hill), vegan butter, and dairy-free white chocolate chips. The texture might be slightly different, but it’s still delicious. I’ve made this for a friend with allergies, and she loved it.
Gluten-Free
Use gluten-free graham crackers. Most brands work well. Just make sure the jam and white chocolate are certified gluten-free if you have celiac disease.
Mini Bars
Divide the batter into a mini muffin tin. Bake for 20-25 minutes. These are perfect for parties and individual portions. Kids love the bite-sized version.
Serving & Storage
Serving: I serve these bars chilled. They taste best cold, like a cheesecake should. I pair them with fresh raspberries or a dollop of whipped cream. For a fancy touch, add a mint leaf on top. These bars are great for picnics, potlucks, or after-school snacks. They travel well in an airtight container.
Storage: Store the bars in an airtight container in the refrigerator for up to 5 days. They actually taste better after a day or two as the flavors meld. If you want to freeze them, wrap individual squares in plastic wrap and place them in a freezer bag. They freeze well for up to 3 months. Thaw in the refrigerator overnight. Don’t freeze the whole pan; it’s harder to cut after thawing.
Meal Prep Tip: I make these on Sunday and cut them into squares. I store them in a container, ready to grab for the week. It’s a healthy-ish treat that kids can pack for lunch or enjoy as a snack.
Nutrition Information
I’m not a nutritionist, but here’s the breakdown. This is a treat, so enjoy it mindfully.
Per serving (1 bar): Calories: 280, Protein: 4g, Carbs: 35g, Fiber: 0g, Fat: 15g, Sodium: 180mg.
My Take: This is indulgent comfort food. It’s rich and sweet. It’s not a health food, but it’s better than store-bought desserts because you control the ingredients. I try to balance it with fresh fruit when I serve it. It’s a special treat, not an everyday snack.
Final Thoughts
Making these Easy White Chocolate Raspberry Cheesecake Bars is more than just baking. It’s about the time we spend together, laughing and creating something delicious. My kids are so proud when they see their handiwork on the table. And the best part? They ask to make them again. That’s the ultimate compliment.
If you make these, I’d love to hear how they turn out in your kitchen. Drop a comment and tell me about your baking adventures with your kids. Did they help mix? Did they eat the batter? (We hope so!) Share your tips and variations. Let’s learn from each other.
Happy cooking!
FAQs
Can I use fresh raspberries instead of jam?
Yes! But you’ll need to cook them down first. Mash fresh raspberries with a little sugar and cook them on the stove until they break down and thicken. Let them cool completely before swirling. Fresh berries can release too much water if used raw, which makes the cheesecake soggy.
Why did my cheesecake crack?
Cracking is usually caused by overmixing or baking at too high a temperature. Make sure you mix the batter gently, especially after adding eggs. Also, cool the cheesecake slowly. Sudden temperature changes cause cracks. If it cracks, don’t worry! It still tastes great.
Can I make this recipe ahead of time?
Absolutely. These bars taste better the next day. You can make them up to 2 days in advance. Just store them in the refrigerator. They also freeze well for up to 3 months. I often make them the night before a party to save time.
What if I don’t have a stand mixer?
You can use a hand mixer or even mix by hand. It will take more effort, but it works. Just make sure the cream cheese is very soft to avoid lumps. I’ve mixed it by hand when I forgot to plug in the mixer, and it was fine, just tiring.
Can I substitute the white chocolate?
You can use milk chocolate or dark chocolate, but the flavor and color will change. White chocolate provides the classic look and mild sweetness. If you use dark chocolate, the swirl will be darker and less sweet. It’s still delicious, just different.
How do I get clean cuts?
Chill the bars completely. Then, use a sharp knife. Wipe the knife with a warm, damp cloth between cuts. This removes any residue and ensures a clean edge. For extra precision, dip the knife in hot water and dry it before each cut.
Can I make these in a springform pan?
Yes, but you’ll need to adjust the baking time. A springform pan is deeper, so the center might take longer to set. Bake for 45-50 minutes and check for doneness. The edges should be set, and the center should have a slight jiggle. You might need to cover the top with foil if it browns too quickly.
Pin This Recipe!
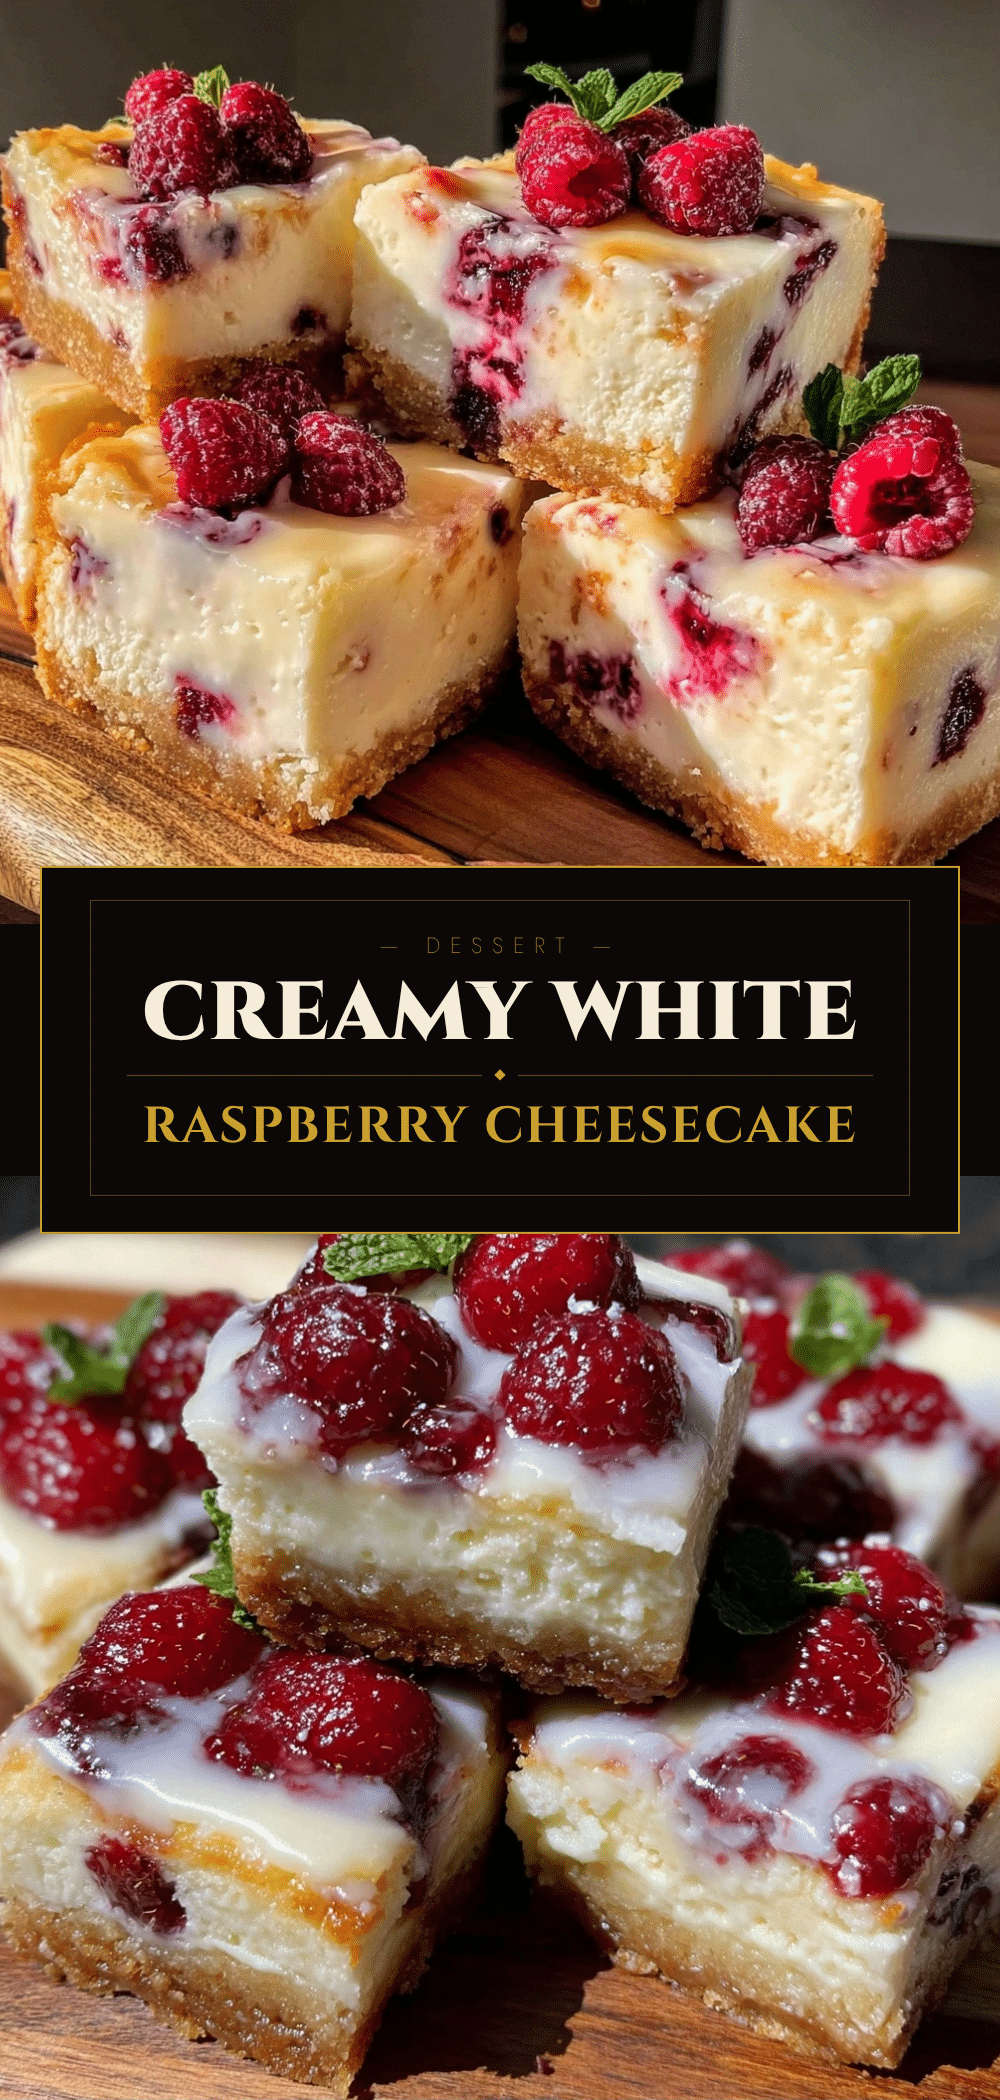
Easy White Chocolate Raspberry Cheesecake Bars
- Total Time: 5 hours
- Yield: 12 servings 1x
Description
These kid-friendly cheesecake bars feature a buttery graham cracker crust, a creamy white chocolate filling, and a vibrant raspberry swirl. They are forgiving, easy to make, and perfect for baking with children.
Ingredients
- 2 cups (200g) graham cracker crumbs
- 6 tablespoons (85g) unsalted butter, melted
- 2 tablespoons (25g) granulated sugar
- 24 ounces (680g) full-fat cream cheese, softened
- 1 cup (200g) granulated sugar
- 1/2 cup (120g) full-fat sour cream
- 3 large eggs, room temperature
- 1 teaspoon (5ml) vanilla extract
- 1 cup (170g) white chocolate chips
- 1/2 cup (150g) seedless raspberry jam or preserves
- 2 tablespoons (28g) butter
Instructions
- Preheat oven to 350°F (175°C). Line a 9×13 inch baking pan with parchment paper, leaving an overhang on the sides, and grease lightly.
- In a medium bowl, mix graham cracker crumbs, melted butter, and sugar. Press firmly into the bottom of the prepared pan. Bake for 8-10 minutes until lightly golden, then let cool completely.
- In a large bowl, beat softened cream cheese on medium speed until smooth. Add sugar and beat until combined. Add sour cream, vanilla, and eggs. Mix on low speed just until combined; do not overmix.
- Pour the filling over the cooled crust.
- Melt white chocolate chips and 2 tablespoons butter in the microwave in 30-second intervals, stirring until smooth. Mix in the raspberry jam.
- Drop spoonfuls of the white chocolate-raspberry mixture over the cheesecake batter. Use a toothpick or knife to swirl the colors together.
- Bake for 40-45 minutes until edges are set but the center has a slight jiggle. If the top browns too much, cover loosely with foil after 30 minutes.
- Cool in the pan on a wire rack for 1 hour, then refrigerate for at least 4 hours (preferably overnight) until firm.
- Lift bars out using parchment overhang and cut into squares with a sharp knife.
Notes
Ensure all ingredients, especially cream cheese and eggs, are at room temperature to prevent lumps. Do not overmix the batter to avoid cracks. For clean cuts, chill the bars completely and wipe the knife between cuts. The bars can be frozen for up to 3 months.
- Prep Time: 10 minutes
- Cook Time: 45 minutes
- Category: Dessert
- Cuisine: American
Nutrition
- Serving Size: 1 bar
- Calories: 280
- Sugar: 28
- Sodium: 180
- Fat: 15
- Saturated Fat: 9
- Carbohydrates: 35
- Protein: 4
Keywords: white chocolate raspberry cheesecake, no-bake cheesecake bars, kid-friendly baking, easy dessert, raspberry swirl, graham cracker crust


