Last year, I made the classic mistake of underestimating the chaos of a Labor Day cookout. I had planned to bring a fancy lemon pound cake that required two layers, a complicated glaze, and about an hour of pristine kitchen time. I spent the morning sweating over my mixer while the grill smoke billowed into the backyard. By the time the cake was done, it was already 4 PM. I dragged it outside, hoping for a heroic reception. Instead, it sat there, uncut, while everyone munched on potato salad and corn dogs. No one wanted a heavy, dense cake after three hours of grilled food. I felt like a failure. A sweet, crumbly failure.
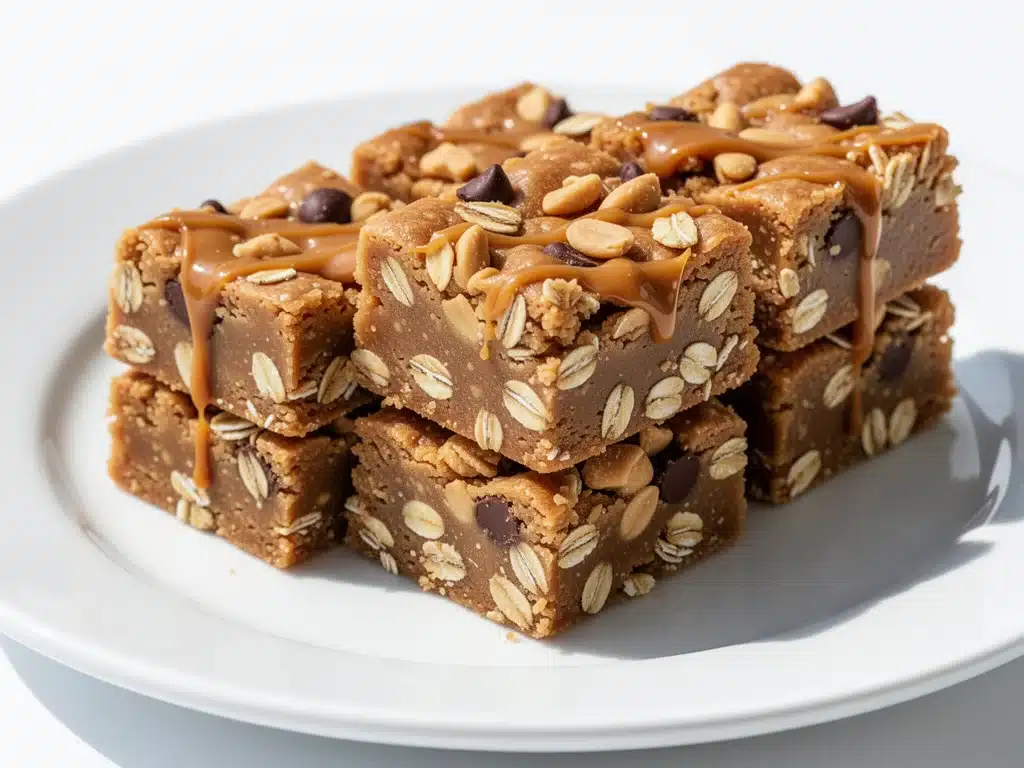
That was the year I decided that labor day desserts had to be as effortless as the day itself. No baking. No oven heat. No stress. Just cold, creamy, peanut buttery goodness that I could throw together in twenty minutes while the burgers were still flipping. Enter the no-bake peanut butter bars. These aren’t just a quick fix; they’ve become the highlight of my holiday spread. They’re the treat people actually wait in line for. The ones that disappear before the fireworks even start.
I’ve made these no-bake peanut butter bars for cookout crowds at least a dozen times since that lemon cake disaster. I’ve tweaked the ratios, tested different brands of peanut butter, and even tried swapping in different chocolates. This version is the winner. It’s got the perfect chewy texture, a salty-sweet balance that hits all the right notes, and it holds up in the summer heat better than any custard-based dessert ever could. If you’re looking for a Labor Day treat that’s crowd-pleasing, budget-friendly, and actually delicious, this is it. Seriously, put down the whisk and pick up a spoon.
Why You’ll Love This No-Bake Peanut Butter Bars Recipe
There are about ten reasons I keep making these bars, but here are the big ones that have converted my skeptical friends and family.
Zero Oven Required — This is the biggest selling point. Your kitchen stays cool, your electric bill stays low, and you don’t have to wait for the oven to preheat. I can make these in the time it takes to chop the vegetables for the coleslaw. It’s a game-changer for summer cooking.
Crowd-Pleasing Texture — Unlike some no-bake bars that turn into a hard rock or a greasy mess, these have a distinct chew. The graham cracker crumbs give it structure, the peanut butter adds richness, and the chocolate topping provides that satisfying snap. It’s the perfect combination of crunchy, chewy, and creamy.
Stands Up to Heat — I’ve had these sitting out on a picnic table in 90-degree weather, and they didn’t melt into a puddle. The high fat content from the peanut butter and coconut oil keeps them stable. They might get slightly softer, but they don’t collapse. This is crucial for outdoor events where refrigeration is limited.
Feeds an Army for Pennies — I cut these into 24 small squares, and they vanished in ten minutes. You can stretch them even further if you cut them smaller. The ingredients are cheap pantry staples. You’re not spending $8 on fancy chocolate or exotic fruits. Just peanut butter, sugar, and graham crackers. It’s budget-smart indulgence.
Make-Ahead Friendly — You can make these two days in advance. In fact, they taste better the next day because the flavors have had time to meld. I usually make them on Sunday evening, let them chill overnight, and then pack them in the cooler on Monday morning. Zero day-of stress.
This is my go-to when I need a dessert that just works. No complicated techniques, no weird ingredients, just reliable, delicious food that makes everyone happy. It’s the kind of dessert that reminds people of their childhood but tastes elevated enough for a holiday party.
Ingredients You’ll Need
Here’s the best part: you probably have most of this already in your pantry. This looks like a short list, but each ingredient plays a specific role in creating that perfect texture. I’m particular about three things here, and I’ll tell you exactly why.
Creamy Peanut Butter (1 cup / 250g) — This is the star. I use standard brands like Jif or Skippy because they have that specific oil content and sweetness that works perfectly in no-bake recipes. Natural peanut butter is too oily and won’t set properly. Don’t try to be healthy here; you’ll ruin the texture. If you must use natural, you have to add extra coconut oil, but why complicate it?
Unsalted Butter (½ cup / 115g) — This binds everything together and adds richness. Make sure it’s softened or melted slightly. Cold butter won’t mix evenly with the powdered sugar. I usually melt it in the microwave for 20 seconds. It’s faster and easier.
Powdered Sugar (3 cups / 360g) — Also known as confectioners’ sugar. Do not use granulated sugar; it won’t dissolve and you’ll get gritty bars. The powdered sugar creates that smooth, fudge-like consistency. Sift it if it’s clumpy. I know it’s annoying, but clumpy sugar ruins the bars.
Graham Cracker Crumbs (1½ cups / 150g) — This gives the bars their structure and that classic “s’more” flavor. You can crush your own graham crackers in a food processor, but buying pre-made crumbs is a huge time-saver. I keep a box of Nabisco crumbs in my pantry specifically for these. If you use homemade crumbs, make sure they’re fine. Coarse crumbs make the bars crumbly.
Vanilla Extract (1 teaspoon) — Just a splash to round out the flavors. Don’t skip it. It adds depth to the peanut butter.
Semi-Sweet Chocolate Chips (1 cup / 170g) — For the topping. I use regular Hershey’s chips because they melt smoothly and have that familiar chocolate bar taste. Dark chocolate can be too bitter against the sweet peanut butter, and milk chocolate might be too sweet. Semi-sweet is the Goldilocks zone.
Coconut Oil (1 tablespoon) — This is the secret weapon for the topping. It keeps the chocolate from cracking when you bite into it and helps it set with a nice shine. It also prevents the chocolate from melting too quickly in the heat. If you don’t have coconut oil, you can skip it, but the chocolate will be harder and more prone to shattering.
Salted Peanuts (½ cup / 60g, chopped) — Optional, but highly recommended. Adding chopped peanuts on top gives you a nice crunch and adds a salty contrast. I buy pre-chopped peanuts to save time, but chopping whole peanuts is easy too. Just don’t make them too tiny; you want visible chunks.
Salt (a pinch) — A tiny pinch in the peanut butter mixture balances the sweetness. It’s subtle, but you’ll miss it if it’s not there.
Equipment Needed
You don’t need fancy equipment for this. Here’s what I actually use.
9×9 Inch Baking Pan — This is the standard size for these bars. Line it with parchment paper. I use the “overhang” method where the parchment hangs over the edges like a sling. This makes it incredibly easy to lift the entire block out of the pan once it’s set. You can use aluminum foil if you don’t have parchment, but parchment is non-stick and easier to clean.
Large Mixing Bowl — Something big enough to hold all the ingredients. A glass or metal bowl works best. Plastic bowls are fine too, just make sure they’re clean and dry.
Electric Mixer or Spoon — I use a hand mixer for the peanut butter mixture because it helps incorporate the powdered sugar evenly. But honestly? A sturdy wooden spoon works just as well. It’s a bit of arm work, but it’s not that hard. I usually switch to the spoon after the first minute of mixing.
Spatula — A silicone spatula is essential for scraping the bowl and pressing the mixture into the pan. You need to press it down firmly so the bars are dense and don’t fall apart.
Microwave-Safe Bowl — For melting the chocolate and coconut oil. I use a glass measuring cup with a spout. It’s easier to pour and less likely to spill. If you don’t have one, any microwave-safe bowl works.
Microplane or Knife — For chopping the peanuts if you’re using whole ones. A sharp chef’s knife works fine if you don’t have a microplane.
Offset Spatula — Optional, but nice for spreading the chocolate topping evenly. A regular butter knife works too, but an offset spatula gives you better control.
How to Make It: Step-by-Step
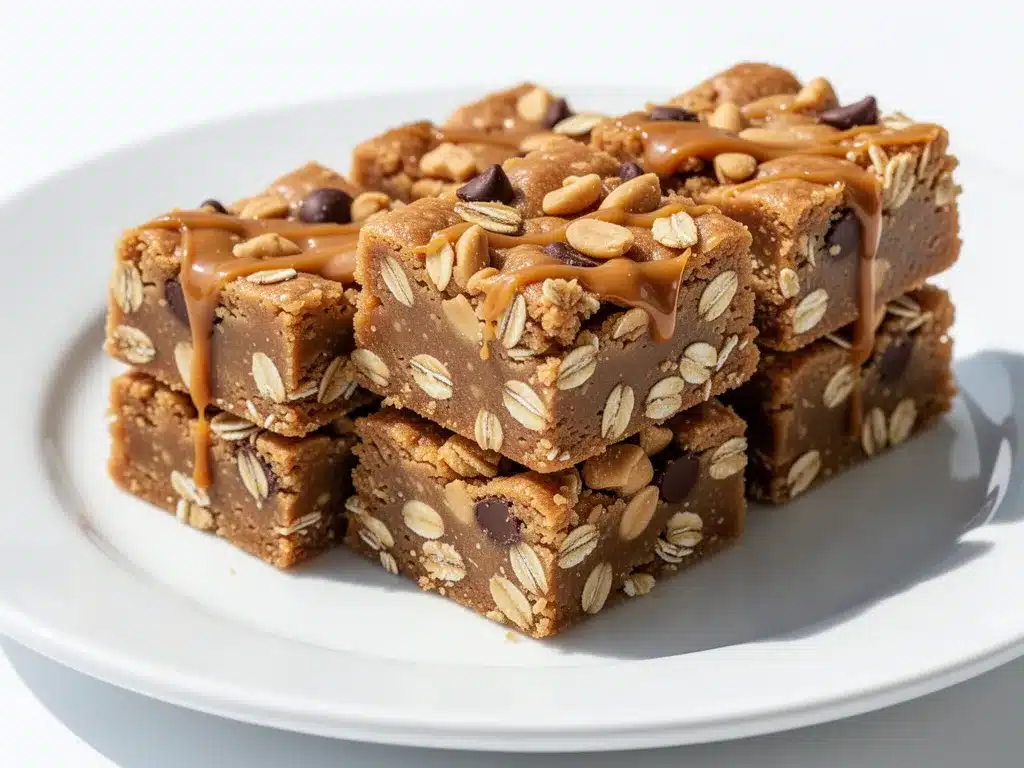
Alright, let’s make this! I’m walking you through exactly how I do it, including the little tricks I’ve picked up over the years.
Step 1: Prep Your Pan (2 minutes)
Line a 9×9 inch baking pan with parchment paper. Leave a 2-inch overhang on the long sides so you can lift the bars out later. Spray the parchment lightly with cooking spray. This is just insurance to ensure nothing sticks. I learned this the hard way with a batch that stuck to the bottom last year. Don’t skip this step.
Step 2: Mix the Peanut Butter Base (5 minutes)
In a large mixing bowl, combine the creamy peanut butter and melted butter. Mix them together until they are smooth and well combined. It should look like a thick, glossy paste. If the butter is too cold, the mixture might look lumpy. That’s okay; it will smooth out as you add the sugar. If you’re using an electric mixer, use the lowest speed. High speed will incorporate too much air and make the bars light and fluffy instead of dense and chewy.
Step 3: Add the Dry Ingredients (3 minutes)
Add the powdered sugar, graham cracker crumbs, vanilla extract, and a pinch of salt. Mix until everything is fully incorporated. The mixture will become thick and stiff. This is where the wooden spoon comes in handy. You need to press and fold the mixture to get rid of any air pockets. The goal is a uniform, dough-like consistency. If it seems too dry, add a teaspoon of milk. If it’s too sticky, add a little more powdered sugar. But with the measurements above, it should be perfect.
Step 4: Press Into the Pan (3 minutes)
Transfer the mixture into your prepared pan. Use your spatula or the back of a spoon to press it down firmly. You want it to be as flat and even as possible. Press it into the corners. The firmer you press it, the better the bars will hold together. I usually use the bottom of a measuring cup to tamp it down. It’s efficient and gives you even pressure. Don’t be gentle here; you want a dense base.
Step 5: Chill the Base (15 minutes)
Place the pan in the refrigerator while you melt the chocolate. This step is crucial. If you try to spread the chocolate on a warm base, the peanut butter layer will melt and mix with the chocolate. You’ll end up with a muddy mess. Give it at least 15 minutes to firm up. If you’re in a hurry, put it in the freezer for 10 minutes.
Step 6: Melt the Chocolate Topping (2 minutes)
In a microwave-safe bowl, combine the semi-sweet chocolate chips and coconut oil. Microwave in 30-second intervals, stirring between each interval. Stop when there are just a few unmelted chips left. Stir vigorously; the residual heat will melt the rest. Do not overheat the chocolate. If it gets too hot, it will seize up and become grainy. You want a smooth, glossy sauce. If it looks separated, add a teaspoon of warm water and stir. It should come back together.
Step 7: Spread and Top (2 minutes)
Remove the pan from the fridge. Pour the melted chocolate over the chilled peanut butter layer. Use an offset spatula or a butter knife to spread it evenly to the edges. Try to get it all the way to the corners. Sprinkle the chopped salted peanuts over the top while the chocolate is still wet. Press them in gently so they stick. The chocolate will set quickly, so work fast.
Step 8: Set and Slice (30 minutes +)
Place the pan back in the refrigerator for at least 30 minutes, or until the chocolate is completely set. For best results, let it chill for a few hours or overnight. This ensures clean cuts. When you’re ready to serve, lift the bars out of the pan using the parchment sling. Place them on a cutting board and slice into squares. I cut them into 24 pieces for a party, but 16 is fine if you want bigger bars. Use a sharp knife for clean cuts. Wipe the knife between cuts if needed.
Expert Tips & Tricks
Here’s everything I’ve learned from making these dozens of times. These tips will save you from my mistakes.
The Peanut Butter Matters
I cannot stress this enough: use creamy, processed peanut butter. Natural peanut butter separates into oil and solids. Unless you’re willing to stabilize it with extra coconut oil and cornstarch, it will not work in this recipe. The oil in natural peanut butter will make the bars greasy and they won’t set. Save the natural peanut butter for smoothies. For these bars, stick to the standard stuff.
Don’t Skip the Chill Time
I know you want to eat them immediately. I get it. But if you skip the 15-minute chill for the base, the chocolate topping will sink into the peanut butter layer. You’ll lose your distinct layers. Patience pays off. The longer you chill them, the cleaner they cut.
Chocolate Temperature Control
Never microwave chocolate on high power. It burns easily. Always use 50% power or 30-second bursts on high. Stirring is your friend. If you see smoke, you’ve gone too far. Burnt chocolate tastes bitter and ruins the whole batch. If your chocolate seizes, don’t panic. Add a tablespoon of warm water and stir. It might save it.
Cutting for Clean Slices
If your knife is dragging the chocolate, warm it up slightly under hot water and dry it off. A warm knife cuts through the chocolate cleanly without cracking it. Also, wipe the knife clean between every cut. Chocolate smears and makes the bars look messy. A clean knife equals professional-looking bars.
Storage is Key
These bars are best stored in the refrigerator. The heat will melt the chocolate and soften the base. If you’re bringing them to a cookout, keep them in a cooler with ice packs. They’ll stay firm and fresh for hours. They also freeze well for up to 3 months. Just thaw them in the fridge before serving.
Variations & Substitutions
Once you’ve nailed the basic version, here’s how you can mix it up. I’ve tried all of these.
Chocolate Chip Version
Add ½ cup of mini chocolate chips to the peanut butter mixture before pressing it into the pan. It adds little bursts of chocolate throughout. My kids love this version. It’s basically a deconstructed cookie dough bar.
Reese’s Cup Style
Instead of chopped peanuts, chop up a few Reese’s Peanut Butter Cups and press them into the base. Then add the chocolate topping. It’s extra sweet and extra peanutty. Perfect for peanut butter lovers.
Sea Salt Crunch
After spreading the chocolate, sprinkle flaky sea salt (like Maldon) over the top. The salt crystals add a nice visual contrast and enhance the peanut butter flavor. It makes the bars taste more gourmet.
White Chocolate Version
Swap the semi-sweet chocolate for white chocolate chips. It’s sweeter and milder. I like to add crushed pretzels on top for a salty-sweet combo. It’s a different vibe, but still delicious.
Gluten-Free Option
Use gluten-free graham cracker crumbs. Most brands work fine. Make sure your peanut butter and chocolate chips are certified gluten-free if you have celiac disease. Everything else is naturally gluten-free.
Peanut-Free Option
Substitute the peanut butter with sunflower seed butter or soy nut butter. The texture and flavor will be slightly different, but it still works. Sunflower seed butter can turn green when baked, but since this is no-bake, it stays brown. It’s a safe bet for school events.
Serving & Storage
How to Serve:
I usually serve these straight from the cooler at the cookout. They’re finger food, so they’re perfect for mingling. I cut them into small squares so people can try multiple desserts. If you’re serving them at a dinner party, I recommend placing them on a nice platter with a few fresh strawberries on the side. The acidity of the strawberries cuts through the richness of the peanut butter.
Side Dishes:
These bars pair well with anything grilled. They’re rich, so they balance out the smoky, salty flavors of burgers and hot dogs. I also serve them with cold coffee or milk. The contrast of hot coffee and cold bars is amazing.
Storage Instructions:
Refrigerator: Store in an airtight container for up to 1 week. Layer them with parchment paper to prevent sticking. They taste best after 24 hours when the flavors have melded.
Freezer: These freeze beautifully. Place them in a single layer on a baking sheet to freeze, then transfer to a freezer bag. They’ll last for 3 months. Thaw in the fridge overnight before serving.
Room Temperature: Do not leave out for more than 2 hours in warm weather. The chocolate will melt, and the peanut butter will go soft. If it’s a cool evening, you can leave them out for a few hours, but refrigeration is safer.
Nutrition Information
I’m not a nutritionist, but here’s the breakdown if you’re tracking. Keep in mind that these are rich, dense bars, so portion control is key.
Per Square (based on 24 servings):
- Calories: 180
- Fat: 10g
- Saturated Fat: 4g
- Carbs: 18g
- Fiber: 1g
- Sugar: 14g
- Protein: 4g
- Sodium: 85mg
What’s Good:
- Decent protein from the peanut butter
- Energy-dense, good for active days
- No baking means no added oils from frying
What to Know:
- High in sugar due to powdered sugar and chocolate
- High in fat from peanut butter and chocolate
- Contains common allergens: peanuts, dairy, gluten
My Take:
Look, this is a treat. It’s not a health food. It’s loaded with sugar and fat, but it’s made with simple ingredients. It’s way better than store-bought candy bars, and you know exactly what’s in it. When I make these, I eat one square and enjoy it. Don’t guilt yourself over it. Life’s too short for sad desserts.
Final Thoughts
So that’s my go-to no-bake peanut butter bars! I’ve probably talked your ear off at this point, but when you make a recipe this often, you have a lot to say about it. These bars have saved my Labor Day celebrations more times than I can count. They’re my answer to “what’s for dessert” when I’m tired, don’t want to turn on the oven, and still want something that tastes amazing. My kids are happy, my husband’s happy, and I’m happy because I’m not stressed about cooking.
Make it yours! Try different toppings, swap in your favorite chocolate, or add extra crunch. The best recipes are the ones you adapt to your family’s tastes. If you make these, drop a comment and let me know what you think! I love hearing how recipes turn out in your kitchen. And if something doesn’t work, tell me that too—I’m here to help troubleshoot.
Happy cooking! And I hope your Labor Day cookout is filled with good food, good friends, and zero oven-related disasters.
Frequently Asked Questions
Can I use crunchy peanut butter instead of creamy?
Yes, you can! Crunchy peanut butter will give the bars a nice texture with little bits of peanut throughout. Just make sure the peanut butter is soft enough to mix easily. If it’s very thick, you might need to add an extra teaspoon of melted butter to help it combine with the powdered sugar. The bars will still set properly.
Why did my chocolate topping crack?
Cracking usually happens if the chocolate is too thick or if it’s exposed to cold air too quickly. Make sure you add the coconut oil to keep the chocolate flexible. Also, don’t refrigerate the bars for too long after adding the chocolate. Let them set at room temperature for 10 minutes, then move them to the fridge. This gradual cooling prevents thermal shock.
Can I make these ahead of time?
Absolutely. These bars actually taste better the next day. The flavors meld together, and the texture firms up. I usually make them 24-48 hours before the event. Store them in the fridge in an airtight container. Take them out 15 minutes before serving so they’re not rock-hard from the fridge.
How do I store leftovers?
Store them in an airtight container in the refrigerator for up to 1 week. You can also freeze them for up to 3 months. If freezing, place a layer of parchment paper between the bars to prevent sticking. Thaw in the fridge overnight before serving.
Can I use honey instead of powdered sugar?
No, honey will change the texture completely. It will make the bars sticky and wet, and they won’t set properly. Powdered sugar is essential because it dissolves completely and provides structure. If you want a different sweetener, you can try maple syrup, but you’ll need to adjust the amount of butter and graham crackers. It’s not a direct substitution.
What if I don’t have a 9×9 pan?
You can use an 8×8 pan, but the bars will be thicker. You might need to increase the chilling time to ensure the center is set. Alternatively, you can use a 10×10 pan for thinner bars, but be careful not to spread them too thin or they’ll be hard to lift out. The 9×9 is the ideal size for this recipe.
Can I double this recipe?
Yes, but you’ll need a larger pan. Use a 9×13 inch pan and double the ingredients. The chilling time will increase slightly because the mass is larger. Make sure to press the mixture down firmly in the corners. This is great for feeding a crowd, but be careful with the chocolate topping—it might be harder to spread evenly over a larger surface area.
Pin This Recipe!
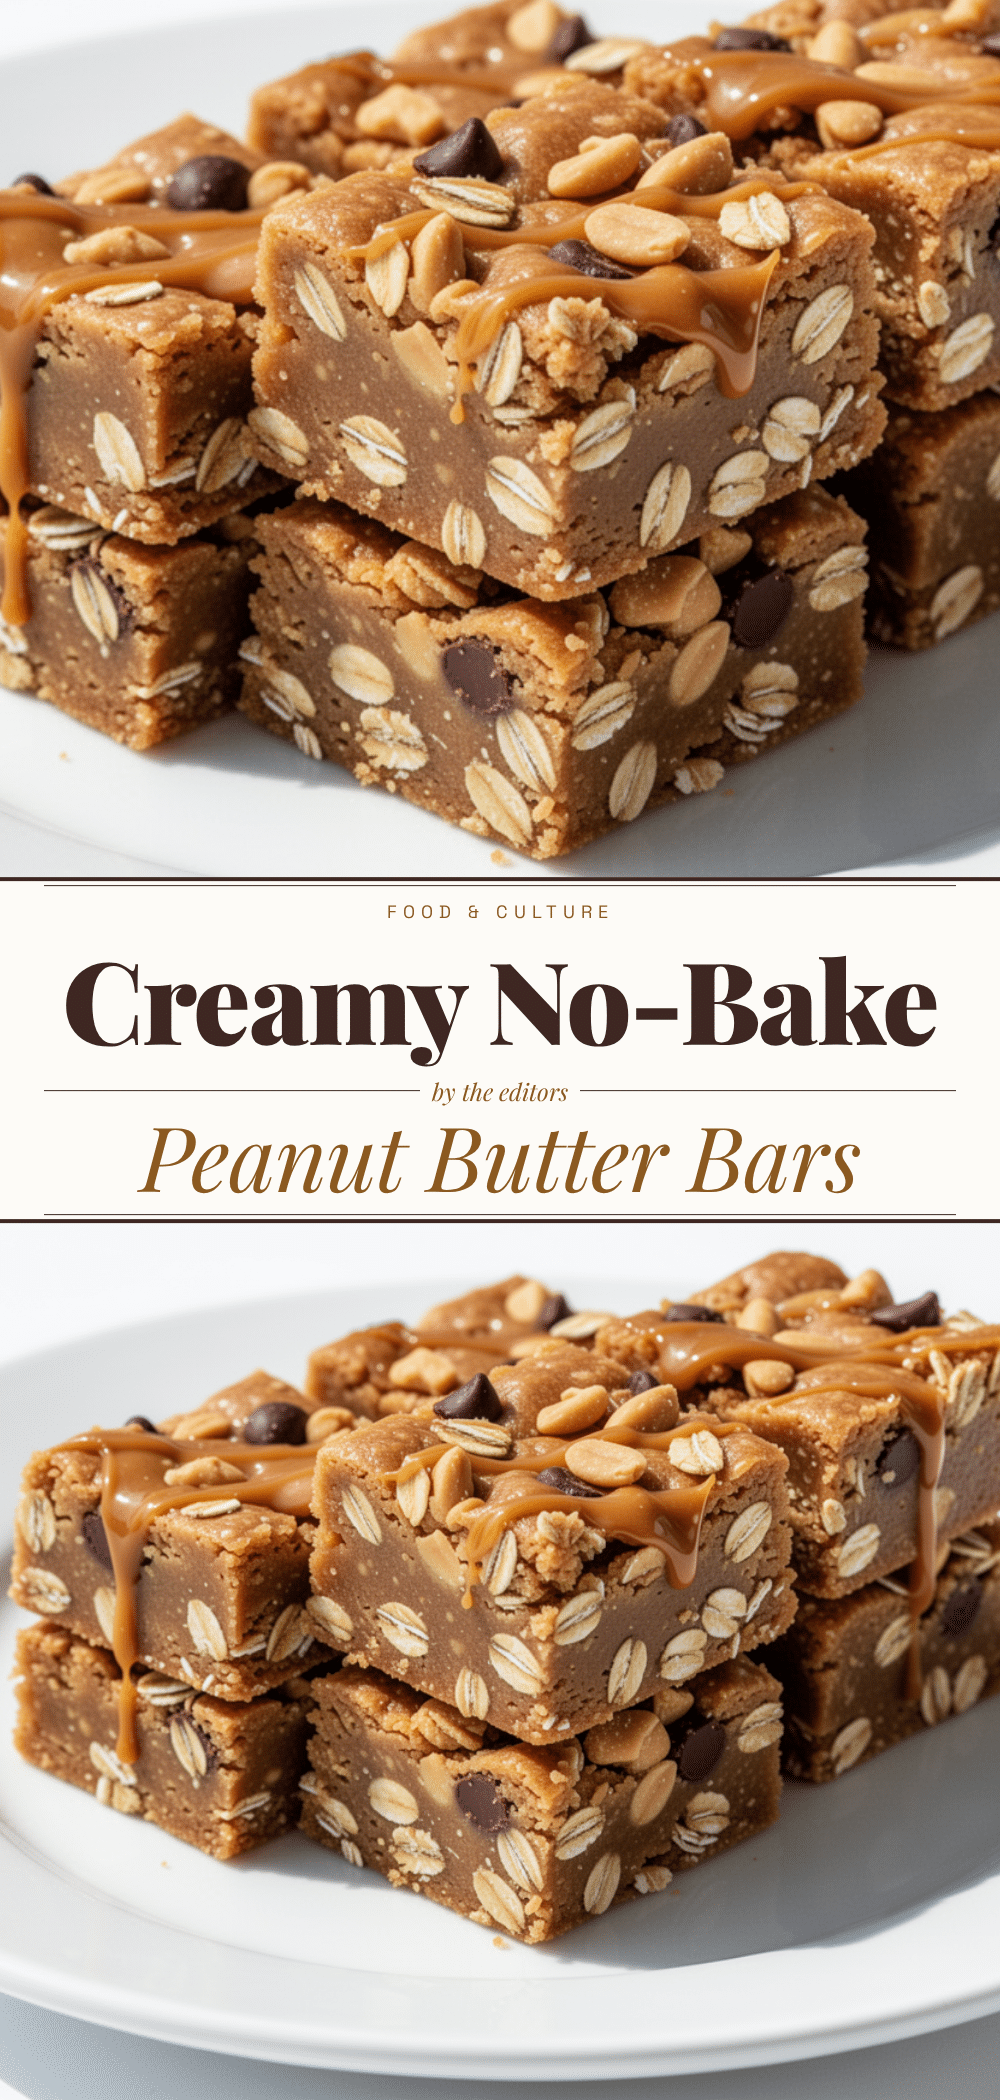
No-Bake Peanut Butter Bars: Best Labor Day Treat
- Total Time: 50 minutes
- Yield: 24 servings 1x
Description
These no-bake peanut butter bars are the perfect effortless, crowd-pleasing dessert for summer cookouts. With a chewy peanut butter base, graham cracker crumbs, and a rich chocolate topping, they require no oven and can be made in just 20 minutes.
Ingredients
- 1 cup (250g) creamy peanut butter
- ½ cup (115g) unsalted butter, melted
- 3 cups (360g) powdered sugar
- 1½ cups (150g) graham cracker crumbs
- 1 teaspoon vanilla extract
- 1 cup (170g) semi-sweet chocolate chips
- 1 tablespoon coconut oil
- ½ cup (60g) salted peanuts, chopped
- a pinch of salt
Instructions
- Line a 9×9 inch baking pan with parchment paper, leaving a 2-inch overhang on the long sides, and lightly spray with cooking spray.
- In a large mixing bowl, combine the creamy peanut butter and melted butter. Mix until smooth and glossy.
- Add the powdered sugar, graham cracker crumbs, vanilla extract, and a pinch of salt. Mix until fully incorporated and the mixture forms a thick, dough-like consistency.
- Transfer the mixture to the prepared pan. Press it down firmly and evenly into the corners using a spatula or the bottom of a measuring cup.
- Refrigerate the base for at least 15 minutes to firm up.
- In a microwave-safe bowl, combine the chocolate chips and coconut oil. Microwave in 30-second intervals, stirring between each, until mostly melted. Stir vigorously until smooth.
- Remove the pan from the fridge. Pour the melted chocolate over the chilled base and spread evenly to the edges.
- Sprinkle chopped salted peanuts over the wet chocolate and press gently to adhere.
- Refrigerate for at least 30 minutes, or until the chocolate is completely set.
- Lift the bars out of the pan using the parchment sling and slice into 24 squares.
Notes
Use creamy, processed peanut butter (like Jif or Skippy) rather than natural peanut butter, as natural butter is too oily and won’t set properly. Do not skip the chilling time for the base, or the chocolate will mix with the peanut butter layer. For clean cuts, wipe the knife between slices and warm it slightly under hot water if the chocolate cracks. Store in the refrigerator for up to 1 week or freeze for up to 3 months.
- Prep Time: 20 minutes
- Cook Time: 0 minutes
- Category: Dessert
- Cuisine: American
Nutrition
- Serving Size: 1 square
- Calories: 180
- Sugar: 14
- Sodium: 85
- Fat: 10
- Saturated Fat: 4
- Carbohydrates: 18
- Fiber: 1
- Protein: 4
Keywords: no-bake, peanut butter bars, labor day dessert, summer dessert, easy dessert, crowd-pleasing, chocolate peanut butter, graham cracker bars


