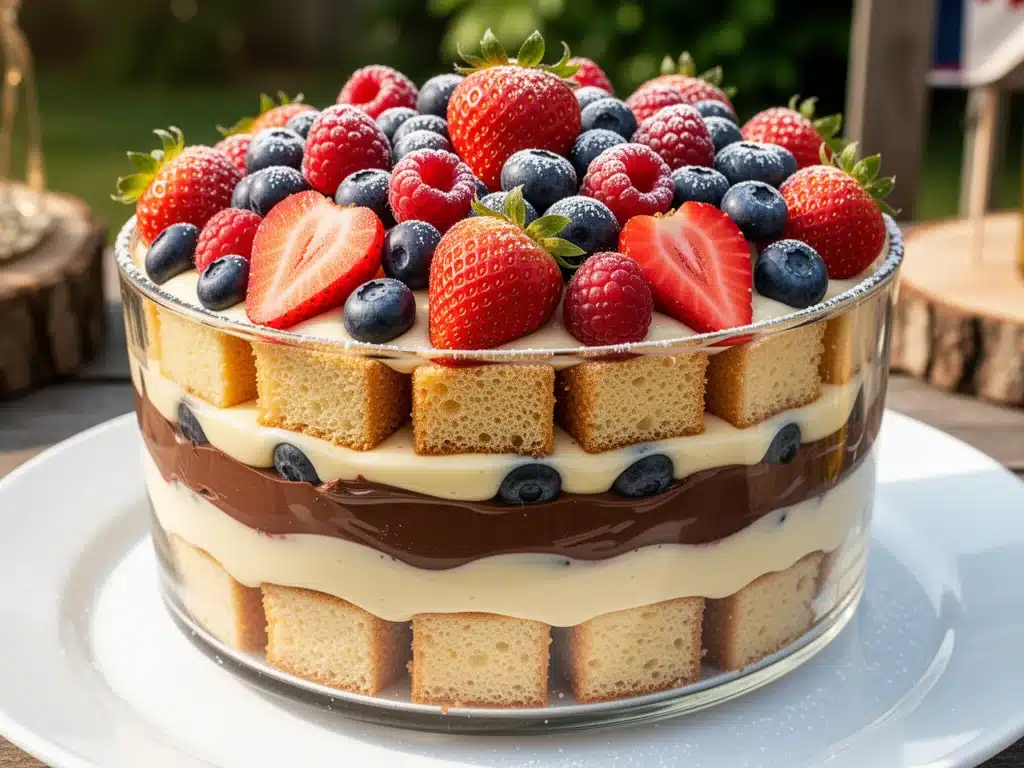
Last Labor Day, I made the mistake of underestimating how hungry a crowd gets after four hours of grilling. I had planned to serve individual tarts—cute, sure, but also a logistical nightmare. I was running around with a spatula like a headless chicken, trying to plate twelve tiny desserts while my husband was trying to keep the burgers from burning. The result? A pile of crumbled crusts and melted berries on the patio table. My guests were polite, but I felt like a failure. That was the day I decided that if I was ever hosting a summer party again, the dessert would be built, not plated. It would be big, bold, and impossible to mess up.
This Labor Day Layered Berry Trifle changed everything. It’s the reason my backyard parties are now the stuff of legend (or at least, the reason people text me the next morning saying “that dessert was amazing”). Instead of stressing over individual portions, I build this trifle in one giant glass bowl the night before. It looks like it came from a high-end patisserie, but it’s actually just five simple steps and a whole lot of berries. By the time everyone is stuffed with ribs and corn on the cob, the trifle is ready to scoop. No last-minute plating. No stress. Just beautiful, jiggly, berry-packed perfection.
I’ve tested this recipe for three consecutive holidays now, tweaking the ratio of cream to fruit until it was absolutely perfect. The secret isn’t in complicated techniques; it’s in the layering. You get that perfect bite every time: cool, creamy custard, soft sponge, and juicy, tart berries. It’s the kind of dessert that disappears so fast you’ll want to make two. If you’re looking for a show-stopping treat that actually saves you time, this is it. Let’s get into why this specific berry trifle is about to become your new party tradition.
Why You’ll Love This Layered Berry Trifle
There are about a dozen reasons I keep making this trifle, but they all boil down to one thing: it works. Every. Single. Time. Here’s why this recipe has earned a permanent spot in my summer rotation.
It’s a Make-Ahead Dream — Seriously, this is the biggest selling point. I build the trifle the night before the party. The flavors meld overnight, the cake gets perfectly moist, and the berries release their juices into the cream. By party time, it’s not just assembled; it’s developed. I can walk out to the patio with a bowl that looks like I just finished it, while my guests are still debating which grill station to hit first.
Zero Plating Stress — Remember my tart disaster? Yeah, never again. With a trifle, you just set the bowl on the table and hand everyone a spoon. There are no dropped slices, no messy fingers trying to pick up a tart, and no awkward moments where someone gets the “ugly” piece. It’s communal, it’s fun, and it’s foolproof.
Seasonal Perfection — Labor Day is right on the tail end of summer, which means it’s peak berry season. Strawberries are sweet, raspberries are tart, and blueberries add that nice burst of color. This trifle celebrates what’s fresh and available right now. It tastes like the end of summer in every bite.
Visually Stunning — I’m not a professional food stylist, but this trifle looks incredible in a clear glass bowl. You get those beautiful stripes of red, white, and purple that catch the eye from across the yard. It’s Pinterest-worthy without requiring any special skills. People stop mid-conversation to take a photo before they even dig in.
Customizable to Any Crowd — Have picky eaters? They can skip the berries if they want (though I doubt it). Want to make it boozy? Add a splash of Chambord to the cream. Want it kid-friendly? Skip the alcohol and add a little extra vanilla. This recipe bends to fit your guests, not the other way around.
This is my go-to when I need a dessert that feels fancy but requires zero last-minute effort. It’s reliable, delicious, and makes you look like a hosting genius. You’ll love it.
Ingredients You’ll Need
Here’s the best part: you probably have most of this already in your kitchen. I’m particular about three ingredients here—the berries, the cream, and the cake—and I’ll tell you exactly why. This looks like a long list, but it’s mostly pantry basics and fresh produce.
For the Cream Layer:
Heavy whipping cream (2 cups / 480ml) — This is non-negotiable if you want that thick, stable layer. Light cream won’t hold its shape. I buy the highest fat content you can find. If you’re in a pinch, you can use a tub of pre-whipped topping, but fresh whipped cream tastes infinitely better and isn’t as sweet.
Confectioners’ sugar (¼ cup / 30g) — Just a little bit to sweeten the cream. Don’t skip it, but don’t overdo it. You want the cream to be lightly sweet, letting the berries shine. Sift it if it’s clumpy.
Vanilla extract (1 teaspoon / 5ml) — Use real vanilla, not imitation. It adds that warm, comforting note that ties everything together. I use a good quality bourbon vanilla for this.
For the Cake Layer:
Angel food cake (1 box / about 14oz / 400g) — I use angel food cake because it’s light, airy, and doesn’t get soggy too quickly. Pound cake is too dense for this. If you can’t find angel food, a plain sponge cake works too, but avoid anything too rich or buttery. Buy it pre-made from the bakery section to save time.
For the Berry Layer:
Strawberries (1 pound / 450g) — The star of the show. Hull them and slice them into quarter-inch rounds. Uniform slices look better and distribute evenly. Use the ripest strawberries you can find; if they’re bland, the trifle will be bland.
Raspberries (1 pint / 450g) — They add a nice tartness to balance the sweet cream. Be gentle when handling them—they bruise easily. I rinse them right before layering and pat them dry thoroughly. Wet berries make the trifle watery.
Blueberries (1 pint / 150g) — For color and texture. They’re sturdy, so they hold up well in the bowl. Again, rinse and dry them well.
For the Glaze (Optional but Recommended):
Apricot jam (¼ cup / 60g) — Heated with a tablespoon of water, this brushed on top gives the berries a glossy, professional finish. It also helps keep them from drying out.
Water (1 tablespoon / 15ml) — To thin the jam for brushing.
Pro Tips for Ingredients:
Buy the best berries you can afford. This is one of those recipes where ingredient quality matters. If the berries are mushy or sour, no amount of cream will fix it. Visit a farmers market if you can—they’re usually fresher than grocery stores. Also, keep everything cold. Whip your cream in a chilled bowl, and keep your berries in the fridge until the last second. Warm cream = soup. Cold cream = peaks.
Equipment Needed
You don’t need fancy equipment for this. Here’s what I actually use, along with some honest opinions on alternatives.
Large glass trifle bowl — I use a 3-quart bowl. It needs to be clear glass so you can see the layers. If you don’t have a trifle bowl, a large glass punch bowl or even a deep casserole dish works. Just make sure it’s wide enough to scoop from easily.
Electric hand mixer or stand mixer — Whip the cream until it forms stiff peaks. A hand mixer is fine, but it takes a bit of arm strength. A stand mixer with the whisk attachment is faster and more consistent. I’ve done it by hand before, but I prefer the machine.
Large mixing bowl — Ideally stainless steel, chilled. This helps the cream whip faster and hold its shape.
Knife and cutting board — For slicing the strawberries and cake. A serrated knife is best for the cake to avoid crushing it.
Small saucepan — For heating the apricot jam glaze. If you don’t have one, a microwave-safe bowl works too.
Spatula — A rubber spatula is essential for folding the cream and spreading the layers evenly. Don’t use a spoon; you’ll get air pockets and uneven layers.
Pastry brush — For applying the glaze. If you don’t have one, a clean paintbrush (food-safe!) or even the back of a spoon works.
Optional: Zester or microplane — For adding a little lemon zest to the cream. It adds a bright note that cuts through the richness.
How to Make It: Step-by-Step
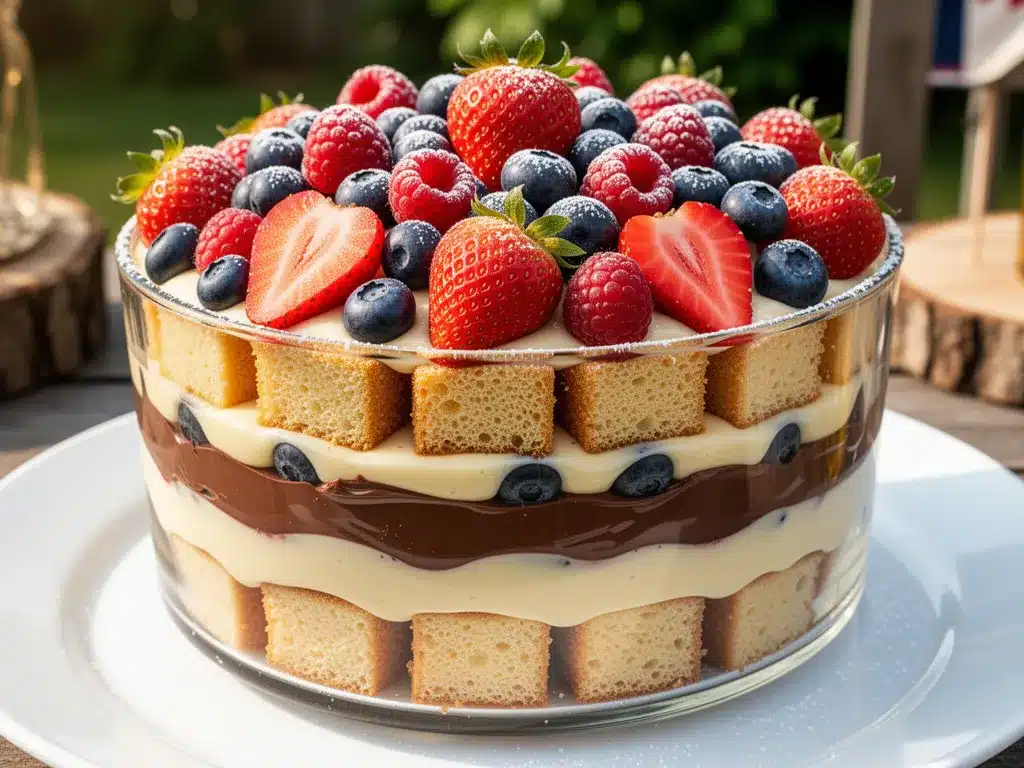
Alright, let’s make this! I’m walking you through exactly how I do it, including the little tricks I’ve picked up over the years. This recipe is designed to be built the night before, so don’t rush it.
Step 1: Prep the Berries (10 minutes)
Wash your strawberries, raspberries, and blueberries under cold water. This is crucial. If they’re dirty, the whole trifle is dirty. After washing, pat them completely dry with paper towels. Moisture is the enemy of a good trifle. Hull the strawberries and slice them into uniform quarter-inch rounds. Set them aside in separate bowls. If you’re building the night before, keep them covered in the fridge.
Step 2: Whip the Cream (5 minutes)
In a chilled large bowl, combine the heavy cream, confectioners’ sugar, and vanilla extract. Whip on medium-high speed until stiff peaks form. You’ll know it’s ready when you lift the beaters and the cream stands up straight without drooping. Be careful not to over-whip, or it’ll turn into butter. If you’re adding lemon zest, fold it in now. Set the whipped cream aside in the fridge until you’re ready to layer.
Step 3: Prepare the Cake (5 minutes)
Take your angel food cake out of the box. You want to cut it into cubes about 1-inch in size. Use a serrated knife and saw gently to avoid crushing the cake. If the cake is very dry, you can brush it lightly with simple syrup (1 part sugar, 1 part water, heated and cooled), but angel food cake usually doesn’t need it. Place the cubes in a large bowl.
Step 4: Build the Layers (15 minutes)
This is the fun part. Start with a layer of cake cubes at the bottom of your trifle bowl. Aim for about one-third of the cake. Next, add a layer of strawberries. Then, dollop half of the whipped cream over the berries and spread it gently. Sprinkle a layer of raspberries over the cream. Add the next layer of cake cubes. Then add the blueberries. Top with the remaining whipped cream, spreading it smoothly to the edges. Finally, top with the remaining strawberries and raspberries. The goal is even distribution, not perfection. It’s supposed to look rustic.
Step 5: Glaze and Chill (Overnight)
In a small saucepan, heat the apricot jam and water over low heat until the jam melts and becomes liquid. Strain it through a fine-mesh sieve to remove any seeds (optional, but recommended for a smooth finish). Let it cool slightly. Brush the top layer of berries with the glaze. This gives them a beautiful shine and helps preserve them. Cover the bowl tightly with plastic wrap and refrigerate for at least 4 hours, but ideally overnight. This allows the flavors to meld and the cake to soften slightly.
Visual Cues: When you’re layering, you want to see distinct colors. Red, white, purple, red, white, purple. If it looks muddy, you’re using too much cream or not enough fruit. Trust your eyes.
Troubleshooting: If the cream starts to melt while you’re layering, put the bowl back in the fridge for 10 minutes. It happens in hot weather. Also, if the cake is too dry, it might not absorb the berry juices. That’s okay; it will still taste good.
Expert Tips & Tricks
Here’s everything I’ve learned from making this dozens of times. These tips will save you from my mistakes.
Keep Everything Cold
This is the #1 rule. Cold cream holds its shape. Cold berries stay firm. Cold cake stays dry until you want it moist. I keep my mixing bowl in the freezer for 15 minutes before whipping. If the kitchen is hot, work in short bursts and return the cream to the fridge between layers.
Don’t Skimp on the Drying
I cannot stress this enough. Wet berries make a watery trifle. I’ve made this mistake twice, and the result was a soup-filled bowl. Pat those berries dry. Then pat them again. Use paper towels until your hands are dry.
Use Stale Cake
Fresh angel food cake is soft and moist, which can make the trifle soggy too quickly. Day-old cake is better. It’s slightly drier and absorbs the juices without turning to mush. If you make it fresh, let the cake sit out for an hour before cubing it.
Fold, Don’t Stir
When spreading the cream, use a gentle folding motion. Stirring creates air pockets and can break down the whipped cream, making it deflated. You want light, airy layers.
Glaze Only the Top
Only glaze the top layer of berries. If you glaze the middle layers, they’ll get sticky and messy when you scoop. The top glaze is for show and preservation.
Common Mistakes:
Mistake: Trifle is too sweet.
Fix: Reduce the sugar in the cream to 2 tablespoons. The berries should provide enough sweetness. Taste your berries first; if they’re very sweet, skip the sugar in the cream entirely.
Mistake: Layers are uneven.
Fix: Use a measuring cup for each layer. One cup of cake, one cup of strawberries, etc. It sounds fussy, but it ensures balance in every bite.
Mistake: Cream is runny.
Fix: Your cream wasn’t cold enough, or you over-whipped it. Next time, chill the bowl and beaters, and stop whipping as soon as peaks form.
Variations & Substitutions
Once you’ve nailed the basic version, here’s how you can mix it up. I’ve tried all of these.
Boozy Berry Trifle
Add 2 tablespoons of Chambord or raspberry liqueur to the whipped cream. Or, brush the cake layer with a simple syrup mixed with 1 tablespoon of liqueur. My friends love this version for adult parties.
Lemon Berry Trifle
Add the zest of one lemon to the whipped cream. It adds a bright, citrusy note that pairs beautifully with the berries. Very refreshing for summer.
Chocolate Berry Trifle
Swap the angel food cake for chocolate pound cake. The chocolate and berries are a classic combination. Add a layer of chocolate pudding in the middle for extra richness.
Gluten-Free Version
Use a gluten-free angel food cake or sponge cake. Most brands work well. Just check the label to ensure it’s safe. The rest of the recipe is naturally gluten-free.
Dairy-Free Option
Use coconut cream instead of heavy cream. Chill a can of full-fat coconut milk overnight, scoop out the solid cream, and whip it with sugar and vanilla. It’s thicker and has a coconut flavor, but it works. Use dairy-free whipped topping if you prefer.
Different Berries
You can use blackberries, mixed berries, or even stone fruits like peaches or nectarines. Peaches are great in late summer. Just adjust the sweetness accordingly.
Serving & Storage
How to Serve:
I usually serve this straight from the bowl at the dinner table. It looks rustic and stays cool. Use a large serving spoon or a trifle server. Scoop from the side to get all the layers. Garnish with a few fresh mint leaves if you want to look fancy.
Side Dishes:
This trifle pairs well with light summer fare. Grilled chicken, corn on the cob, and a simple green salad are perfect. Avoid heavy, rich sides since the dessert is already rich.
Storage Instructions:
Store in the refrigerator for up to 3 days. Cover tightly with plastic wrap. The berries may release more juice over time, which is normal. The cake will continue to absorb the juices, making it softer. It’s still delicious on day two, maybe even better.
Reheating:
Do not reheat this trifle. It’s meant to be served cold. If it’s too cold, let it sit at room temperature for 10 minutes before serving.
Freezing:
This does not freeze well. The cream will separate, and the berries will become mushy. Make it fresh or store in the fridge for up to 3 days.
Nutrition Information
I’m not a nutritionist, but here’s the breakdown if you’re tracking. This is a rich dessert, so portions matter.
Per Serving (based on 8 servings):
– Calories: 320
– Protein: 4g
– Carbs: 42g
– Fiber: 3g
– Sugar: 28g
– Fat: 16g
– Saturated Fat: 10g
– Cholesterol: 45mg
– Sodium: 180mg
What’s Good:
It contains fruit, which provides vitamins and fiber. The protein from the cream and cake is modest.
What to Know:
It’s high in sugar and saturated fat due to the cream and berries. Use low-fat cream or coconut cream to reduce calories. Increase the fruit ratio to boost nutrition.
My Take:
Look, this is a treat. It’s not a health food. But it’s better than store-bought cake, and I know exactly what’s in it. When I make it for kids, I use less sugar and more fruit. When I make it for adults, I add booze. It’s flexible.
Final Thoughts
So that’s my Labor Day Layered Berry Trifle! I’ve probably talked your ear off at this point, but when you make a recipe this often, you have a lot to say about it. This trifle has saved my backyard parties more times than I can count. It’s my answer to “what’s for dessert” when I’m tired, don’t want takeout, and still want something that looks incredible. My guests are happy, my family is happy, and I’m happy because I’m not stressed about cooking.
Make it yours! Try different berries, swap in your favorite cake, adjust the sweetness. The best recipes are the ones you adapt to your family’s tastes. If you make this, drop a comment and let me know what you think! I love hearing how recipes turn out in your kitchen. And if something doesn’t work, tell me that too—I’m here to help troubleshoot.
Happy cooking! And I hope your kitchen smells half as good as my patio does right now.
Frequently Asked Questions
Q: Can I use frozen berries?
A: You can, but fresh are better. If you must use frozen, thaw them completely and drain the excess liquid. Pat them dry thoroughly. Frozen berries can be mushy, so the texture won’t be as crisp. I recommend fresh whenever possible.
Q: Why did my trifle turn out watery?
A: Usually means the berries were too wet or the cream wasn’t whipped stiff enough. Make sure to dry your berries completely. Also, ensure your cream is cold and whipped to stiff peaks. If the cake was too dry, it might have absorbed too much juice, leaving the bowl dry. Balance is key.
Q: Can I make this ahead for a dinner party?
A: Absolutely! This trifle is best made the night before. It needs at least 4 hours to set, but overnight is ideal. The flavors meld and the cake softens perfectly. Build it the night before, chill it, and bring it out party-ready.
Q: Can I use a different type of cake?
A: Yes. Sponge cake, pound cake, or even ladyfingers work well. Angel food cake is my favorite because it’s light, but any dry, airy cake will work. Avoid dense or moist cakes like banana bread, as they’ll get soggy too quickly.
Q: How do I keep the layers distinct?
A: Use a spatula to spread the cream evenly. Don’t mix the layers together. When scooping, go straight down to the bottom to get a full cross-section of layers. It’s supposed to look striped.
Q: Can I add other fruits?
A: Yes! Peaches, nectarines, kiwi, or mango all work well. Just make sure they’re ripe and not too watery. Adjust the sweetness if needed. Mixed berry trifle is also delicious.
Q: How long does this last in the fridge?
A: Up to 3 days. After that, the berries may break down and the cake may become too soft. It’s best eaten within 24-48 hours for optimal texture.
Pin This Recipe!
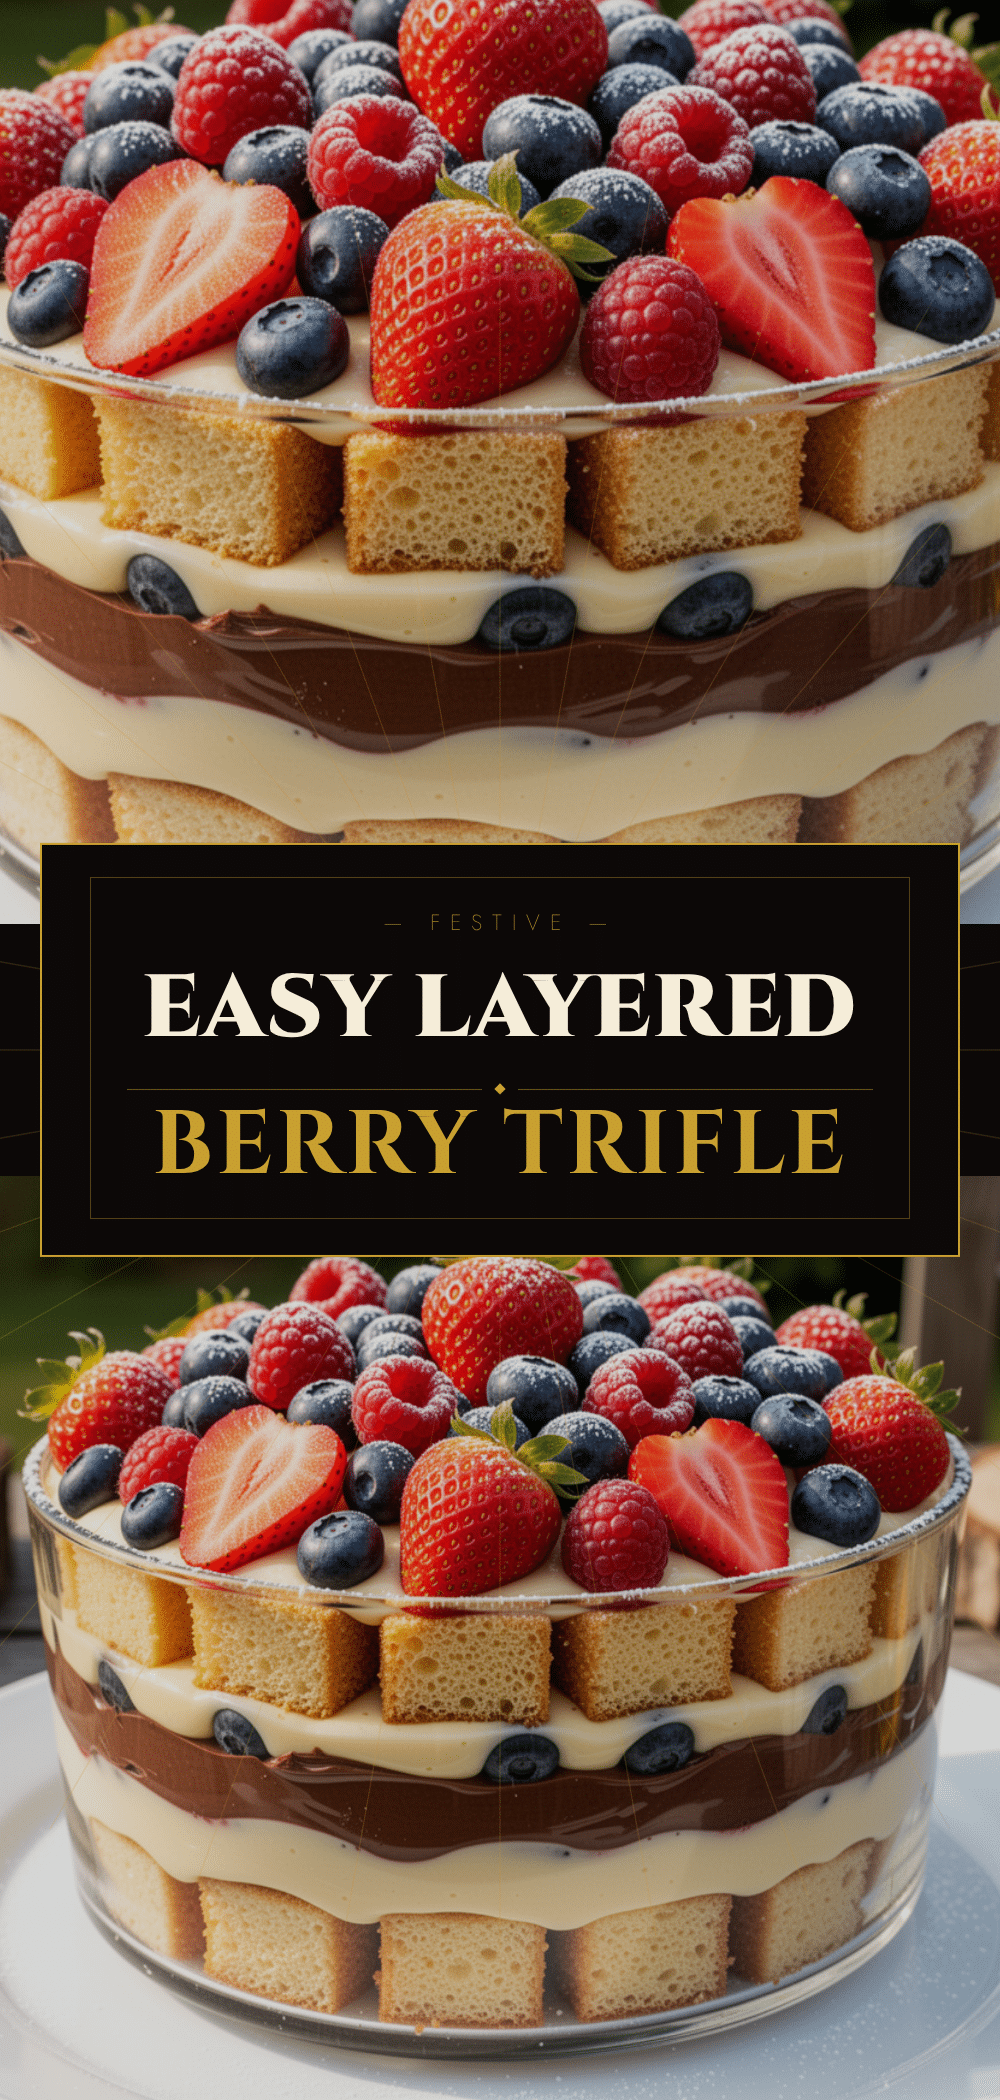
Labor Day Layered Berry Trifle: Easy 5-Step Party Dessert
- Total Time: 4 hours 40 minutes
- Yield: 8 servings 1x
Description
A make-ahead, no-plating-required layered berry trifle that is visually stunning and perfect for summer parties. Built in a large glass bowl with angel food cake, fresh berries, and whipped cream.
Ingredients
- 2 cups heavy whipping cream
- 1/4 cup confectioners’ sugar
- 1 teaspoon vanilla extract
- 1 box angel food cake (about 14oz / 400g)
- 1 pound strawberries, hulled and sliced
- 1 pint raspberries
- 1 pint blueberries
- 1/4 cup apricot jam (for glaze)
- 1 tablespoon water (for glaze)
Instructions
- Wash and thoroughly dry strawberries, raspberries, and blueberries. Hull and slice strawberries into quarter-inch rounds. Keep berries cold until ready to use.
- In a chilled large bowl, whip heavy cream, confectioners’ sugar, and vanilla extract on medium-high speed until stiff peaks form. Do not over-whip. Set aside in the fridge.
- Cut the angel food cake into 1-inch cubes using a serrated knife. Place cubes in a large bowl.
- In the trifle bowl, create layers: start with one-third of the cake cubes, followed by a layer of strawberries, then half the whipped cream. Add raspberries, remaining cake cubes, blueberries, and top with remaining whipped cream. Finish with remaining strawberries and raspberries.
- Heat apricot jam and water in a small saucepan until melted. Strain if desired and let cool slightly. Brush the top layer of berries with the glaze.
- Cover tightly with plastic wrap and refrigerate for at least 4 hours, ideally overnight, to allow flavors to meld and cake to soften.
Notes
Keep all ingredients cold to ensure the cream holds its shape. Ensure berries are completely dry to prevent a watery trifle. Use day-old angel food cake for better texture. This dessert is best made the night before to allow flavors to meld.
- Prep Time: 35 minutes
- Cook Time: 5 minutes
- Category: Dessert
- Cuisine: American
Nutrition
- Serving Size: 1 serving
- Calories: 320
- Sugar: 28
- Sodium: 180
- Fat: 16
- Saturated Fat: 10
- Carbohydrates: 42
- Fiber: 3
- Protein: 4
Keywords: berry trifle, labor day dessert, make ahead dessert, summer party dessert, layered trifle, angel food cake dessert


