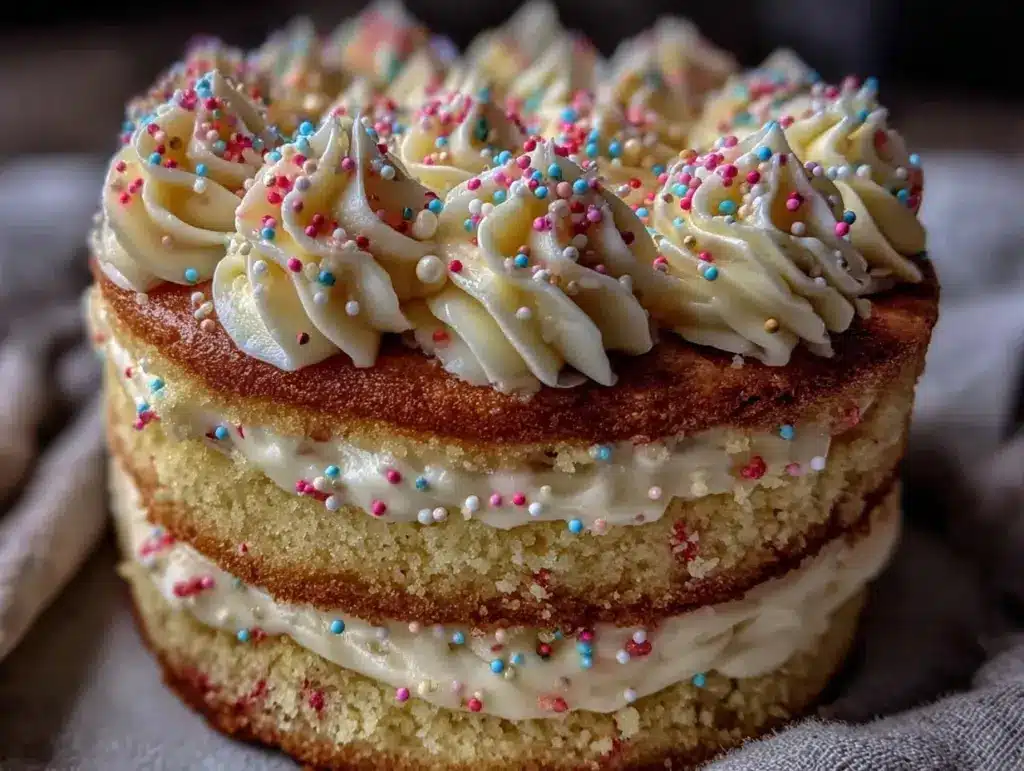
I’ve had some serious birthday cake disasters in my day. I’m talking about the kind where you pull it out of the oven, and it looks less like a celebration dessert and more like a geological formation. Dense, lopsided, and tasting vaguely of burnt sugar and regret. But this? This easy birthday cake recipe you can’t mess up? This one is different. It’s the culinary equivalent of a warm hug. It’s the dessert I reach for when I have zero experience, zero time, and zero desire to stress over intricate piping or tempering chocolate.
Here’s the confession: I actually froze the batter for this cake once. Not intentionally. I had prepped everything on Sunday, got distracted by life, and shoved the bowls in the fridge. I baked it on Monday morning, panic rising in my chest as I waited for the smell. When I pulled it out, it was golden, moist, and rose perfectly. That’s when I knew I had something special. This easy birthday cake recipe you can’t mess up is so forgiving that even my clumsiness couldn’t ruin it.
It’s simple, it’s reliable, and it tastes like childhood summers spent at the county fair. You don’t need fancy gadgets. You don’t need a degree in pastry arts. You just need a few basic pantry staples and the willingness to trust the process. If you’re nervous about baking, this is your safe harbor. It’s the recipe that will make you look like a pro, even if you’re baking in the dark after a long day. Let’s get into why this specific cake has earned a permanent spot in my rotation and why you’ll want to make it for every occasion, big or small.
Why You’ll Love This Easy Birthday Cake Recipe You Can’t Mess Up
Let’s be real. Most baking recipes require a precision that feels impossible for a normal human being. You need to weigh ingredients to the gram, watch temperatures like a hawk, and pray the oven isn’t lying to you. This easy birthday cake recipe you can’t mess up throws all of that out the window. It’s built for confidence. Here’s why it’s going to become your new best friend.
One-Bowl Simplicity — I’m serious. You dump everything into one bowl and mix. No creaming butter and sugar separately. No folding egg whites with surgical precision. Just dump, stir, bake. I made this while helping my kid with a math worksheet, and it turned out perfect. That’s the level of ease we’re talking about.
Forgiving Texture — Because we’re using oil instead of butter, this cake stays moist for days. Butter cakes can dry out if you overbake them by two minutes. Oil cakes? They’re resilient. I’ve left this in the pan overnight, and it’s still tender. It’s hard to overbake because the oil keeps the crumb soft, even if you’re a little distracted.
Pantry Staples Only — You don’t need to run to the store for obscure ingredients. Flour, sugar, eggs, milk, oil, baking powder, vanilla. That’s it. If you have these in your house, you can make this cake. It removes the friction of “I can’t make it because I don’t have X.”
Classic Flavor Profile — It tastes like the birthday cake you remember from ten years ago. Sweet, vanilla-forward, with a tender crumb that melts in your mouth. It’s nostalgic without being cloying. It pairs perfectly with the classic buttercream I’ll share later, but it’s good enough to eat plain with a glass of cold milk.
Visual Perfection — It rises evenly. It doesn’t crack down the middle (usually). It has that beautiful golden-brown edge that signals “I did this.” When you take it out of the pan, it looks professional. This gives you the confidence to serve it at a party without hiding it in the kitchen.
Make-Ahead Friendly — I’ve baked this two days in advance. It actually tastes better the next day because the flavors have had time to settle. You can bake, cool, wrap tightly in plastic, and forget about it until the party. No stress. No last-minute panic.
This is my go-to when I need a win. Whether it’s a birthday, a holiday, or just a Tuesday that needs cheering up, this easy birthday cake recipe you can’t mess up delivers every single time. It’s reliable, delicious, and incredibly simple.
Key Ingredients for Your Foolproof Cake
Let’s talk about what’s going into this bowl. I want you to understand why each ingredient matters so you feel confident in your choices. You don’t need fancy brands, but you do need quality basics.
All-Purpose Flour (3 cups / 375g) — This is your structure. Don’t substitute cake flour unless you know what you’re doing. All-purpose gives that perfect tender bite. Tip: Spoon it into your measuring cup and level it off. Don’t scoop straight from the bag, or you’ll pack it down and get a dense cake. I learned this the hard way on my third attempt.
Granulated Sugar (1 ½ cups / 300g) — This provides sweetness and tenderness. It also helps with browning. Don’t reduce the sugar significantly, or the cake will be dry. If you’re worried about sweetness, you can reduce it by ¼ cup, but I recommend sticking to the full amount for that classic birthday cake taste.
Vegetable Oil (½ cup / 120ml) — This is the secret weapon. Oil keeps the cake moist longer than butter. It also allows you to mix everything in one bowl without worrying about softening butter. Use a neutral oil like vegetable, canola, or light olive oil. Don’t use extra virgin olive oil; you’ll taste it.
Large Eggs (3 large / ~150g total weight) — Eggs provide structure and richness. Bring them to room temperature if you can. Cold eggs can shock the batter, though with this forgiving recipe, it won’t ruin it. Just make sure they’re well-beaten before adding.
Whole Milk (1 cup / 240ml) — Milk adds flavor and moisture. Buttermilk is great too, but whole milk is what I always have. If you’re out, milk and a splash of vinegar works as a quick substitute, but fresh milk is best for this easy birthday cake recipe you can’t mess up.
Vanilla Extract (2 teaspoons / 10ml) — Use real vanilla. Not the imitation stuff. The flavor difference is night and day. If you have pure vanilla bean paste, use that for speckled visual appeal. It looks fancy but is just as easy.
Baking Powder (2 teaspoons / 10g) — This is your lift. Make sure it’s fresh. If your baking powder is older than six months, it might not work, and your cake will be flat. Test it by dropping a teaspoon in hot water—it should fizz vigorously.
Salt (½ teaspoon / 3g) — Salt isn’t optional. It enhances the vanilla and balances the sugar. Without it, the cake tastes flat and overly sweet. Don’t skip it.
Buttercream Frosting Ingredients (Unsalted butter 1 cup / 225g, Powdered sugar 3-4 cups / 360-480g, Heavy cream 2-3 tbsp / 30-45ml, Vanilla 1 tsp / 5ml) — For the frosting, use softened unsalted butter. If it’s too hard, it won’t cream properly. If it’s melted, you’ll get greasy frosting. Room temperature is the sweet spot.
Tools Needed for Success
You don’t need a fancy kitchen. Here’s what I use, and what you can swap if you don’t have it.
Two 9-inch Round Cake Pans — I use metal pans. Glass pans conduct heat differently and can cause over-browning. If you only have glass, reduce the oven temperature by 25°F. Grease and flour your pans, or use parchment rounds at the bottom. This is the #1 way to ensure your cake doesn’t stick.
Large Mixing Bowl — Something big enough to hold all the ingredients without splattering. I use a 5-quart bowl.
Electric Hand Mixer or Stand Mixer — While you can mix by hand, it takes effort and time. A mixer ensures everything is incorporated evenly. If you mix by hand, just be prepared to arm-work for a few minutes.
Whisk — For mixing the dry ingredients together. This distributes the baking powder and salt evenly, preventing bitter spots.
Cooling Rack — Essential. You must cool the cake on a rack, not in the pan. Trapped heat will steam the bottom, making it soggy. I have a cheap wire rack that’s seen better days, but it does the job perfectly.
Spatula — A rubber spatula helps you scrape the bowl clean so you don’t waste batter and ensure everything is mixed.
Offset Spatula — For frosting. It makes spreading the buttercream smooth and easy. If you don’t have one, a regular butter knife works in a pinch.
How to Make This Easy Birthday Cake Recipe You Can’t Mess Up
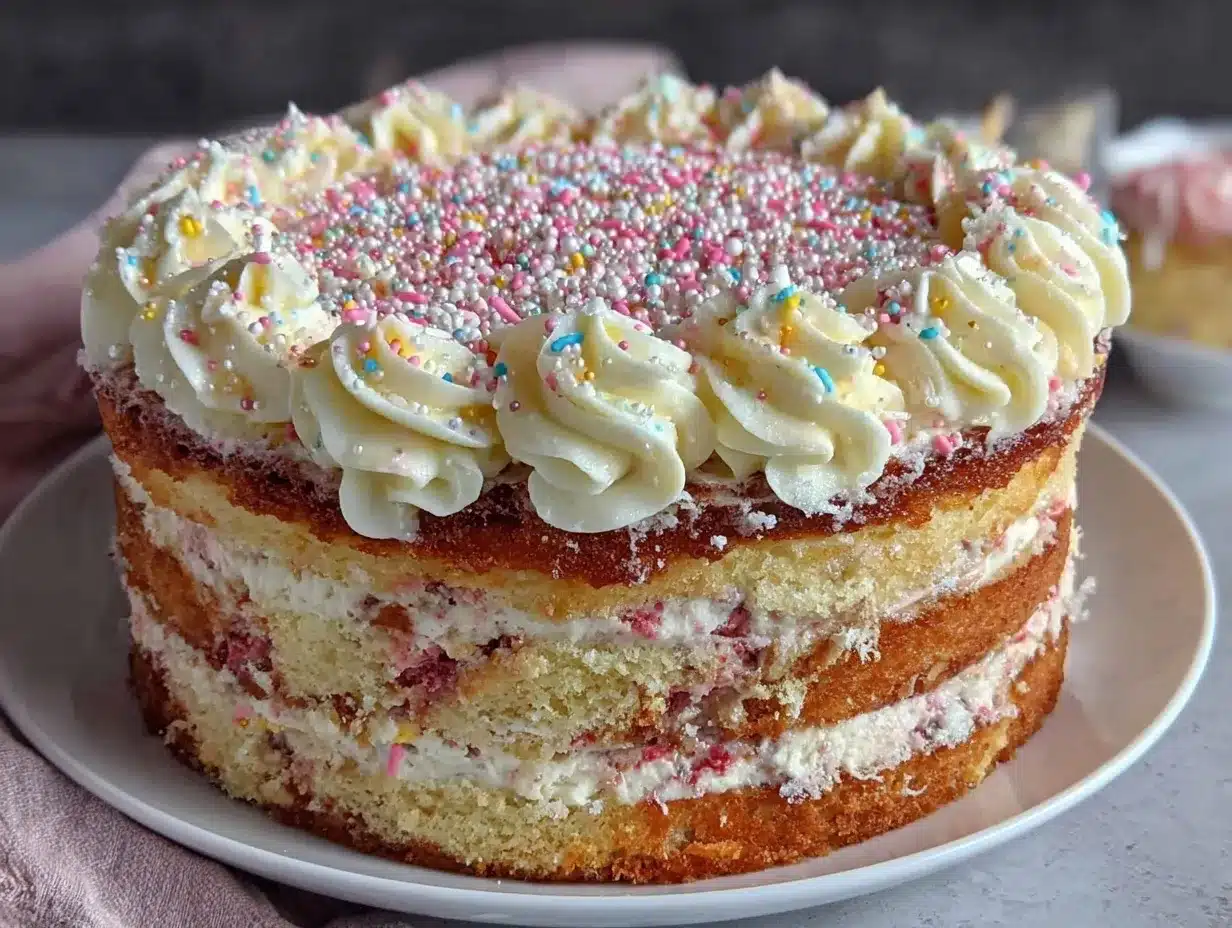
Here’s the step-by-step. I’m walking you through it like I’m standing next to you in the kitchen. Don’t overthink it. Just follow along.
Step 1: Prep Your Pans and Oven (5 minutes)
Preheat your oven to 350°F (175°C). This is crucial. If the oven isn’t hot enough when the cake goes in, it won’t rise properly. While it heats, grease your two 9-inch round cake pans with butter or non-stick spray. Dust them with flour, tapping out the excess. Or, line the bottoms with parchment paper. This step prevents sticking, which is the only real way to “mess up” this recipe. I’ve learned to never skip this. Trust me.
Step 2: Mix Dry Ingredients (2 minutes)
In your large bowl, whisk together the flour, baking powder, and salt. Do this first to ensure there are no lumps of baking powder. If you skip this, you might get a bitter bite in your cake. Whisk until well combined. Set aside.
Step 3: Combine Wet Ingredients (3 minutes)
In a separate medium bowl (or just use the same bowl if you’re lazy, but separate is cleaner), beat the eggs, sugar, oil, milk, and vanilla. Use your mixer on medium speed. Beat for about 2 minutes. The mixture should look pale and slightly frothy. This step incorporates air, which helps with the rise. You’ll notice the sugar dissolving into the oil and eggs. It’s satisfying to watch.
Step 4: Combine Wet and Dry (2 minutes)
Gradually add the dry ingredients to the wet ingredients. Mix on low speed just until combined. Stop as soon as you see no more streaks of flour. Overmixing develops gluten, which makes the cake tough. I’ve made this cake dense before by mixing too long. It’s a common mistake. The batter will be thick but pourable. Don’t add extra milk unless it’s extremely dry.
Step 5: Bake (25-30 minutes)
Divide the batter evenly between the two pans. Smooth the tops with your spatula. Bake for 25-30 minutes. The cakes are done when a toothpick inserted into the center comes out clean or with just a few moist crumbs. They should also spring back when lightly touched. Do not open the oven door before 20 minutes, or you risk deflating the cake. Patience pays off.
Step 6: Cool Completely (1 hour)
Let the cakes cool in the pans for 10 minutes. Then, turn them out onto a wire rack. Peel off the parchment if you used it. Let them cool completely before frosting. Warm cake melts frosting. I know it’s tempting, but wait. This is the hardest part. If you frost too soon, you’ll get a messy, sliding mess.
Step 7: Make the Buttercream (10 minutes)
While the cakes cool, make the frosting. Beat the softened butter on medium-high speed for 3 minutes until pale and creamy. Add the vanilla and heavy cream. Gradually add the powdered sugar, one cup at a time, on low speed. Once all sugar is in, beat on high for 2 minutes until fluffy. Add more cream if it’s too thick, or more sugar if it’s too thin.
Step 8: Assemble and Frost (10 minutes)
Place one cake layer on your serving plate. Spread a generous layer of frosting on top. Place the second layer on top. Frost the top and sides. Use your offset spatula to create swirls or smooth it out. Decorate with sprinkles if you want that classic birthday look. This easy birthday cake recipe you can’t mess up is ready to serve.
Total Time: Prep 5 mins, Mix 7 mins, Bake 30 mins, Cool 60 mins, Frost 20 mins. Total active time is under 30 minutes, but you need to plan for cooling.
Expert Tips for a Perfect Cake
Here’s everything I learned from making this too many times. These are the game-changers.
Room Temperature Ingredients Matter
I used to use cold eggs and milk. The batter would curdle slightly. Now, I take my eggs and milk out of the fridge 30 minutes before baking. They emulsify better, creating a smoother, more uniform batter. It’s a small step that makes a big difference in texture.
Don’t Overfill the Pans
Fill your pans only 2/3 full. If you fill them to the top, the cake will dome and spill over, creating a mess in your oven. It also prevents even baking. I’ve had cakes that burned on the bottom because they were too deep. Stick to 2/3 full.
Rotate the Pans
Ovens have hot spots. Halfway through baking, rotate your pans 180 degrees. This ensures both cakes bake evenly. I learned this after one cake was always darker than the other. It’s a simple trick that guarantees uniformity.
Common Problems & Solutions
Cake Stuck to Pan: Did you grease and flour? Or use parchment? If it stuck, you likely missed a spot. Next time, use parchment rounds. It’s foolproof.
Cake Dense: Did you pack the flour? Or overmix? Spoon and level your flour. Mix just until combined. These are the two main causes of density.
Frosting Too Sweet: Taste your buttercream before frosting. If it’s too sweet, add a pinch of salt or a splash of lemon juice. It balances the flavor without changing the texture.
Pro Tricks
Chill the Cake: Before frosting, put the cake layers in the fridge for 20 minutes. Firm cake is easier to frost. It won’t crumble as easily. This is a professional trick that makes home baking easier.
Use a Cake Leveler: If your cakes dome, use a serrated knife to slice off the top. This creates a flat surface for frosting. It looks pro and ensures even layers. I use a knife because I don’t have a leveler, but it works fine if you’re gentle.
Recipe Variations to Mix It Up
Once you’ve nailed the basic version, here’s how to mix it up. This easy birthday cake recipe you can’t mess up is a blank canvas.
Chocolate Version
Replace ¾ cup of flour with ¾ cup cocoa powder. Add ½ cup of hot coffee to the wet ingredients. The coffee enhances the chocolate flavor without making it taste like coffee. It’s rich and dark. Perfect for chocolate lovers.
Strawberry Shortcake Style
Fold 1 cup of fresh chopped strawberries into the batter. Bake as usual. Top with whipped cream instead of buttercream. It’s light and fresh. Great for summer birthdays. I pair this with my easy watermelon feta salad for a light meal.
Lemon Zest Cake
Add the zest of two lemons to the wet ingredients. Add 1 tablespoon of lemon juice. Frost with a lemon buttercream. It’s bright and tangy. Cuts through the sweetness. Very refreshing.
Funfetti
Add ½ cup of rainbow sprinkles to the batter. Mix gently at the end. This is the classic birthday look. Kids love it. I use large jimmies because they hold their shape better.
Dairy-Free Option
Use plant-based milk and oil. For the frosting, use vegan butter and powdered sugar. It works surprisingly well. The texture is nearly identical. I tested this for my friend who is lactose intolerant, and she loved it.
Gluten-Free Option
Use a 1:1 gluten-free flour blend. Add ½ teaspoon of xanthan gum if your blend doesn’t have it. The cake will be slightly more crumbly but still delicious. It’s a great option for those with sensitivities.
Serving & Storage
Serving
Slice with a sharp knife. Dip the knife in hot water and wipe it dry between cuts for clean slices. Serve with cold milk or coffee. It pairs well with fruit salads or tangy cucumber tomato feta salad if you’re serving a full meal. Top with fresh berries for a pop of color.
Storage
Room Temperature: Store in an airtight container for up to 3 days. Keep it away from direct sunlight. It stays moist and delicious.
Refrigerator: If your frosting is perishable (like cream cheese), refrigerate it. Bring to room temperature before serving. The cake will firm up in the fridge, so let it sit out for 30 minutes.
Freezer: This cake freezes beautifully. Wrap the unfrosted layers tightly in plastic wrap and foil. Freeze for up to 3 months. Thaw overnight in the fridge. I do this for big parties. It’s a lifesaver. Frosted cakes freeze okay, but the texture of the frosting can change slightly. Unfrosted is best.
Meal Prep Tips
Bake the layers a week ahead. Freeze them. Thaw and frost the day of. This is the ultimate stress-free strategy. You’re basically a genius.
Nutrition Information
I’m not a nutritionist, but here’s the breakdown. This is indulgent food. It’s cake. Enjoy it guilt-free.
| Nutrient | Per Slice (1/12 of cake) |
|---|---|
| Calories | 380 |
| Protein | 5g |
| Carbs | 55g |
| Fiber | 1g |
| Fat | 16g |
| Sodium | 250mg |
My Take: This is comfort food. It’s high in sugar and carbs. But it’s made with simple ingredients. It’s better than store-bought cake, which has preservatives. This is real food. Enjoy it as a treat.
Final Thoughts
This easy birthday cake recipe you can’t mess up is more than just a dessert. It’s a confidence builder. It’s proof that you can create something beautiful with simple tools and ingredients. Whether you’re a seasoned baker or a complete novice, this cake will deliver. It’s reliable, delicious, and incredibly satisfying to make.
If you make this, drop a comment! I love hearing how it turns out in your kitchen. Did you add sprinkles? Did you use chocolate frosting? Share your variations. Let’s inspire each other. And if you need a side dish, check out my classic peanut butter cookies for a sweet finish.
Happy cooking!
FAQs
Can I make this cake in a 9×13 pan?
Yes, but you’ll need to adjust the baking time. It will take about 35-40 minutes. Check it at 30 minutes. The cake will be thicker, so it needs more time to bake through. This is a great option for feeding a crowd.
Why did my cake sink in the middle?
This usually happens if the oven door was opened too early, or if the cake wasn’t baked through. Make sure you wait until the toothpick comes out clean. Also, ensure your baking powder is fresh. Old baking powder loses its lift.
Can I use cake flour instead of all-purpose?
You can, but you’ll need to adjust the amount. Cake flour is lighter. Use 2 ¾ cups of cake flour instead of 3 cups of all-purpose. It will make the cake even more tender. But all-purpose works perfectly fine for this easy birthday cake recipe you can’t mess up.
How do I store leftover cake?
Keep it in an airtight container at room temperature for up to 3 days. If it’s very humid, refrigerate it. Bring to room temperature before serving for the best texture.
Can I make the frosting ahead of time?
Yes. Store it in an airtight container in the fridge for up to 5 days. Let it come to room temperature and beat it again before using. It might need a splash of milk to re-emulsify. It works perfectly.
What if I don’t have a mixer?
You can mix by hand, but it takes more effort. Use a sturdy whisk or a wooden spoon. Make sure you mix the wet ingredients well to incorporate air. The cake will be slightly denser, but still delicious. Don’t let the lack of a mixer stop you.
Can I freeze the cake layers?
Absolutely. This is one of the best parts. Bake, cool, wrap tightly in plastic and foil. Freeze for up to 3 months. Thaw overnight in the fridge. It’s a game-changer for party planning. I do it all the time.
Pin This Recipe!
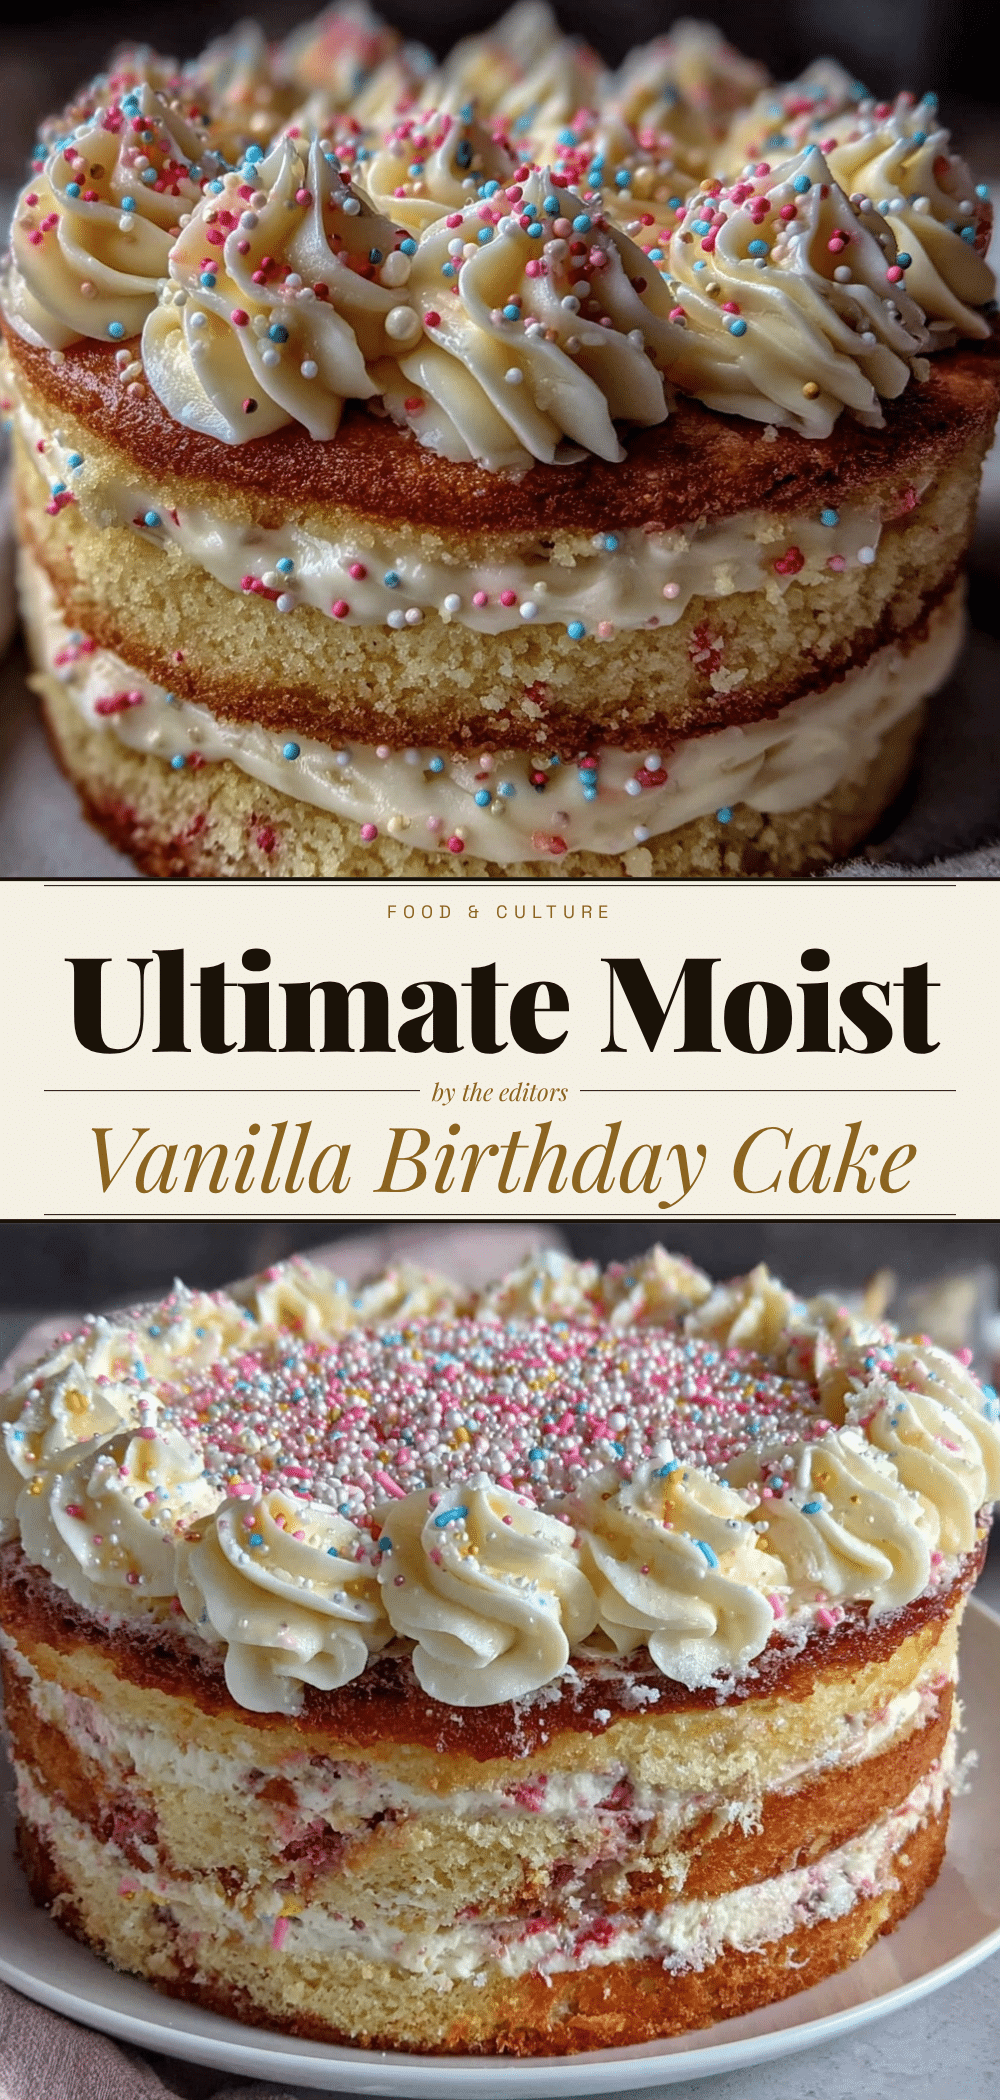
Easy Birthday Cake Recipe: Foolproof & Perfect
- Total Time: 1 hour 45 minutes
- Yield: 12 servings 1x
Description
A forgiving, one-bowl vanilla birthday cake that stays moist for days. This recipe uses oil instead of butter for a tender crumb and requires only basic pantry staples, making it perfect for beginners.
Ingredients
- 3 cups (375g) All-Purpose Flour
- 1 ½ cups (300g) Granulated Sugar
- ½ cup (120ml) Vegetable Oil
- 3 large Eggs
- 1 cup (240ml) Whole Milk
- 2 teaspoons (10ml) Vanilla Extract
- 2 teaspoons (10g) Baking Powder
- ½ teaspoon (3g) Salt
- 1 cup (225g) Unsalted Butter (for frosting)
- 3–4 cups (360-480g) Powdered Sugar (for frosting)
- 2–3 tbsp (30-45ml) Heavy Cream (for frosting)
- 1 tsp (5ml) Vanilla Extract (for frosting)
Instructions
- Preheat oven to 350°F (175°C). Grease and flour two 9-inch round cake pans or line bottoms with parchment paper.
- In a large bowl, whisk together the flour, baking powder, and salt until well combined.
- In a separate medium bowl, beat the eggs, sugar, oil, milk, and vanilla on medium speed for about 2 minutes until pale and frothy.
- Gradually add the dry ingredients to the wet ingredients. Mix on low speed just until combined, being careful not to overmix.
- Divide batter evenly between the two pans. Bake for 25-30 minutes, or until a toothpick inserted into the center comes out clean.
- Let cakes cool in pans for 10 minutes, then turn out onto a wire rack to cool completely.
- While cakes cool, beat softened butter on medium-high speed for 3 minutes until pale. Add vanilla and heavy cream.
- Gradually add powdered sugar on low speed, then beat on high for 2 minutes until fluffy.
- Place one cake layer on a serving plate, spread frosting on top, add second layer, and frost the top and sides.
- Decorate with sprinkles if desired and serve.
Notes
Ensure ingredients are at room temperature for best emulsification. Do not overfill pans (fill only 2/3 full). Rotate pans halfway through baking for even browning. Cool cake completely before frosting to prevent melting. For gluten-free option, use a 1:1 gluten-free flour blend.
- Prep Time: 15 minutes
- Cook Time: 30 minutes
- Category: Dessert
- Cuisine: American
Nutrition
- Serving Size: 1 slice (1/12 of cak
- Calories: 380
- Sugar: 40
- Sodium: 250
- Fat: 16
- Saturated Fat: 8
- Carbohydrates: 55
- Fiber: 1
- Protein: 5
Keywords: birthday cake, easy cake recipe, vanilla cake, one bowl cake, foolproof baking, moist cake, homemade birthday cake


