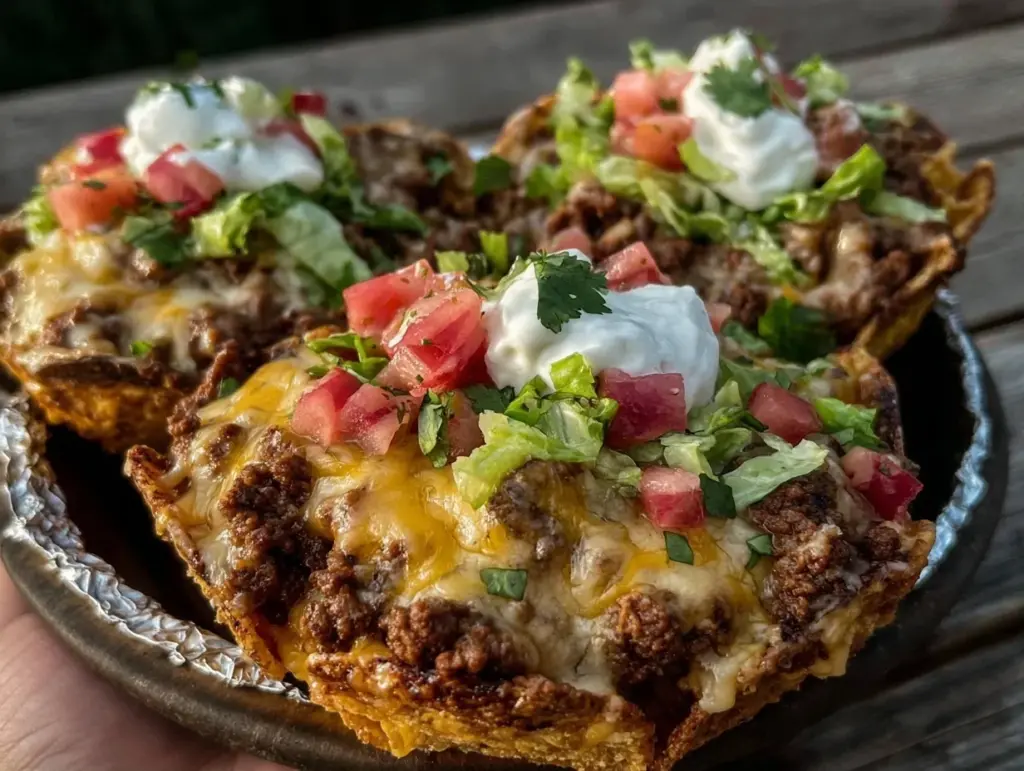
I still remember the first time I served walking tacos at a Super Bowl party. It was 2012, my living room was packed, and the kitchen counter was a disaster zone of empty soda bottles and crumpled napkins. I had planned to make a fancy taco bar, but halfway through, I realized I didn’t have enough plates. Panic set in. Then, my friend Sarah grabbed a bag of Fritos, tore the side open, and dumped a cup of seasoned beef directly into the chip bag. She handed it to me. “Eat it standing up,” she said. “No dishes. No problem.”
I was skeptical. It felt like cheating. But five minutes later, watching people graze while watching the halftime show, I realized something profound: this was genius. The chips acted as the bowl, the scoop, and the utensil. There was zero cleanup. That single bag changed how I host forever. Now, every time football season starts, my Football Tailgate Walking Tacos for Game Day are the star of the show. They’re messy, they’re delicious, and they disappear faster than I can refill the bowl.
What started as a desperate workaround has become my signature game day dish. I’ve refined the recipe over twelve seasons, tweaking the seasoning, testing different chip brands, and figuring out the perfect ratio of toppings so you don’t get a soggy bottom. This isn’t just junk food. It’s a carefully constructed flavor experience that brings the comfort of a taco night into the chaos of a tailgate. Whether you’re sitting in a stadium seat or standing around a grill in the parking lot, this Football Tailgate Walking Tacos for Game Day recipe delivers big flavor with minimal effort. Let’s talk about why this simple concept is actually the secret weapon of any successful party.
Why You’ll Love This Game Day Snack
There is a specific kind of magic that happens when you combine comfort food with convenience. Most party food requires plating, garnishing, and eventually, washing a dozen dishes. This Football Tailgate Walking Tacos for Game Day approach flips the script entirely. Here is why this recipe has earned a permanent spot in my rotation:
- Zero Dishwashing Required — This is the biggest selling point. The chip bag *is* the bowl. When your guests are done eating, they toss the bag in the trash. I’ve hosted parties for 30 people and only washed the mixing bowls. It’s a game-changer for anyone who hates cleanup.
- Build-Your-Own Flexibility — Everyone has different taste buds. Some people want it spicy; others want it mild. By letting guests assemble their own walking tacos, you accommodate picky eaters and adventurous eaters alike without needing three separate batches of food.
- Crunch-to-Topping Ratio Control — When you serve tacos on plates, the toppings slide off. In a walking taco, the chips act as a structural anchor. You get that essential crunch in every bite because the ingredients are layered directly into the vessel. It’s textural perfection.
- Speed of Assembly — I can prepare the filling for 50 walking tacos in under 20 minutes. If you’re prepping for a crowd, speed is everything. While the meat is browning, you can be setting up the topping bar. It keeps the host in the party, not stuck in the kitchen.
- Portable and Mess-Free (Mostly) — Sure, it’s a little messy. But it’s contained mess. Your guests aren’t holding a plate that might slide off a tray table at the tailgate. They hold the bag. It’s stable, handheld, and perfect for eating while watching the game or walking around the venue.
This is my go-to when dinner needs to just work, but still feel special. It’s indulgent, it’s fun, and it brings people together. Plus, it pairs perfectly with cold drinks and warm weather. If you’re looking for other easy crowd-pleasers, you might also enjoy my easy grilled corn salad to go alongside it, or even some watermelon feta salad for a refreshing contrast.
Key Ingredients for the Perfect Walking Taco
The beauty of this recipe is its simplicity. You don’t need exotic spices or hard-to-find ingredients. However, the quality of your components matters. Here is exactly what I use and why, with precise measurements so your first attempt is your best one.
Ground Beef (1 lb / 450g) — I use 80/20 ground beef. Yes, the higher fat content. Lean beef dries out quickly when you’re cooking a large batch for a party. The fat carries the flavor and keeps the meat juicy. If you prefer turkey, you can substitute it, but you’ll need to add a tablespoon of olive oil to the pan to prevent sticking.
Taco Seasoning (1 packet / 25g) — I usually stick to a classic store-bought packet like Old El Paso or McCormick for consistency. However, if you want to go homemade, mix 1 tbsp chili powder, 1 tsp cumin, 1 tsp paprika, 1/2 tsp garlic powder, 1/2 tsp onion powder, 1/2 tsp oregano, and 1/2 tsp salt. The pre-made packet saves time and guarantees that familiar, nostalgic flavor that everyone loves.
Water (1/2 cup / 120ml) — This is crucial. The water creates steam, which helps the seasoning dissolve and coat every piece of meat evenly. Without it, you’ll end up with a dry, powdery mess. Do not skip this step.
Fritos Original Corn Chips (12 bags / ~240g total) — While you can use any corn chip, Fritos are the traditional choice for a reason. They are sturdy enough to hold the weight of the meat and cheese without breaking immediately, but they still soften pleasantly. Avoid thin tortilla chips; they shatter too easily. You need about one 11-ounce bag per 6-8 walking tacos.
Shredded Cheddar Cheese (2 cups / 225g) — Pre-shredded cheese contains cellulose to prevent clumping, which means it doesn’t melt as smoothly. For the best melting experience, buy a block of sharp cheddar and shred it yourself. If you’re in a rush, pre-shredded works, but the texture will be slightly grainier.
Tomatoes (2 medium / 300g) — Dice these finely. Large chunks of tomato are slippery and fall out of the bag. You want little bursts of acidity to cut through the richness of the beef and cheese. Roma tomatoes are best because they have less water and fewer seeds.
Sour Cream (1/2 cup / 120g) — A dollop of sour cream adds tang and creaminess. It balances the heat from the chili powder. Greek yogurt works as a lighter substitute if you’re watching calories, though the flavor profile shifts slightly.
Green Onions (4 stalks / 60g) — Thinly sliced. These add a fresh, oniony crunch that ties everything together. They are optional, but highly recommended for that pop of color and freshness.
Hot Sauce or Jalapeños (To taste) — For the heat lovers. I keep a bottle of Cholula or tapadillo hot sauce on the topping bar. Sliced pickled jalapeños are also a fantastic addition if you want a vinegar kick.
Tools Needed
You don’t need fancy equipment to make this. Here’s what I use, keeping it simple and accessible.
Large Skillet — I use a 12-inch non-stick skillet. It gives you enough surface area to brown the beef evenly without overcrowding. If the meat is packed too tightly, it steams instead of browning, and you lose that delicious flavor.
Wooden Spoon or Spatula — For breaking up the meat. A wooden spoon is gentle on non-stick coatings and perfect for crumbling the beef into small, bite-sized pieces.
Sharp Knife and Cutting Board — For dicing tomatoes and slicing green onions. Make sure your knife is sharp; dull knives slip and make uneven cuts.
Small Bowls — For holding your toppings. I use four small glass bowls for cheese, tomatoes, sour cream, and green onions. Glass is nice because you can see how much is left easily.
Trash Can — Keep a small trash bin near your serving area. It’s polite and practical for guests to dispose of their empty chip bags right there. It keeps the serving table clean.
How to Make Football Tailgate Walking Tacos for Game Day
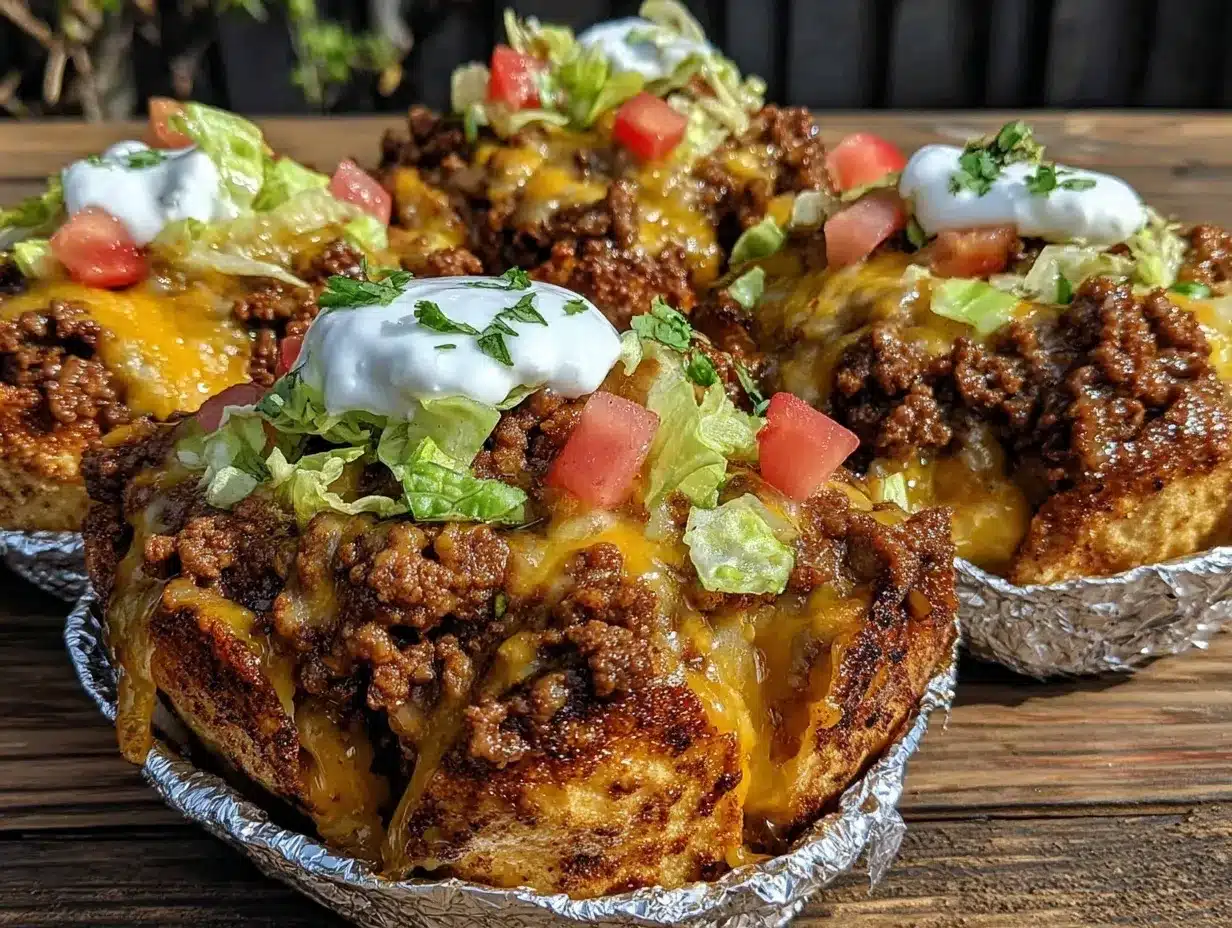
Let’s get cooking. This process is straightforward, but attention to detail makes the difference between good and great.
Step 1: Prepare Your Topping Station (10 minutes)
Before you start cooking the meat, set up your topping bar. This is critical because the meat cooks fast, and you don’t want to be chopping tomatoes while the beef is burning. Take your shredded cheddar, diced tomatoes, sliced green onions, and sour cream, and place them in separate small bowls. Arrange them on a tray or a clean section of your counter. If you’re using jalapeños or hot sauce, add those now. Having everything ready means you can focus entirely on the meat. It also invites guests to start assembling their bags early, which gets the party started.
Step 2: Brown the Beef (8-10 minutes)
Heat your large skillet over medium-high heat. Add the ground beef. As it heats up, use your wooden spoon to break the meat into small crumbles. You want small pieces, not large chunks, so they fit easily into the chip bags. Cook for about 5-6 minutes until the beef is mostly brown. If there is a lot of excess grease, you can drain some of it, but leave a little bit for flavor. Once the meat is browned, reduce the heat to medium-low.
Step 3: Season and Simmer (5 minutes)
Pour in the taco seasoning and the 1/2 cup of water. Stir everything together thoroughly, making sure the seasoning is distributed evenly. Let it simmer for 3-4 minutes. You’ll see the liquid reduce and thicken into a sauce that clings to the beef. This is where the magic happens—the flavors meld together. Taste a small piece. Does it need more salt? Add a pinch. Too bland? Add a little more seasoning. Remove from heat once the liquid has mostly absorbed.
Step 4: Prep the Chip Bags (5 minutes)
Take your bags of Fritos. Hold the bag upright. Using the edge of the counter or a table, gently tear a zig-zag line down one side of the bag. Do not tear the bottom. You want to create an opening that is about 3-4 inches wide. Be careful not to rip the bag open completely. This is your “taco shell.” If you’re making these for a large crowd, prep the bags in batches. Keep them in a large bin or on a tray so they are easy to grab.
Step 5: Assemble and Serve (5 minutes)
Now for the fun part. Take a prepared chip bag. Add a generous scoop of the seasoned beef mixture. Aim for about 1/2 cup of meat per bag. Then, let your guests add their toppings. Start with the cheese, then tomatoes, sour cream, and green onions. Hand them a napkin (lots of napkins) and a plastic fork. The fork is essential for getting the last bits of meat and cheese out of the bag. Serve immediately while the meat is warm and the cheese is starting to melt. Enjoy!
Total Time: 30 minutes. Prep: 15 minutes. Cook: 15 minutes. This timing allows you to have everything ready just as your guests arrive.
Expert Tips from a Tailgate Veteran
Here’s everything I learned from making this too many times. These tricks will save you from common pitfalls.
The Game-Changers
Don’t Overcrowd the Pan
This is the #1 mistake. When browning the beef, if you put too much in at once, the pan temperature drops, and the meat steams. I learned this the hard way during my first Super Bowl party. The meat was gray and soggy. Now, I cook in two batches if I’m making more than 20 tacos. It takes two extra minutes, but the flavor is infinitely better.
Warm the Meat, Cool the Toppings
Temperature contrast is key. The meat should be hot, but the cheese and sour cream should be cold. If you leave the cheese out too long, it gets greasy. Keep your topping bowls in the fridge until the last minute. This contrast makes each bite more interesting.
Use Sturdy Bags
Not all chip bags are created equal. Some brands have thin plastic that tears easily. I stick to Fritos or sturdy corn chips. If you use thin tortilla chips, you need to double-bag them, which is annoying. Test your bag’s integrity before the party. Tear one open and press down on it. If it feels weak, don’t use it.
Common Problems & Solutions
Problem: The bag falls apart.
Solution: If your bag tears at the bottom, you’ve cut too deep. Use a fresh bag. If it tears on the side, you can patch it with a piece of foil, but it’s better to start over. Always tear along the edge, not the middle.
Problem: The meat is dry.
Solution: You didn’t add enough water, or you cooked it too long. Make sure you simmer it for 3-4 minutes after adding the seasoning. The liquid should reduce but not evaporate completely.
Problem: It’s too messy.
Solution: Provide plenty of napkins and wet wipes. Also, advise your guests to eat slowly. Rushing leads to spills. A plastic fork helps keep things contained.
Pro Tricks
Make Ahead the Meat
You can cook the beef mixture up to 2 days in advance. Store it in an airtight container in the fridge. Reheat it in the microwave or on the stove before serving. This saves you huge amounts of time on game day. Just make sure to reheat it thoroughly.
Add a Crunch Factor
For extra texture, sprinkle crushed tortilla chips or bacon bits on top. It adds another layer of crunch that complements the Fritos.
Recipe Variations
Once you’ve nailed the basic version, here’s how to mix it up. I like to offer a few variations to keep things interesting.
Chicken Walking Tacos
Instead of beef, use shredded rotisserie chicken or grilled chicken thighs tossed in taco seasoning. It’s lighter and faster to prep. I often do this for weekday game nights. It pairs well with a tangy cucumber tomato feta salad for a fresh side.
Vegetarian Walking Tacos
Swap the beef for seasoned black beans or a meatless ground alternative. Use vegetable broth instead of water for the seasoning. Top with extra veggies like corn and peppers. It’s surprisingly satisfying.
Spicy Jalapeño Version
Add diced jalapeños to the meat while it’s browning. Use pepper jack cheese instead of cheddar. This is for the heat seekers. I make this for the guys in my group who love spice.
Bacon Cheeseburger Walking Tacos
Add cooked, crumbled bacon to the meat mixture. Use cheddar cheese and diced onions. It tastes like a burger in a bag. It’s indulgent and rich.
Gluten-Free Option
Most corn chips are naturally gluten-free, but always check the label. Ensure your taco seasoning is certified gluten-free, as some brands contain wheat starch. This recipe is easily adaptable for gluten-sensitive guests.
Serving & Storage
Serving Suggestions
I serve these in a large bin or on a platter, surrounded by the topping bowls. It looks abundant and inviting. Pair them with cold sodas, beer, or a spicy margarita. For a lighter side, serve with a fresh watermelon feta salad or some grilled corn salad to balance the heaviness of the chips and cheese. These sides add brightness and cut through the richness.
Storage
Meat Filling: Store in an airtight container in the refrigerator for up to 3 days. Reheat in the microwave or on the stove with a splash of water to loosen it up. It freezes well for up to 3 months, though the texture may soften slightly upon thawing.
Assembled Walking Tacos: Do not assemble these in advance. The chips will get soggy within an hour. Always assemble right before serving. This is non-negotiable for the best experience.
Leftovers: If you have leftover meat, it makes excellent tacos, burritos, or nachos the next day. It’s versatile and delicious.
Nutrition Information
I’m not a nutritionist, but here’s the breakdown per walking taco (1 bag chips + 1/2 cup meat + toppings):
| Nutrient | Amount |
|---|---|
| Calories | 450-550 kcal |
| Protein | 20g |
| Carbs | 35g |
| Fiber | 3g |
| Fat | 28g |
| Sodium | 600mg |
My Take: This is comfort food. It’s high in sodium and fat, which is expected for a game day snack. It’s not diet food. But it’s better than processed chips alone, and you control the toppings. Enjoy it in moderation as part of a fun, social meal.
Final Thoughts
Football Tailgate Walking Tacos for Game Day are more than just food; they’re an experience. They bring people together, they’re easy to eat, and they taste incredible. I’ve made this recipe dozens of times, and it never fails to impress. Whether you’re a seasoned tailgater or a first-time host, this recipe will make you look like a pro. Don’t be afraid to experiment with toppings and spices. Make it your own. If you try this, I’d love to hear how it turns out. Drop a comment below with your favorite topping combo!
Happy cooking!
FAQs
Can I make this ahead of time?
You can prep the meat filling up to 3 days in advance. However, do not assemble the walking tacos until right before serving. The chips will absorb moisture and become soggy if they sit with the meat for too long. Prep the chip bags early, but wait to fill them.
What chips work best for walking tacos?
Fritos Original Corn Chips are the gold standard because they are sturdy and hold up well to toppings. Other sturdy corn chips like Doritos (Cool Ranch or Nacho Cheese) also work well and add extra flavor. Avoid thin tortilla chips as they break easily.
Can I use ground turkey instead of beef?
Yes, ground turkey is a great leaner alternative. Just be sure to add a tablespoon of oil to the pan to keep it from drying out. Turkey may require a bit more seasoning to match the robust flavor of beef.
How do I prevent the bag from tearing?
Tear the bag carefully along the side edge, creating a zig-zag cut. Do not cut too deep into the bottom. If you’re worried, test one bag first. If it tears, use a double bag or switch to a sturdier chip.
Can I freeze the walking tacos?
No, do not freeze assembled walking tacos. The chips will lose all crunch and become mushy upon thawing. Freeze the meat filling only, and assemble fresh when ready to eat.
What are some good sides to serve with walking tacos?
Light, fresh sides work best to balance the heavy, savory tacos. Try a watermelon feta salad, grilled corn salad, or a simple green salad. These add crunch and acidity that cut through the richness.
Pin This Recipe!
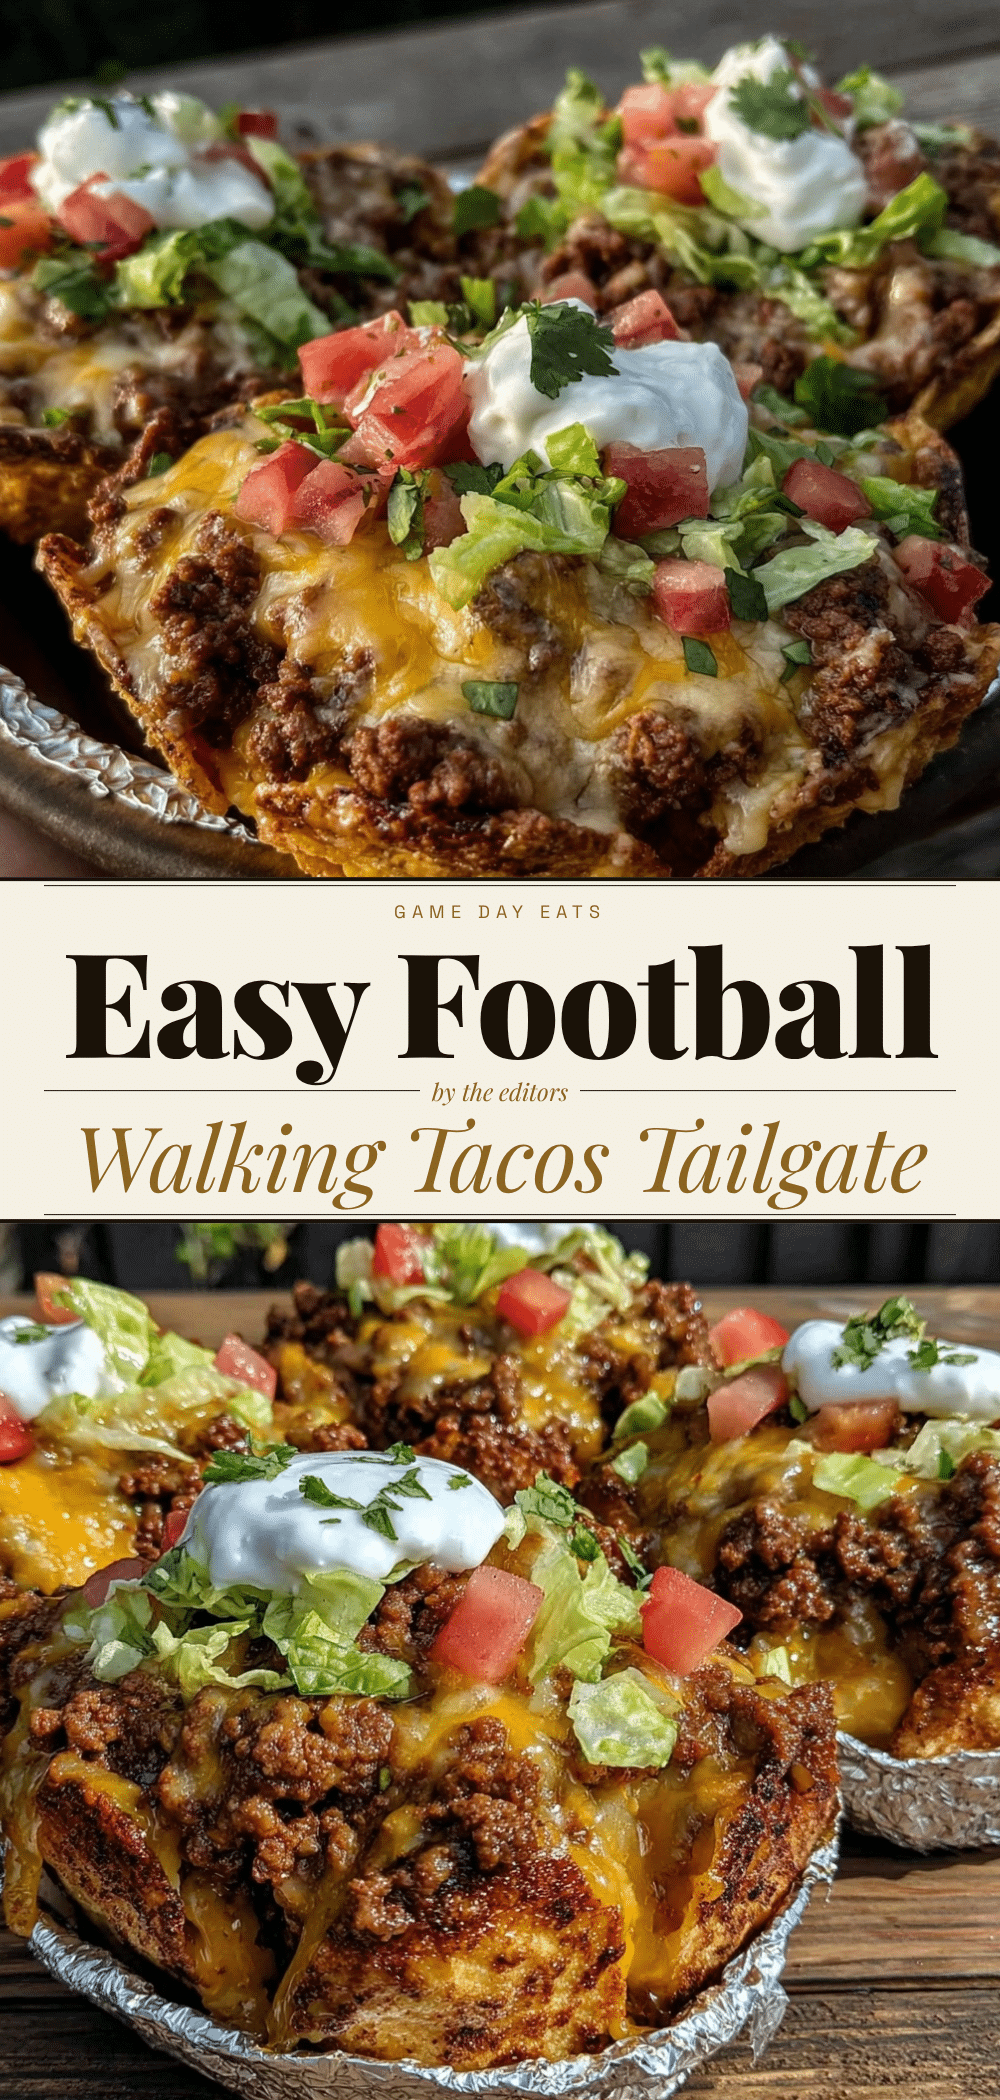

Football Tailgate Walking Tacos: 5-Step Game Day Snack
- Total Time: 30 minutes
- Yield: 12 servings 1x
Description
A convenient, mess-free game day snack where seasoned ground beef and toppings are served directly inside a bag of Fritos, eliminating the need for plates or dishes.
Ingredients
- 1 lb (450g) 80/20 ground beef
- 1 packet (25g) taco seasoning (e.g., Old El Paso or McCormick)
- 1/2 cup (120ml) water
- 12 bags Fritos Original Corn Chips (~240g total)
- 2 cups (225g) shredded sharp cheddar cheese
- 2 medium Roma tomatoes, finely diced (300g)
- 1/2 cup (120g) sour cream
- 4 stalks green onions, thinly sliced (60g)
- Hot sauce or pickled jalapeños (to taste)
Instructions
- Set up a topping station with small bowls containing shredded cheddar, diced tomatoes, sour cream, and sliced green onions.
- Heat a large skillet over medium-high heat and add the ground beef. Break the meat into small crumbles using a wooden spoon.
- Cook the beef for 5-6 minutes until mostly browned. Drain excess grease if desired, but leave some for flavor.
- Reduce heat to medium-low. Pour in the taco seasoning and water. Stir to distribute evenly.
- Simmer for 3-4 minutes until the liquid reduces and thickens into a sauce that clings to the meat. Remove from heat.
- Hold a bag of Fritos upright and tear a zig-zag line down one side to create an opening about 3-4 inches wide.
- Add a generous scoop (about 1/2 cup) of the seasoned beef mixture into each prepared chip bag.
- Let guests top their tacos with cheese, tomatoes, sour cream, and green onions.
- Serve immediately with plastic forks and plenty of napkins.
Notes
Do not assemble the walking tacos in advance as the chips will become soggy. The meat filling can be prepared up to 3 days in advance and reheated. Ensure the meat is hot while toppings are cold for the best texture contrast. Use sturdy corn chips like Fritos to prevent tearing.
- Prep Time: 15 minutes
- Cook Time: 15 minutes
- Category: Appetizer
- Cuisine: American
Nutrition
- Serving Size: 1 bag of chips with
- Calories: 450550
- Sugar: 2
- Sodium: 600
- Fat: 28
- Saturated Fat: 10
- Carbohydrates: 35
- Fiber: 3
- Protein: 20
Keywords: walking tacos, game day snacks, tailgate food, football party, easy appetizer, no dishes, Fritos tacos, ground beef recipes


