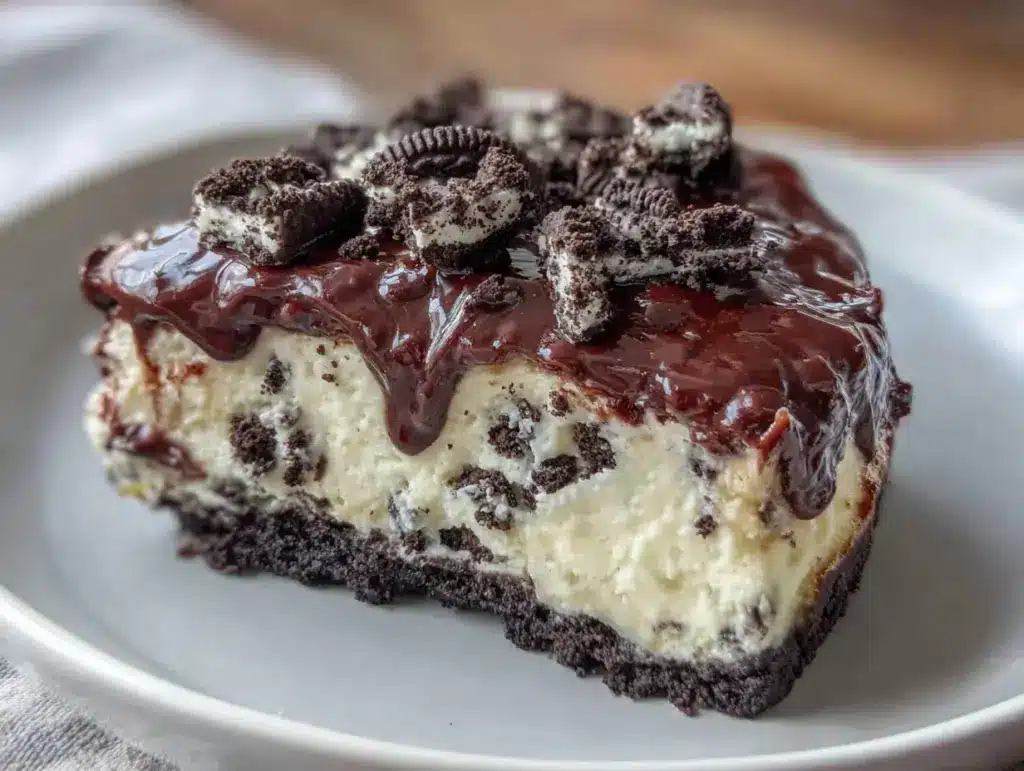
Last July, the heat hit us like a wet wool blanket. I mean, the kind of heat that makes you forget what day it is and just want to sit in front of a fan until the sun goes down. I had just come back from the farmers market with a haul of peaches and berries, but honestly? I didn’t have the energy to bake. The thought of turning on the oven felt like a punishment. My husband was complaining about the humidity, and the kids were whining about dessert. I needed something cold, sweet, and incredibly easy. Something that screamed “summer” without requiring me to stand over a stove.
I looked at the fridge and saw a block of cream cheese, a tub of heavy cream, and a package of Oreos that my son had been eyeing suspiciously. It was a lightbulb moment. Why bake when you can just mix? That afternoon, I whipped together a No-Bake Oreo Cheesecake with Chocolate Ganache. It took me twenty minutes to assemble, and then I just let the fridge do the heavy lifting. When we dug in an hour later, the silence in the kitchen said everything. It was cool, rich, and had that perfect crunch from the cookie crust. It wasn’t just a dessert; it was a rescue mission for a sweltering afternoon.
I’ve made this No-Bake Oreo Cheesecake with Chocolate Ganache at least a dozen times since then. Some weeks I add fresh strawberries on top because summer berries are peaking. Other times I stick to the classic chocolate ganache drizzle. It’s become my go-to when I want to impress guests without spending hours in the kitchen. If you’re tired of complicated recipes that require a thermometer and a patience you don’t have, this is your answer. It’s the best summer dessert because it respects the season: keep it cool, keep it simple, and let the flavors shine.
Why You’ll Love This No-Bake Dessert
There is something deeply satisfying about a dessert that comes together faster than you can finish your coffee. This No-Bake Oreo Cheesecake with Chocolate Ganache isn’t just about convenience; it’s about texture and temperature. Here is why this recipe has earned a permanent spot in my summer rotation.
- Zero Oven Required — This is the biggest selling point for me. In July, I don’t want my kitchen to feel like a sauna. This recipe stays entirely in the fridge. I prep it in the morning, and by evening, it’s ready. No heating up the house, no watching a cake rise, no guessing if it’s done.
- Texture Heaven — The magic is in the layers. You get the crumbly, buttery crunch of the Oreo crust, followed by the incredibly smooth, airy cheesecake filling, and finally the glossy, rich chocolate ganache. Each bite has a different mouthfeel that keeps it interesting. It’s not just one-note sweet; it’s complex.
- Make-Ahead Friendly — Summer hosting is chaotic. Between grilling and managing kids’ schedules, I need desserts that can sit in the fridge for days. This cheesecake actually gets better after sitting for 24 hours. The flavors meld, the ganache sets perfectly, and it’s still firm enough to slice cleanly. I made it three days before a BBQ, and it was the star of the show.
- Uses Simple Ingredients — You don’t need fancy French butter or rare vanilla beans. You need cream cheese, sugar, heavy cream, Oreos, and chocolate chips. Most of these are pantry staples. If you need inspiration for other simple summer treats, check out my best ever bourbon peach cobbler for when you *do* want to bake, but this cheesecake is for when you want zero effort.
- Customizable Toppings — While the ganache is classic, this base is a canvas. In August, I drizzle it with salted caramel. In September, I top it with spiced pears. The base recipe never changes, but the finish can match whatever is fresh at the market.
This is my go-to when dinner needs to just work, but I still want to serve something that feels special. It’s reliable, it’s delicious, and it’s incredibly forgiving.
Key Ingredients for the Perfect Crust and Filling
Let’s talk about what goes into this No-Bake Oreo Cheesecake with Chocolate Ganache. I’m a big believer in using good quality ingredients because they make a huge difference in a no-bake recipe. Since there’s no baking to mask imperfections, you taste everything.
For the Crust
Oreo Cookies (24 full cookies, about 2 cups crumbs) — You need the full cookies, filling and all. Do not buy the “double stuffed” unless you want an overly sweet crust, and definitely do not use the thin ones. The standard Oreos give you the right balance of chocolate cookie and creamy filling. I usually just put them in a food processor, but if you don’t have one, put them in a ziplock bag and crush them with a rolling pin. It’s a good workout.
Unsalted Butter (6 tbsp / 85g, melted) — The butter binds the crumbs. I use unsalted so I can control the saltiness. Melt it in the microwave in 15-second bursts, stirring in between so it doesn’t burn. It should be liquid but not hot.
Granulated Sugar (1 tbsp / 12g) — Even though Oreos are sweet, a tablespoon of sugar helps caramelize the crust slightly and adds depth. Don’t skip it, but don’t add more or it’ll be cloying.
For the Cheesecake Filling
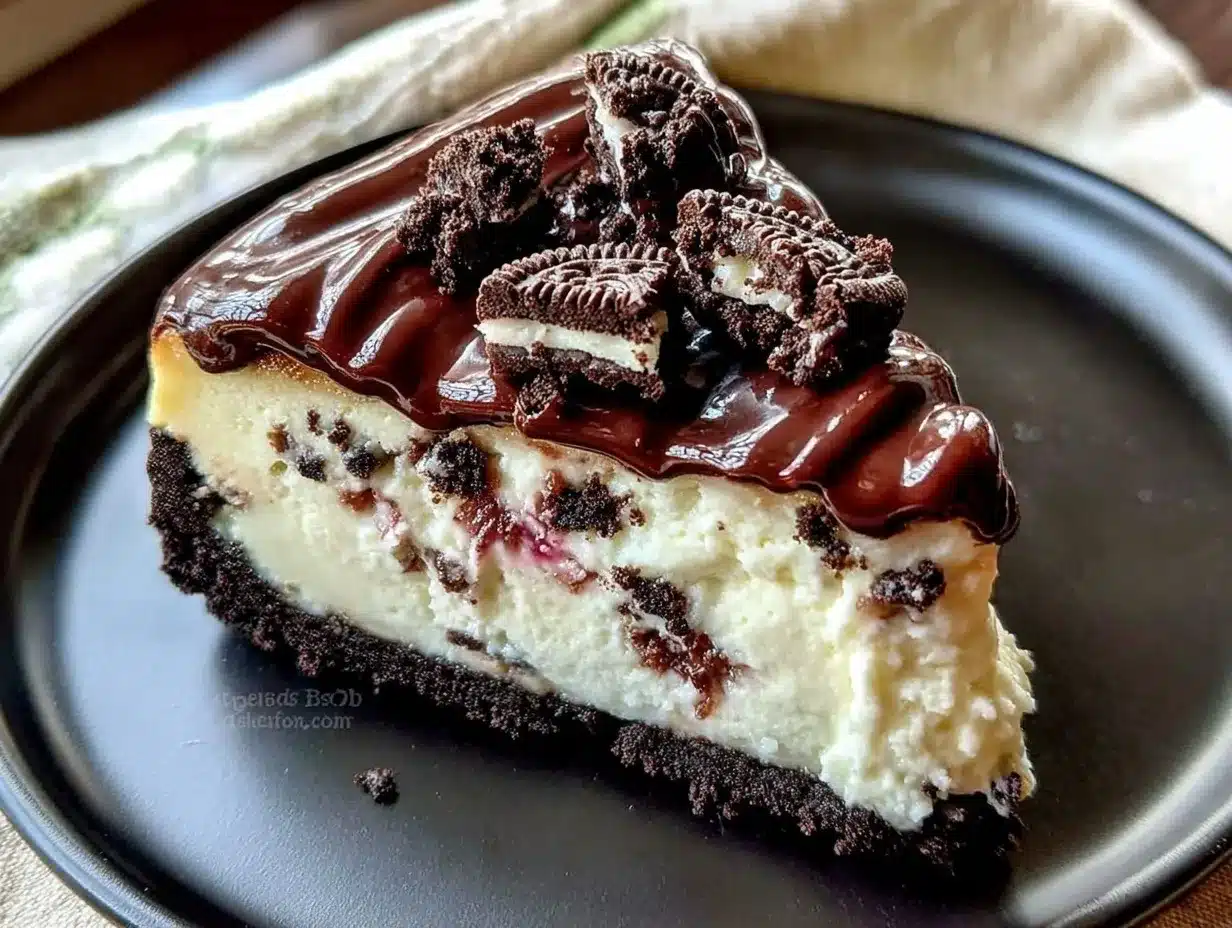
Full-Fat Cream Cheese (24 oz / 680g, softened) — This is non-negotiable. Low-fat cream cheese has too much water and won’t set properly. It will be runny. I buy the block kind and let it sit on the counter for 30-45 minutes before mixing. If it’s cold and hard, you’ll get lumps in your smooth, dreamy filling. Softened cream cheese mixes like butter.
Heavy Whipping Cream (2 cups / 480ml, cold) — This is what gives the cheesecake its light, airy texture. Since there’s no gelatin or eggs, the whipped cream provides the structure. It must be very cold. If your kitchen is hot, keep the carton in the fridge until the second you pour it.
Confectioners’ Sugar (1 cup / 120g) — Also known as powdered sugar. It dissolves instantly, unlike granulated sugar, which can leave a gritty texture in a no-bake dessert. Sift it if it’s clumpy.
Vanilla Extract (2 tsp / 10ml) — Use real vanilla. The artificial stuff tastes harsh in a simple recipe like this. I keep a bottle of pure vanilla bean paste in my pantry for extra specks of flavor, but extract works fine.
For the Chocolate Ganache
Semi-Sweet Chocolate Chips (1 cup / 170g) — I use Guittard or Ghirardelli. Avoid the cheap baking chips that melt into oil. You want chocolate that snaps when you break it. Semi-sweet is perfect because it balances the sweetness of the cheesecake.
Heavy Cream (1/2 cup / 120ml) — Just enough to melt the chocolate and create a glossy pour. If you want a thicker ganache for drizzling, use less cream. For a thicker layer you can spread, use more.
Pinch of Sea Salt — A tiny pinch in the ganache cuts the sweetness and makes the chocolate taste more intense. It’s a chef’s secret that you can easily do at home.
Tools You’ll Need
You don’t need fancy equipment. Here’s what I use to make this No-Bake Oreo Cheesecake with Chocolate Ganache without a fuss.
9-Inch Springform Pan — This is essential. The sides pop off, making it easy to get clean slices and remove the cake. If you don’t have one, a 9-inch pie dish works, but slicing will be harder. Grease the springform pan lightly with butter before adding the crust.
Food Processor or Blender — For crushing the Oreos quickly and evenly. If you’re old-school, a heavy rolling pin and a sturdy ziplock bag work, but it takes more arm strength.
Electric Hand Mixer or Stand Mixer — You need this to whip the heavy cream to stiff peaks and beat the cream cheese until smooth. Doing this by hand is possible but will take you 15 minutes of arm fatigue. Save your arms.
Spatula — A flexible silicone spatula is your best friend for folding the whipped cream into the cheese mixture. You want to keep the air in the batter, so gentle folds are key.
Saucepan — Small saucepan for melting the ganache. A microwave-safe bowl works too if you’re careful with intervals.
How to Make It
Let’s walk through the steps. It’s straightforward, but timing matters.
Step 1: Prep the Crust (10 minutes)
Crush your 24 Oreos into fine crumbs. You want them to feel like wet sand, not chunky gravel. Pour them into a bowl and mix in the melted butter and sugar. Press this mixture firmly into the bottom and slightly up the sides of your greased springform pan. Use the bottom of a measuring cup to pack it down tight. If it’s loose, your slices will fall apart. Place the pan in the fridge while you make the filling. This chills the crust and helps it set.
Step 2: Make the Cheesecake Filling (15 minutes)
In a large bowl, beat the softened cream cheese and confectioners’ sugar on medium speed until completely smooth and creamy. This should take about 2-3 minutes. Scrape down the sides of the bowl to ensure no lumps remain. In a separate cold bowl, whip the heavy cream and vanilla extract on high speed until you form stiff peaks. This means when you lift the beaters, the cream stands up straight. Be careful not to over-whip it into butter, though.
Now, the fold. Add about one-third of the whipped cream to the cream cheese mixture and stir gently to lighten it. Then, pour that mixture back into the remaining whipped cream. Use your spatula to fold them together. Cut through the middle, scrape the bottom, and fold over. Repeat until no white streaks remain. It should look fluffy and uniform. Pour this mixture over the chilled crust. Smooth the top with the spatula. Cover with plastic wrap and refrigerate for at least 4 hours, but overnight is best for the cleanest slices.
Step 3: Whip Up the Chocolate Ganache (5 minutes)
While the cheesecake chills, make the ganache. Heat the heavy cream in a small saucepan over medium heat until it just starts to simmer. Do not let it boil over. Pour the hot cream over the semi-sweet chocolate chips in a heatproof bowl. Let it sit for 2 minutes without stirring. This melts the chocolate from the bottom up. After 2 minutes, stir gently from the center outwards until the mixture is glossy and smooth. Stir in the pinch of sea salt.
Step 4: Assemble and Serve (5 minutes)
Remove the cheesecake from the fridge. Pour the warm ganache over the center of the cake. Use an offset spatula or the back of a spoon to gently spread it to the edges. Let it sit for 10-15 minutes so the ganache sets slightly but stays soft. Release the springform pan ring. Slice with a hot, clean knife for perfect edges. Dip the knife in hot water and wipe dry between cuts. Serve immediately.
Total time: 35 minutes active, plus 4+ hours chilling.
Expert Tips from My Kitchen
Here’s everything I learned from making this too many times. These tips will save you from common pitfalls.
The Cream Cheese Temperature is Critical
I cannot stress this enough. If your cream cheese is cold, you will get lumps. And you can’t fix lumps in a no-bake cheesecake without blending it, which adds too much air and changes the texture. I leave my cream cheese blocks on the counter for an hour before I start. If you forget, cut the block into cubes and microwave on 30% power for 15-second bursts, checking frequently. It should be soft enough to press a finger into easily.
Don’t Skip the Chilling Time
I know you want to eat it now. I do too. But if you cut it after 1 hour, it will be soft and messy. The structure comes from the fat in the cream cheese and cream solidifying in the cold. For the cleanest slices that hold their shape, let it chill for at least 6 hours. Overnight is ideal. The flavors also deepen as they rest.
Warm Your Knife for Clean Slices
This is a pro trick for cheesecake. Fill a bowl with hot water. Dip your knife in, wipe it dry, and cut. Do this for every single slice. The heat cuts through the cold cream cheese and ganache like butter. If you don’t do this, you’ll get ragged edges and squished crumbs.
Ganache Consistency Control
If your ganache is too thick to pour, add a teaspoon of warm cream. If it’s too thin and runs off the sides, add a few more chocolate chips and stir. You want it to coat the back of a spoon. It will thicken as it cools on the cake.
Recipe Variations
Once you’ve nailed the basic version, here’s how to mix it up. The base is versatile.
Strawberry Swirl
Mash 1 cup of fresh strawberries with 1 tbsp sugar. Swirl it into the cheesecake filling before pouring it over the crust. It adds a tartness that cuts the richness. Fresh berries are at their best in late spring and early summer, so make this then.
Cookie Butter Layer
Add a layer of Biscoff cookie butter between the crust and the cheesecake. It adds a spicy, caramel-like flavor that pairs beautifully with chocolate. This is a great alternative if you want something less sweet than the ganache.
Mini Cupcake Version
Divide the crust and filling into 12 lined muffin cups. Chill for 2 hours. Top with a mini dollop of ganache. These are perfect for potlucks or portion control. They travel well in a cooler.
Dairy-Free Option
Use vegan cream cheese and vegan chocolate chips. Use coconut cream instead of heavy cream for whipping. The texture is slightly denser, but the flavor is still great. It’s a good option for guests with allergies.
Gluten-Free Crust
Use gluten-free Oreo cookies or crush gluten-free chocolate sandwich cookies. The rest of the recipe remains the same. Just ensure your chocolate chips are certified GF if cross-contamination is a concern.
Serving & Storage
Serving Suggestions:
I serve this with fresh berries on the side. The tartness of strawberries or raspberries balances the sweet, rich cake. A drizzle of salted caramel on top is also delicious. Pair it with a cup of black coffee or a glass of cold milk. It’s a dessert that stands on its own, but the contrast of textures makes it better.
Storage:
This cheesecake keeps well in the refrigerator for up to 5 days. Cover it tightly with plastic wrap or keep it in the springform pan with the lid on. It does not freeze well. The whipped cream filling can become grainy and separate when thawed. So, make it only when you plan to eat it within the week. If you have leftovers, they’re usually gone by day three!
Nutrition Information
I’m not a nutritionist, but here’s the breakdown per slice (1/8 of the cake).
| Nutrient | Amount |
|---|---|
| Calories | 450 |
| Protein | 6g |
| Carbohydrates | 42g |
| Fiber | 2g |
| Fat | 28g |
| Sodium | 250mg |
My Take:
This is indulgent comfort food. It’s heavy on cream and sugar. It’s not a health food. But it’s better than buying a fancy dessert from a bakery, and you know exactly what’s in it. Enjoy it as a special treat, not an everyday snack.
Final Thoughts
This No-Bake Oreo Cheesecake with Chocolate Ganache is more than just a recipe; it’s a solution for hot days and busy schedules. It’s cool, creamy, and satisfying without the hassle of baking. I love that I can make it ahead of time and let the fridge work for me. Whether you’re hosting a summer BBQ or just need a sweet pick-me-up, this cake delivers. Give it a try, and let me know how it turns out in your kitchen. I love hearing your tweaks and stories. Happy cooking!
FAQs
Can I use reduced-fat cream cheese?
I don’t recommend it. Reduced-fat cream cheese has more water and less fat, which means it won’t set properly. The cheesecake will be soft and possibly runny. For the best texture, stick to full-fat block cream cheese. It’s worth the extra calories for the texture.
Why is my ganache grainy?
This usually happens if the chocolate wasn’t melted properly or if the cream was too hot and scorched the chocolate. Make sure you let the cream sit on the chocolate for 2 minutes before stirring. If it’s grainy, you can try warming it slightly again and adding a teaspoon of warm cream while whisking vigorously.
Can I make this in a pie dish?
Yes, but slicing will be harder because you can’t remove the sides. If you use a pie dish, press the crust firmly into the bottom and up the sides. Chill it well. When serving, use a sharp knife and wipe it clean between cuts. You’ll get messy edges, but the taste will be the same.
How do I store leftovers?
Keep it covered in the fridge for up to 5 days. If you don’t have the springform pan, cover the whole dish tightly with plastic wrap. It will absorb other fridge smells if not covered well, so double-wrap if necessary.
Can I add fresh fruit on top?
Absolutely. Fresh strawberries, raspberries, or sliced peaches work beautifully. Add them just before serving so they don’t get soggy. If you’re using juicy fruit, pat them dry with a paper towel first. For a contrast to this rich dessert, a light salad like my easy watermelon feta salad can be a refreshing starter, but the fruit on top of the cake is pure dessert joy.
Pin This Recipe!
No-Bake Oreo Cheesecake with Chocolate Ganache
- Total Time: 4 hours 35 minutes
- Yield: 8 servings 1x
Description
A cool, rich, and incredibly easy no-bake summer dessert featuring a crunchy Oreo cookie crust, a smooth and airy cream cheese filling, and a glossy chocolate ganache topping.
Ingredients
- 24 full Oreo cookies (about 2 cups crumbs)
- 6 tbsp unsalted butter, melted
- 1 tbsp granulated sugar
- 24 oz full-fat cream cheese, softened
- 1 cup confectioners’ sugar
- 2 cups heavy whipping cream, cold
- 2 tsp vanilla extract
- 1 cup semi-sweet chocolate chips
- 1/2 cup heavy cream
- Pinch of sea salt
Instructions
- Crush 24 Oreos into fine crumbs. Mix with melted butter and sugar, then press firmly into the bottom and slightly up the sides of a greased 9-inch springform pan. Chill in the fridge.
- In a large bowl, beat softened cream cheese and confectioners’ sugar until smooth. In a separate cold bowl, whip heavy cream and vanilla extract until stiff peaks form.
- Gently fold one-third of the whipped cream into the cream cheese mixture to lighten it, then fold in the remaining whipped cream until uniform. Pour over the chilled crust and smooth the top.
- Refrigerate for at least 4 hours, preferably overnight, to set.
- Heat 1/2 cup heavy cream in a saucepan until it just starts to simmer. Pour over chocolate chips in a heatproof bowl and let sit for 2 minutes. Stir gently until glossy and smooth. Stir in a pinch of sea salt.
- Pour warm ganache over the chilled cheesecake and spread to the edges. Let sit for 10-15 minutes to set slightly.
- Release the springform pan ring. Slice with a hot, clean knife for perfect edges and serve immediately.
Notes
Ensure cream cheese is fully softened to avoid lumps. Chill the cheesecake for at least 6 hours or overnight for clean slices. Use a hot knife dipped in water and wiped dry between cuts for neat slices. Do not freeze, as the texture may become grainy.
- Prep Time: 35 minutes
- Cook Time: 0 minutes
- Category: Dessert
- Cuisine: American
Nutrition
- Serving Size: 1 slice (1/8 of the
- Calories: 450
- Sugar: 32
- Sodium: 250
- Fat: 28
- Saturated Fat: 17
- Carbohydrates: 42
- Fiber: 2
- Protein: 6
Keywords: no-bake cheesecake, Oreo dessert, summer dessert, chocolate ganache, easy dessert, make-ahead dessert


