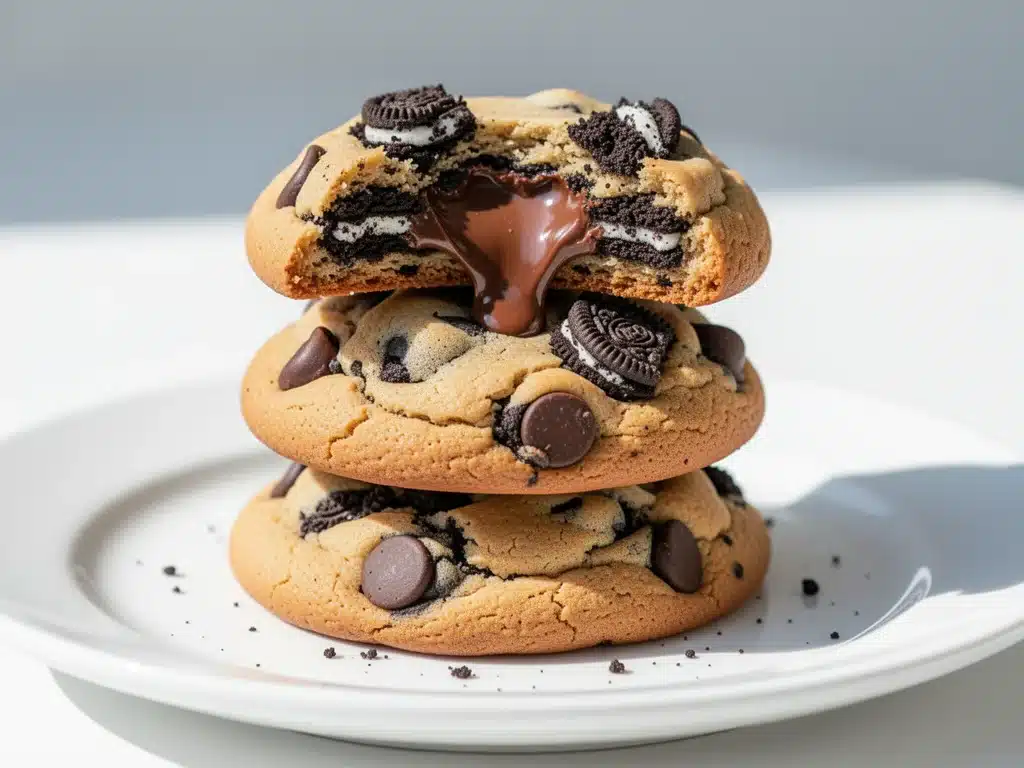
I have a confession to make. Last weekend, I made a batch of cookies that I genuinely believe should be illegal in three states. They’re soft, chewy, loaded with chocolate chips, and stuffed with a whole Oreo that melts into a gooey, creamy center. I baked them, let them cool for exactly four minutes (which is basically zero time in cookie terms), and took one bite. Then I looked at my husband and said, “We need to never buy store-bought cookies again.” He just nodded, reached for a second one, and didn’t say a word because his mouth was too full.
These aren’t just regular chocolate chip cookies with an Oreo pressed on top. This is a structural marvel. It’s a soft, buttery chocolate chip cookie dough that wraps around a full Oreo cookie, creating a pocket of creamy filling that oozes out when you pull the cookie apart. The contrast between the crisp edges, the chewy center, and the molten Oreo inside is honestly life-changing. I’ve made these at least five times in the last month. My kids think I’m the best mom ever. My friends are begging for the recipe. And honestly? I’m not even mad about it.
If you’re tired of cookies that are either too cakey, too dry, or just boring, you need to stop scrolling and start preheating your oven. This recipe for soft Oreo stuffed chocolate chip cookies is the ultimate crowd-pleaser. It’s easy enough for a Tuesday night but fancy enough for a holiday party. Plus, the gooey center makes them look like you spent hours in the kitchen, even though you’re done in under 30 minutes.
Why You’ll Love This Recipe
There are a million cookie recipes out there. So why this one? Why spend the time stuffing Oreos into dough? Because once you try it, you’ll never go back. Here’s why these cookies have completely taken over my kitchen:
The Gooey Factor — This is the big one. When you bite into these, that Oreo center doesn’t just sit there. It warms up, softens, and turns into a creamy, chocolatey lava. It’s the kind of texture that makes people stop mid-chew and stare at you like you’re a wizard. I’ve seen grown adults cry over these cookies. Not literally, but emotionally.
Perfect Texture Every Time — I’ve tested dozens of cookie dough recipes, and most end up either flat as pancakes or hard as rocks. This dough strikes the perfect balance. The edges get slightly crisp, the centers stay soft and chewy, and the Oreo adds a tender, cake-like contrast. It’s the best of all worlds.
Impressive but Easy — You don’t need any special skills to make these. No fancy equipment, no rare ingredients. Just standard baking stuff and a box of Oreos. But the result looks like something from a high-end bakery. I’ve brought these to potlucks and watched people ask, “Did you buy these?” It’s a great power move.
Customizable Fun — Yes, I said Oreos. But you can swap them out. Want Mint Oreos? Go for it. Golden Oreos for a vanilla twist? Done. Even sandwich cookies from the dollar store work. It’s a blank canvas for chocolate and cream lovers.
Kid-Approved — My picky eater son, who usually turns his nose up at “fancy” food, devoured these in three bites. He loved the surprise element. Kids love surprises. Adults love surprises. It’s a win-win.
This recipe has become my go-to for last-minute gatherings, school bake sales, and just because I want something sweet with my coffee. It’s reliable, delicious, and always a hit. Once you make these, you’ll be making them on repeat. I promise.
Ingredients You’ll Need
Here’s the good news: you probably have most of these ingredients already. I’m not asking you to hunt down rare spices or expensive chocolates. This is simple, accessible baking. But I am particular about a few things, and I’ll tell you exactly why.
For the Cookie Dough
Unsalted butter (1 cup / 226g) — I use unsalted so I can control the salt level. Make sure it’s softened to room temperature. Not melted, not cold from the fridge. Softened. If you poke it, it should leave an indent but not sink. This helps create that chewy texture.
Granulated sugar (¾ cup / 150g) — This helps create the crisp edges. Don’t skip it or reduce it too much, or you’ll lose that texture. I use regular white sugar.
Brown sugar (1 cup / 200g) — This is the key to chewiness. Use light or dark brown sugar; I prefer dark for a deeper molasses flavor. Pack it tightly into the cup.
Eggs (2 large / about 100g) — Room temperature eggs mix better into the dough. I crack them into a small bowl first to make sure they’re not bad. Happens to the best of us.
Vanilla extract (2 teaspoons) — Use real vanilla, not imitation. It makes a huge difference in flavor. I keep a bottle of pure vanilla extract on hand specifically for baking.
All-purpose flour (2 ¼ cups / 280g) — Don’t overmeasure this. Spoon it into the cup and level it off. Too much flour makes dense cookies. I use Gold Medal flour because it’s consistent.
Baking soda (1 teaspoon) — This helps the cookies spread and brown. Make sure it’s not expired. Old baking soda makes flat, dense cookies.
Salt (½ teaspoon) — Even though we’re using unsalted butter, salt is crucial for balancing the sweetness. Don’t skip it.
For the Filling
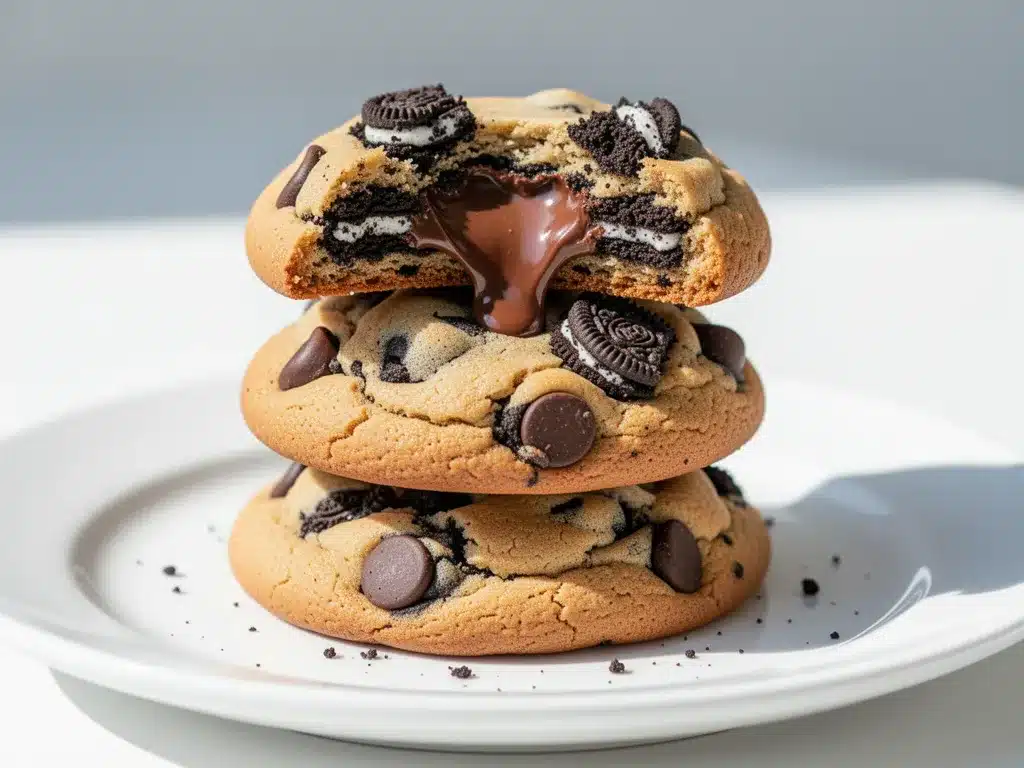
Oreo cookies (24 cookies) — Standard size Oreos work best. I buy the family size pack because I always end up eating a few while I’m baking. Double Stuf Oreos work too, but they’re bigger, so you might need to adjust the dough size.
Chocolate chips (1 ½ cups / 270g) — I use semi-sweet chocolate chips. They’re not too sweet and melt beautifully. You can also use chunks for a more rustic look.
Optional: Sea salt flakes — Sprinkling a little flaky sea salt on top after baking adds a nice contrast to the sweetness. I do this for the fancy version.
Equipment Needed
You don’t need fancy gadgets for this. Here’s what I actually use:
Large mixing bowl — I use a 5-quart stainless steel bowl. It’s big enough to mix everything without making a mess.
Hand mixer or stand mixer — I use a hand mixer because it’s faster for small batches. A stand mixer works too, but you have to be careful not to overmix.
Baking sheets — I use two half-sheet pans. Make sure they’re heavy-duty so they don’t warp. I have some cheap ones that buckle, and it’s frustrating.
Parchment paper — Line your baking sheets with parchment. It prevents sticking and makes cleanup easier. I never bake cookies directly on the pan anymore. Trust me.
Cooling rack — Essential for letting cookies cool evenly. I have a wire rack that sits right over the sink for easy cleanup.
Measuring cups and spoons — Standard stuff. I have a set that’s been with me for years. They work fine.
Cookie scoop — Optional but helpful. It ensures uniform size. I use a 2-tablespoon scoop for these. If you don’t have one, use a spoon, but be consistent.
How to Make It: Step-by-Step
Alright, let’s make these bad boys. I’m walking you through exactly how I do it, including the little tricks I’ve picked up along the way.
Step 1: Prep Your Dough (10 minutes)
Start by creaming together the softened butter, granulated sugar, and brown sugar. Use your mixer on medium-high speed for about 3-4 minutes. You want this mixture to be light, fluffy, and pale. This step is crucial for texture. If you rush it, your cookies will be dense. I usually do this while my oven preheats.
Step 2: Add Wet Ingredients (2 minutes)
Beat in the eggs one at a time, then add the vanilla extract. Mix until just combined. Don’t overmix here. You want everything smooth and creamy.
Step 3: Mix Dry Ingredients (2 minutes)
In a separate bowl, whisk together the flour, baking soda, and salt. Then, gradually add this to the wet mixture on low speed. Mix until *just* combined. Stop as soon as you see no more streaks of flour. Overmixing develops gluten, which makes cookies tough. I stop when it looks shaggy but cohesive.
Step 4: Fold in Chocolate Chips (1 minute)
Use a spatula to fold in the chocolate chips. This gives you more control than using the mixer. Make sure they’re distributed evenly.
Step 5: Chill the Dough (30 minutes)
This step is non-negotiable. Chill the dough in the fridge for at least 30 minutes. This prevents spreading and concentrates flavor. I know it’s tempting to skip it, but don’t. I’ve tried. The cookies spread too much and lose their shape. If you’re in a hurry, freeze for 15 minutes, but fridge is best.
Step 6: Stuff the Oreos (10 minutes)
Take a ball of dough (about 2 tablespoons) and flatten it in your palm. Place one Oreo in the center. Wrap the dough around the Oreo, sealing it completely. Roll it into a ball. Make sure there are no cracks. If you see cracks, press them shut. Place on a parchment-lined tray.
Step 7: Bake (10-12 minutes)
Preheat oven to 350°F (175°C). Place cookies on baking sheets, spaced 2 inches apart. Bake for 10-12 minutes. They should look set on the edges but still soft in the center. They will continue to cook on the hot pan.
Step 8: Cool and Serve
Let them cool on the pan for 5 minutes. Then transfer to a wire rack. Eat warm for the gooey experience. Store leftovers in an airtight container.
Expert Tips & Tricks
Here’s everything I’ve learned from making these dozens of times. These tips will save you from my mistakes.
Don’t Overbake — This is the #1 mistake. Pull them out when they look slightly underdone. They’ll firm up as they cool. Overbaked cookies are dry and sad.
Chill Your Dough — I can’t stress this enough. Chilled dough spreads less and tastes better. It’s the secret to bakery-quality cookies.
Use Room Temperature Butter — Cold butter doesn’t cream properly. Melted butter makes flat cookies. Softened is the sweet spot.
Seal the Dough Tight — If the Oreo leaks out, it burns on the pan. Make sure the dough is completely sealed around the cookie. If you see cracks, fix them.
Flaky Salt on Top — Sprinkling flaky sea salt on top right after baking elevates the flavor. It’s a small step that makes a big difference.
Variations & Substitutions
Once you’ve nailed the basic version, here’s how you can mix it up. I’ve tried all of these.
Mint Oreo Version — Swap in Mint Oreos. It tastes like a mint chocolate chip cookie. Amazing with dark chocolate chips.
Golden Oreo Version — Use Golden Oreos for a vanilla flavor. Pair with white chocolate chips for a classic treat.
Double Stuf Oreos — Use Double Stuf for extra creaminess. You might need a bit more dough to wrap around them.
Gluten-Free — Use gluten-free flour blend and gluten-free Oreos. Everything else stays the same. It works great.
Dairy-Free — Use dairy-free butter and dairy-free Oreos (some brands make them). Use dairy-free chocolate chips. It’s surprisingly good.
Serving & Storage
How to Serve: I serve these warm, straight from the oven. They’re best enjoyed with a cold glass of milk. I also like to serve them with a scoop of vanilla ice cream on the side for extra indulgence.
Storage: Store in an airtight container at room temperature for up to 5 days. They stay soft and chewy. If they get stale, microwave for 10 seconds to refresh.
Freezing: You can freeze the unbaked dough balls. Place them on a tray, freeze solid, then transfer to a bag. Bake from frozen, adding 1-2 minutes to the bake time. They freeze beautifully.
Nutrition Information
I’m not a nutritionist, but here’s the breakdown if you’re tracking. These are rich cookies, so enjoy in moderation.
Per Cookie (approximate):
- Calories: 220
- Protein: 3g
- Carbs: 32g
- Fat: 10g
- Sugar: 22g
Look, this is a treat. It’s not a diet food. But it’s homemade, so you know what’s in it. When I want to make it lighter, I use less sugar and add oats. But usually? I just eat one and enjoy it.
Final Thoughts
So that’s my go-to soft Oreo stuffed chocolate chip cookies! I’ve probably talked your ear off at this point, but when you make a recipe this often, you have a lot to say about it. These cookies have saved weeknight desserts more times than I can count. They’re my answer to “what’s for dessert” when I’m tired, don’t want takeout, and still want something that tastes really good. My kids are happy, my husband’s happy, and I’m happy because I’m not stressed about cooking.
Make it yours! Try different Oreos, swap in your favorite chocolate, adjust the sugar. The best recipes are the ones you adapt to your family’s tastes. If you make this, drop a comment and let me know what you think! I love hearing how recipes turn out in your kitchen. And if something doesn’t work, tell me that too—I’m here to help troubleshoot.
Happy baking! And I hope your kitchen smells half as good as mine does right now.
Frequently Asked Questions
Can I use homemade cookie dough?
Yes! Any basic chocolate chip cookie dough works. Just make sure it’s stiff enough to wrap around the Oreo. If it’s too soft, chill it first.
Why did my cookies spread too much?
Usually, this means the butter was too warm or the dough wasn’t chilled enough. Make sure your butter is softened, not melted, and chill the dough for at least 30 minutes.
Can I freeze the baked cookies?
You can, but they might lose some texture. It’s better to freeze the unbaked dough balls. Bake them fresh for the best results.
What if I don’t have an Oreo?
Use any sandwich cookie. Nilla Wafers, Golden Oreos, or even homemade cookies work. The key is a sturdy cookie that won’t disintegrate.
How do I store leftovers?
Store in an airtight container at room temperature for up to 5 days. Add a slice of bread to the container to keep them soft.
Can I make these gluten-free?
Yes, use gluten-free flour and gluten-free Oreos. The rest of the ingredients are naturally gluten-free. Check your chocolate chips too.
Why are my cookies cakey?
You might be using too much flour or overmixing the dough. Spoon and level your flour, and mix until just combined. Also, ensure your baking soda is fresh.
Pin This Recipe!


Soft Oreo Stuffed Chocolate Chip Cookies
- Total Time: 50-52 minutes
- Yield: 24 cookies 1x
Description
Soft, chewy chocolate chip cookies stuffed with a whole Oreo cookie that melts into a gooey, creamy center. These cookies feature crisp edges, a tender center, and a surprising molten filling.
Ingredients
- 1 cup (226g) unsalted butter, softened to room temperature
- ¾ cup (150g) granulated sugar
- 1 cup (200g) brown sugar, packed
- 2 large eggs, room temperature
- 2 teaspoons vanilla extract
- 2 ¼ cups (280g) all-purpose flour
- 1 teaspoon baking soda
- ½ teaspoon salt
- 24 standard Oreo cookies
- 1 ½ cups (270g) semi-sweet chocolate chips
- Optional: Sea salt flakes for topping
Instructions
- Preheat oven to 350°F (175°C) and line baking sheets with parchment paper.
- In a large mixing bowl, cream together the softened butter, granulated sugar, and brown sugar on medium-high speed for 3-4 minutes until light, fluffy, and pale.
- Beat in the eggs one at a time, then add the vanilla extract. Mix until just combined.
- In a separate bowl, whisk together the flour, baking soda, and salt.
- Gradually add the dry ingredients to the wet mixture on low speed. Mix until just combined and no streaks of flour remain.
- Fold in the chocolate chips using a spatula.
- Chill the dough in the refrigerator for at least 30 minutes.
- Take a 2-tablespoon ball of dough, flatten it in your palm, and place one Oreo in the center.
- Wrap the dough around the Oreo, sealing it completely to prevent leaking, and roll into a ball.
- Place cookies on prepared baking sheets, spaced 2 inches apart.
- Bake for 10-12 minutes until edges are set but centers are still soft.
- Let cookies cool on the pan for 5 minutes, then transfer to a wire rack to cool completely.
- Optional: Sprinkle with flaky sea salt immediately after baking.
Notes
Ensure butter is softened, not melted, for the best texture. Do not overmix the dough to avoid tough cookies. Chilling the dough is crucial to prevent excessive spreading. For gluten-free options, use gluten-free flour and Oreos. For dairy-free, use dairy-free butter and Oreos.
- Prep Time: 40 minutes
- Cook Time: 10-12 minutes
- Category: Dessert
- Cuisine: American
Nutrition
- Serving Size: 1 cookie
- Calories: 220
- Sugar: 22
- Sodium: 150
- Fat: 10
- Saturated Fat: 6
- Carbohydrates: 32
- Fiber: 1
- Protein: 3
Keywords: Oreo cookies, chocolate chip cookies, stuffed cookies, soft cookies, chewy cookies, dessert, baking, easy cookies, kid-friendly


