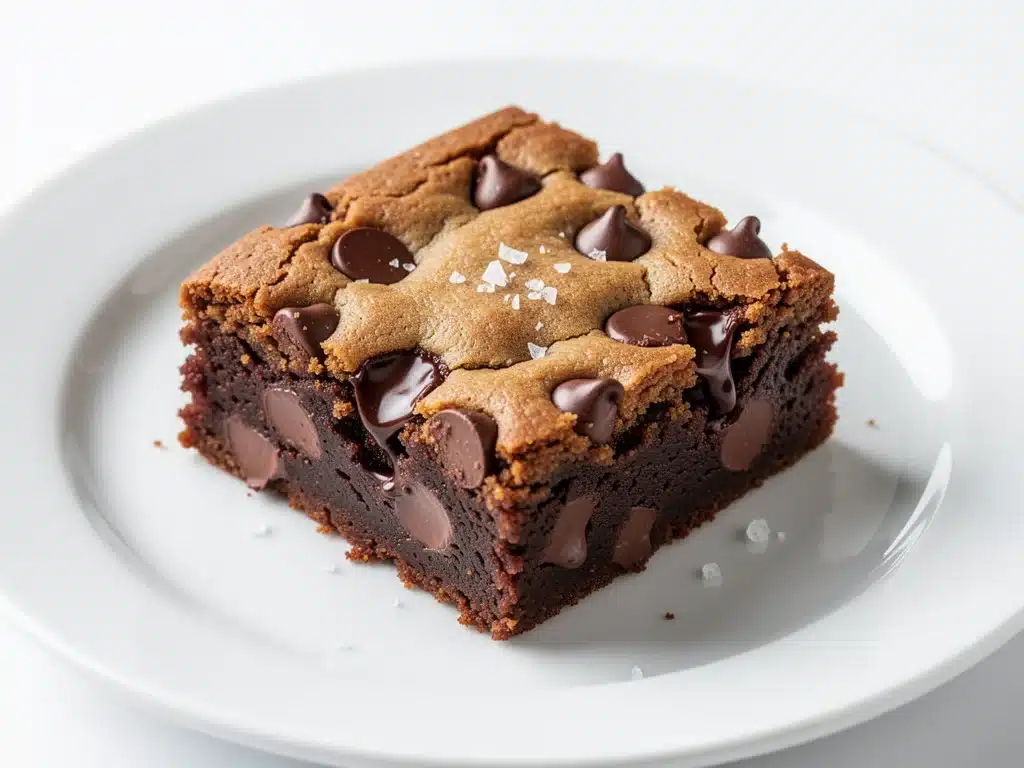
Last Tuesday, I was having one of those weeks where dinner feels like a negotiation and the pantry is basically a collection of random jars. I was staring at a block of butter that had been sitting on the counter too long, a bag of chocolate chips that was slowly losing its structural integrity, and a profound lack of willpower to bake individual cookies. I wanted something sweet, but I didn’t want to spend forty minutes scooping dough onto a sheet pan. I just wanted bars. Big, chewy, impossible-to-stop-eating bars.
I threw together a batch of what I thought would be a mediocre chocolate chip cookie bar. Standard stuff. Butter, sugar, flour, chips. I baked them, let them cool (which took exactly zero seconds because I couldn’t wait), and took one bite. And then I stopped. Because something was different. The edges were crisp and caramelized, the center was gooey enough to make a mess on my shirt, and the flavor… well, the flavor was nutty and deep in a way that regular cookies just aren’t. I realized I’d accidentally let the butter brown in the pan while I was arguing with my kid about homework, and that little accident changed everything.
That night, I discovered that Ultra-Fudgy Brown Butter Chocolate Chip Cookie Bars are better than takeout, better than the bakery down the street, and honestly, better than the cookies I’ve been making for years. Since then, I’ve made this recipe at least fifteen times. I’ve tweaked the ratios, tested different chocolates, and even tried using half whole wheat flour (don’t bother, stick to all-purpose). This is the version that works. It’s the version that has my husband asking, “Did you order anything from the bakery?” when he smells it baking. Spoiler alert: It’s just me, some browned butter, and a whole lot of chocolate.
These bars are my secret weapon for weeknight cravings, last-minute dessert requests, and that specific type of stress-eating that requires something rich and comforting. If you’re tired of dry, cakey bars or bland chocolate chips, this is the one. It’s fudgy, it’s intense, and it’s surprisingly easy to make. Let’s get into why this recipe has completely taken over my kitchen.
Why You’ll Love Ultra-Fudgy Brown Butter Chocolate Chip Cookie Bars
There are about ten reasons I keep coming back to this recipe, but here are the big ones. This isn’t just another cookie bar; it’s a texture and flavor upgrade that actually makes a difference.
The Brown Butter Factor — This is the game-changer. Browning butter takes the simple, salty richness of butter and turns it into something nutty, toasty, and deeply savory. It adds a layer of complexity that makes every bite taste like it came from a high-end patisserie. I used to skip this step because I thought it was too much work. Now? I won’t make it any other way. The flavor is just too good.
Actually Fudgy, Not Cakey — So many cookie bar recipes turn out dry or crumbly. These are dense. Chewy. Fudgy. The key is using more brown sugar than white sugar and underbaking them slightly. You want that center to still feel a bit raw when you pull them out of the oven (it sets as they cool). If you like your bars to snap in half like a shortbread, look elsewhere. These are for the goo-lovers.
One Bowl, Minimal Cleanup — I know, I know, “one bowl” recipes sound too good to be true. But this one actually works. You brown the butter in the pan, mix the dough in a bowl, press it into the pan, and bake. That’s it. No electric mixer, no dozen dirty bowls. This is crucial for a Tuesday night when I just want to eat dessert, not do dishes.
Better Than Takeout — Seriously. A small order of cookies from a local bakery can run you $15-$20. This recipe makes a full 9×13 pan of bars for about $5 in ingredients. And they taste fresher, richer, and more homemade. My friends have literally refused to buy bakery cookies after tasting these. They claim they’re “too good to pay for.”
Freezes Like a Dream — I bake these on Sundays, let them cool, wrap the whole pan tightly in plastic wrap, and freeze them. On Wednesday night, I pull out a few bars, microwave them for 20 seconds, and they taste fresh-baked. This is my meal-prep hack for dessert. No more guilt-inducing impulse buys at the grocery store bakery.
This is my go-to when I need a win in the kitchen. It’s reliable, it’s delicious, and it makes everyone happy. Whether you’re feeding a crowd or just feeding your own sweet tooth, these bars deliver.
Ingredients You’ll Need for Ultra-Fudgy Brown Butter Chocolate Chip Cookie Bars
Here’s the best part: you probably have most of this already. I’m particular about three ingredients here, and I’ll tell you exactly why. The rest is standard pantry stuff.
Unsalted Butter (1 cup / 226g) — This is where the magic happens. You need to brown this butter. Use high-quality butter if you can afford it; you’ll taste the difference. I use Land O’Lakes or Kerrygold. Don’t skip the browning step—it’s the whole point of this recipe.
Brown Sugar (1 ½ cups / 300g) — Light or dark brown sugar both work, but I prefer dark for that deeper molasses flavor. This is what gives the bars their chewiness and moisture. Don’t use white sugar as a 1:1 substitute here; you’ll lose the fudgy texture.
Granulated Sugar (½ cup / 100g) — This balances the sweetness and helps with the crisp edges. Again, don’t skip it. It’s not just about sweetness; it’s about texture.
Eggs (2 large) — Room temperature is best. Cold eggs can seize the butter when you mix them in. I usually take them out of the fridge 15 minutes before I start. If I forget, I put them in a bowl of warm water for 5 minutes.
Vanilla Extract (2 teaspoons) — Use real vanilla, not imitation. The flavor is concentrated in these bars, so fake vanilla will taste chemical. I keep a bottle of Nielsen-Massey on hand for baking.
All-Purpose Flour (1 ½ cups / 190g) — Spoon and level this. Don’t scoop it directly from the bag, or you’ll pack it down and get dry bars. I use Gold Medal all-purpose flour. It has the right protein content for chewy bars.
Baking Soda (½ teaspoon) — Not baking powder. Baking soda helps the bars spread and brown. Make sure it’s fresh; if it’s older than 6 months, replace it.
Salt (½ teaspoon) — Even though we’re using unsalted butter, you need salt to balance the sweetness. Flaky sea salt on top after baking is optional but highly recommended for that fancy touch.
Chocolate Chips (2 cups / 340g) — I use a mix of semi-sweet and milk chocolate chips. Some people use chunks instead of chips for bigger chocolate pockets. I’ve tried both, and chips melt more evenly, giving that uniform fudgy texture. If you’re a chocolate purist, use high-quality chocolate bars chopped by hand.
Optional: Flaky Sea Salt — For sprinkling on top. Maldon is my favorite. It adds a nice crunch and salty contrast to the sweet bars.
Equipment Needed
You don’t need fancy equipment for this. Here’s what I actually use.
Large Saucepan or Skillet — I use a 10-inch stainless steel skillet. It needs to be wide enough to spread the butter out so it browns evenly. A deep pot works too, but a wide pan gives you more surface area for browning.
Mixing Bowl — A large bowl, preferably glass or ceramic so you can see the dough. I use a 4-quart bowl.
9×13 Inch Baking Pan — Standard size. Grease it well with butter or non-stick spray. I line it with parchment paper for easy removal, but it’s not strictly necessary if you grease it well.
Whisk — For mixing the wet ingredients. I use a silicone whisk because it’s easier to clean.
Spatula — For folding in the chocolate chips and pressing the dough into the pan. A sturdy rubber spatula works best.
Cooling Rack — Essential. Don’t skip this. The bars need to cool completely to set properly. If you cut them while warm, they’ll be a mess.
How to Make It: Step-by-Step
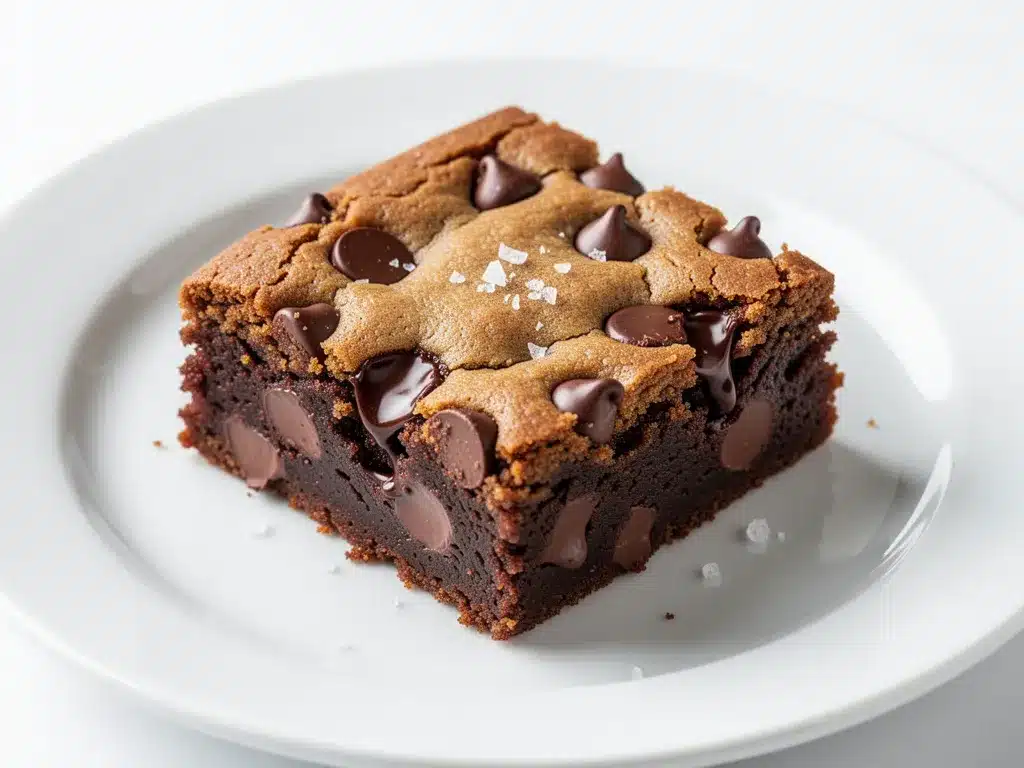
Alright, let’s make this! I’m walking you through exactly how I do it, including the little tricks I’ve picked up over the last year.
Step 1: Brown the Butter (5-7 minutes)
This is the most important step. Melt the butter in your saucepan or skillet over medium heat. Stir it constantly with a wooden spoon. It will foam up and then settle. Keep watching. You’ll start to see little brown specks at the bottom and smell a nutty, toasted aroma. As soon as it smells like browned butter (like hazelnuts or toasted marshmallows), remove it from the heat immediately. Pour it into a heat-proof bowl to stop the cooking. Let it cool for 10 minutes. If you add hot butter to the sugar, it will melt the sugar and make a grainy mess.
Step 2: Mix the Wet Ingredients (2 minutes)
In your large mixing bowl, combine the cooled browned butter, brown sugar, and granulated sugar. Whisk vigorously for about 2 minutes. You want the mixture to look glossy and smooth. This step incorporates air and helps create that chewy texture. Add the eggs one at a time, whisking well after each addition. Stir in the vanilla extract.
Step 3: Add the Dry Ingredients (2 minutes)
Add the flour, baking soda, and salt to the wet mixture. Switch to a spatula or wooden spoon and mix just until combined. Do not overmix! Once the flour disappears, stop. Overmixing develops gluten, which leads to tough bars. The dough will be thick and sticky.
Step 4: Fold in the Chocolate (1 minute)
Pour in the chocolate chips. Fold them in gently until they’re evenly distributed. Scrape the bottom and sides of the bowl to get all the chocolate. The dough should look heavy and rich.
Step 5: Press into Pan and Bake (25-30 minutes)
Preheat your oven to 350°F (175°C). Grease your 9×13 pan. Press the dough evenly into the pan. Use your hands or the back of a spoon to flatten it out. It will be thick, so wet your hands slightly to prevent sticking. Bake for 25-30 minutes. Here’s the trick: pull them out when the edges are golden brown but the center still looks slightly underbaked and soft. It will jiggle a little. Don’t panic. They will set as they cool.
Step 6: Cool and Slice (30+ minutes)
Let the bars cool in the pan for at least 30 minutes. This is the hardest part, I know. If you cut them too soon, they’ll fall apart. Once cooled, lift them out of the pan using the parchment paper (if you used it) or just slice directly in the pan. Cut into squares. Sprinkle with flaky sea salt if using.
Total Time: About 45 minutes active, plus cooling time.
Expert Tips & Tricks
Here’s everything I’ve learned from making these dozens of times. These tips will save you from my mistakes.
Don’t Burn the Butter
Browned butter goes from perfect to burnt in seconds. If it smells acrid or looks black, start over. Burnt butter tastes bitter and ruins the whole batch. When in doubt, pull it out earlier. You can always brown it more next time, but you can’t fix burnt butter.
Underbake on Purpose
I cannot stress this enough. Pull the bars out when they look done but the center is still soft. They continue to cook on the hot pan after you remove them from the oven. If you wait until they look fully set in the oven, they will be dry and cakey when cool. The key to fudgy bars is residual heat.
Use a Scale
Baking is chemistry. Measuring flour by volume (cups) is inconsistent. If you want consistent results, use a kitchen scale. 1 ½ cups of flour is about 190 grams. If you don’t have a scale, spoon the flour into the cup and level it off. Never scoop directly.
Room Temperature Eggs
Cold eggs can cause the browned butter to solidify into weird clumps when you mix them. Bring your eggs to room temperature for a smooth, emulsified dough. It takes 5 minutes in warm water if you’re in a rush.
Chill the Dough (Optional but Recommended)
If you have time, chill the dough in the fridge for 30 minutes before baking. This helps the bars hold their shape better and can enhance the flavor as the butter solidifies. I don’t always do this, but when I do, the texture is even chewier.
Variations & Substitutions
Once you’ve nailed the basic version, here’s how you can mix it up. I’ve tried all of these.
White Chocolate Macadamia Nut
Swap the chocolate chips for white chocolate chips and macadamia nuts. Toast the nuts first for extra flavor. This is my favorite variation for holidays.
Peanut Butter Cup Bars
Add ½ cup of peanut butter chips and drizzle melted peanut butter on top before baking. Sprinkle with flaky salt. This is a winner for peanut butter lovers.
Double Chocolate
Add ¼ cup of cocoa powder to the dry ingredients and use dark chocolate chips. This makes them even more intense and fudgy. Great for chocolate addicts.
Gluten-Free
Use a 1:1 gluten-free flour blend (like Bob’s Red Mill or King Arthur). The texture might be slightly more crumbly, but it still works. Add ¼ teaspoon of xanthan gum if your blend doesn’t have it.
Dairy-Free
Use a high-quality vegan butter (like Miyoko’s or Earth Balance) that’s meant for baking. Use dairy-free chocolate chips. The flavor won’t be quite as nutty, but it’s still delicious.
Serving & Storage
How to Serve:
I serve these warm, right out of the oven with a scoop of vanilla ice cream. But they’re also great at room temperature. They travel well in a lunchbox or to potlucks. Just make sure they’re completely cool before packing them, or they’ll get mushy.
Storage:
Store in an airtight container at room temperature for up to 5 days. They actually get chewier after a day or two as the moisture redistributes. If your kitchen is hot, keep them in the fridge.
Freezing:
These freeze beautifully. Wrap the whole pan tightly in plastic wrap and then aluminum foil. Freeze for up to 3 months. Thaw overnight in the fridge or at room temperature. You can also freeze individual bars on a baking sheet, then transfer to a freezer bag.
Reheating:
Microwave a single bar for 15-20 seconds to soften it up. Or bake a few bars at 350°F for 5 minutes to crisp the edges. They taste almost fresh-baked.
Nutrition Information
I’m not a nutritionist, but here’s the breakdown if you’re tracking. Keep in mind that this is a rich, dense bar, so portions matter.
Per Serving (based on 16 bars):
- Calories: 320
- Protein: 4g
- Carbs: 42g
- Fiber: 1g
- Sugar: 28g
- Fat: 16g
- Saturated Fat: 9g
Look, this is dessert. It’s butter and sugar and chocolate. It’s not a health food. But it’s homemade, so you know exactly what’s in it. When I make these, I usually cut them into smaller squares (24 instead of 16) to control portions. A little goes a long way because they’re so rich.
Final Thoughts
So that’s my go-to Ultra-Fudgy Brown Butter Chocolate Chip Cookie Bars! I’ve probably talked your ear off at this point, but when you make a recipe this often, you have a lot to say about it.
This has saved my dessert routine more times than I can count. It’s my answer to “what’s for dessert?” when I’m tired, don’t want to order out, and still want something that tastes really good. My kids are happy, my husband’s happy, and I’m happy because I’m not stressed about cooking.
Make it yours! Try different chocolates, add nuts, or switch up the salts. The best recipes are the ones you adapt to your family’s tastes. If you make this, drop a comment and let me know what you think! I love hearing how recipes turn out in your kitchen. And if something doesn’t work, tell me that too—I’m here to help troubleshoot.
Happy baking! And I hope your kitchen smells half as good as mine does right now.
Frequently Asked Questions
Q: Can I use salted butter instead of unsalted?
A: You can, but you’ll need to reduce the added salt in the recipe. Use ¼ teaspoon of salt instead of ½ teaspoon. I prefer unsalted because it lets me control the sodium level, but salted works in a pinch.
Q: Why did my bars turn out dry?
A: Overbaking is the most common cause. Remember, pull them out when the center still looks slightly underbaked. They will set as they cool. Also, make sure you’re not packing the flour into the measuring cup. Spoon and level it instead.
Q: Can I make this in an 8×8 pan?
A: Yes, but the bars will be thicker and may need more baking time. Start checking at 30 minutes. The center will take longer to cook. Keep an eye on the edges—they might burn before the center is done.
Q: How do I brown butter properly?
A: Melt butter in a light-colored pan over medium heat. Stir constantly. It will foam, then settle. Watch for brown specks at the bottom and a nutty smell. Remove from heat immediately when you see it. It continues to cook from residual heat.
Q: Can I use chocolate chunks instead of chips?
A: Absolutely. Chunks give you bigger pockets of chocolate and a more rustic look. I use a mix of chips and chunks sometimes. Just chop a high-quality chocolate bar into irregular pieces.
Q: Do I need to grease the pan?
A: Yes, definitely. Even if you use parchment paper, a light greasing helps the paper stick and ensures easy removal. I use butter to grease the pan—it adds flavor.
Q: Can I freeze the dough?
A: Yes! Scoop the dough into balls, freeze them on a baking sheet, then transfer to a freezer bag. Bake from frozen, adding 1-2 minutes to the baking time. This is great for having fresh bars on demand.
Pin This Recipe!
Ultra-Fudgy Brown Butter Chocolate Chip Cookie Bars
- Total Time: 45 minutes
- Yield: 16 servings 1x
Description
These bars feature nutty, browned butter and a fudgy, chewy texture that is better than bakery cookies. Made in one bowl with minimal cleanup, they are rich, intense, and surprisingly easy to make.
Ingredients
- 1 cup (226g) unsalted butter
- 1 ½ cups (300g) brown sugar (light or dark)
- ½ cup (100g) granulated sugar
- 2 large eggs, room temperature
- 2 teaspoons vanilla extract
- 1 ½ cups (190g) all-purpose flour
- ½ teaspoon baking soda
- ½ teaspoon salt
- 2 cups (340g) chocolate chips (semi-sweet and milk mix)
- Flaky sea salt (optional, for topping)
Instructions
- Preheat oven to 350°F (175°C) and grease a 9×13 inch baking pan.
- Melt butter in a large saucepan or skillet over medium heat. Stir constantly until it foams, settles, and develops brown specks with a nutty aroma (5-7 minutes).
- Pour browned butter into a heat-proof bowl and let cool for 10 minutes.
- In a large mixing bowl, whisk the cooled browned butter, brown sugar, and granulated sugar vigorously for 2 minutes until glossy.
- Add eggs one at a time, whisking well after each addition, then stir in vanilla extract.
- Add flour, baking soda, and salt. Mix with a spatula just until combined; do not overmix.
- Fold in chocolate chips until evenly distributed.
- Press dough evenly into the prepared pan.
- Bake for 25-30 minutes, pulling them out when edges are golden but the center still looks slightly underbaked and soft.
- Let bars cool in the pan for at least 30 minutes to set before slicing.
- Sprinkle with flaky sea salt if desired.
Notes
Do not burn the butter; remove from heat immediately when nutty aroma appears. Underbake slightly for fudgy texture as bars continue to cook on the hot pan. Use a kitchen scale for flour for best results. Dough can be chilled for 30 minutes for chewier texture. Store in airtight container for up to 5 days or freeze for up to 3 months.
- Prep Time: 15 minutes
- Cook Time: 30 minutes
- Category: Dessert
- Cuisine: American
Nutrition
- Serving Size: 1 bar
- Calories: 320
- Sugar: 28
- Fat: 16
- Saturated Fat: 9
- Carbohydrates: 42
- Fiber: 1
- Protein: 4
Keywords: brown butter, chocolate chip cookie bars, fudgy bars, one bowl dessert, easy baking, weeknight dessert


